

Jacket Patch Placement: Where Every Patch Should Go

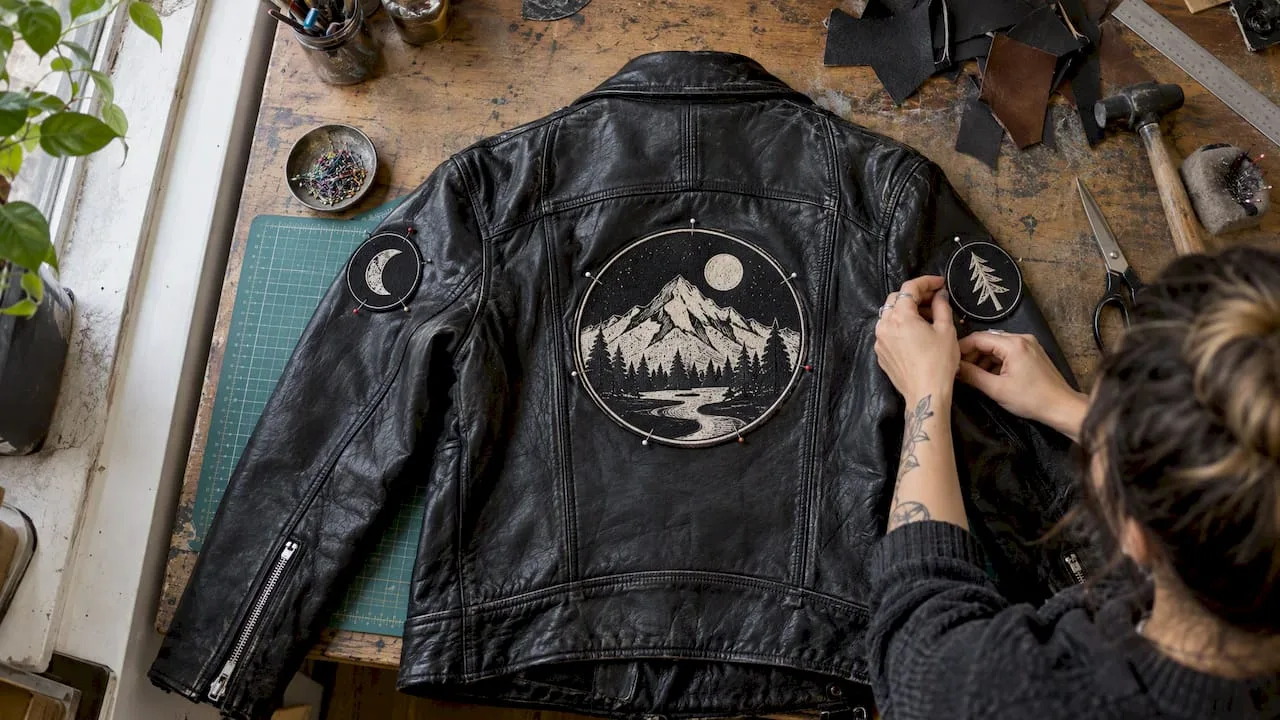
The safest jacket patch placement is a flat, uninterrupted panel: the upper sleeve, the chest, or the center of the back. Keep patches off seams, zippers, pocket openings, elbows and cuffs. Pin or tape the whole layout first, wear the jacket, move around, and only then attach anything. This guide covers where each type of patch belongs, how big it should be, how biker jackets and flag patches follow their own conventions, and how to test a layout before it becomes permanent.
TL;DR
- Put patches on flat panels: chest, upper sleeve, center back. Avoid seams, zippers, pocket openings, elbows, cuffs and hems.
- Use one focal point, usually a large back patch, then support it with fewer medium and small patches.
- A U.S. flag patch goes on either sleeve, and on the right sleeve the star field faces forward.
- Never wear club rockers or MC lettering unless a club has given them to you.
- Tape or pin the layout, wear the jacket, move, sit and fasten everything, then attach.
Table of Contents
- Start with a map of the jacket
- Chest placement
- Sleeve placement
- Back placement
- Biker jacket patch placement
- Flag patch placement
- Size, spacing and balance
- Match the attachment method to the jacket
- The test-fit routine before you commit
- Perspective: why placement is a design decision
- Plan it into a custom jacket
- Common placement mistakes
- FAQ
- Sources
Start with a map of the jacket
Before you pick a spot for a single patch, look at the jacket as a set of panels separated by features that get in the way. Collar, front closure, pockets, yoke, side seams, armholes, cuffs and hem all interrupt the fabric. A patch that crosses one of them has to bend, and a patch that bends tends to bunch, wrinkle, lift or wear out faster.
The flat areas are the obvious candidates:
- Upper chest, left and right of the zipper or button placket.
- Upper sleeve, between the shoulder seam and the elbow.
- Shoulder cap, if the patch is small enough not to wrap over the edge.
- Center back, the largest uninterrupted panel on most jackets.
The zones to leave alone are the ones that move or fold: elbows, cuffs, hems, the area under the arm, and anything within about half an inch of a seam or zipper. If you are not sure whether a spot is safe, bend your arm, sit down and look at how the fabric folds. A patch should sit where the jacket stays calm.
Different jackets give you different canvases. A biker jacket in leather has a diagonal zipper, a belt, and often shaped panels, so the back and upper sleeves do most of the work. A varsity jacket has ribbed cuffs and a wool body with a clear left chest and wide back. A bomber has a smooth chest and a short sleeve zone above the pocket on the forearm. A trench has a lot of open space but also straps, storm flaps and a belt, so patches are rare and usually small.
Chest placement
The left chest is the traditional spot for the patch that identifies you: a team emblem, a logo, a brand mark. The right chest is where secondary information tends to go, such as a name tape, rank or position, a flag, or a certification mark. Think of it as a hierarchy: what matters most sits over the heart side, supporting details balance it on the other side.
A few practical points for the chest:
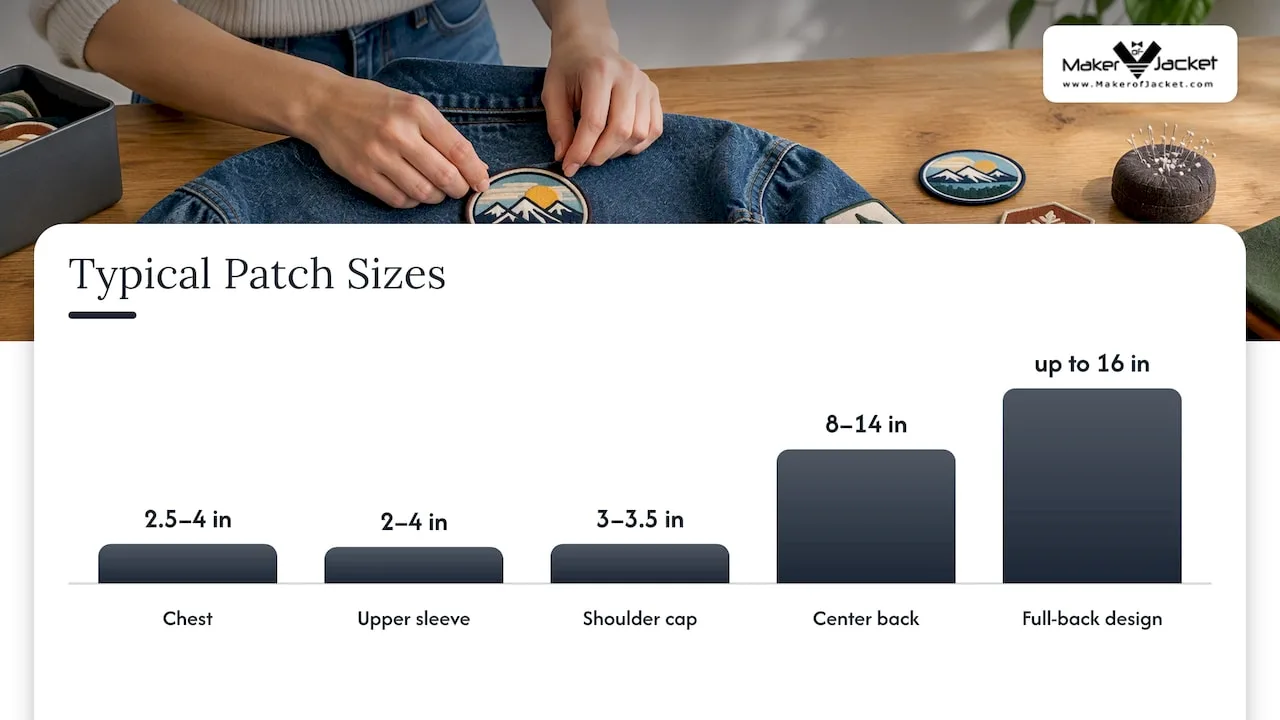
- Size: a chest patch generally reads best at roughly 2.5 to 4 inches wide. Larger and it starts to crowd the zipper and collar.
- Height: set the top edge a hand’s width below the collar seam, or roughly in line with where a shirt pocket would sit. Too high and it disappears under the collar when you move.
- Symmetry: if you use two chest patches, match their heights. Hold a ruler across both and check them in a mirror, because jackets hang slightly differently when worn.
- Distance from the front edge: leave a margin of an inch or so so the patch does not curl at the placket.
If you want a visual example of a logo placed on the chest, this logo embroidery placement example shows how a small mark can hold the eye without crowding what is around it. The same thinking applies to a patch on a jacket front.
Chest pockets and flaps
A pocket is a tempting flat surface, but it is also a working part of the jacket. Measure the usable area first. Leave the opening, the flap edge and any button or snap hardware clear, so you can still reach into the pocket and fasten it. If the patch has to sit on a pocket flap, check it with the flap open and closed.
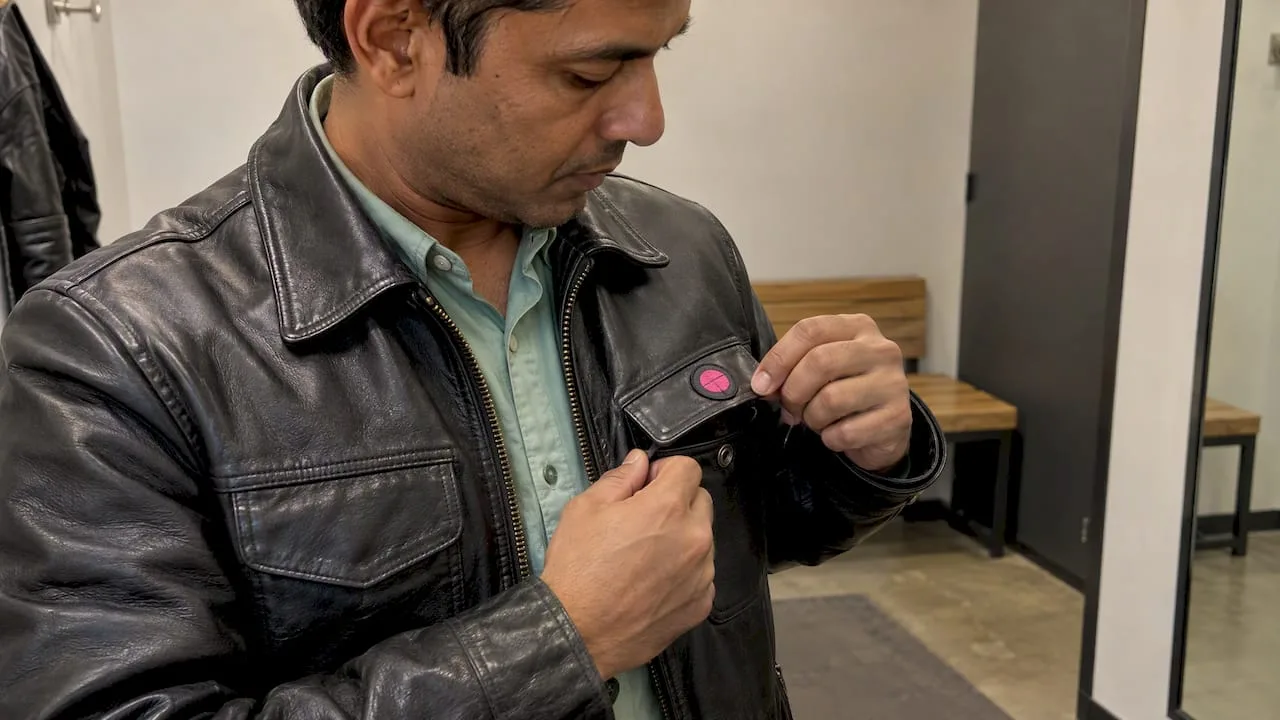
If you sew on a patch pocket or reinforce an existing one, the sewing magazine Threads recommends marking the pocket position, comparing symmetrical pockets, basting before you topstitch, and reinforcing the top corners. The same discipline helps when a patch sits close to a pocket: baste or pin first, then sew.
Sleeve placement
Sleeves are the best home for smaller patches and flags. The upper sleeve is flat and visible from the front, side and back, and it does not fold when you reach.
- Size: sleeve patches of about 2 to 4 inches are typical. Shoulder patches around 3 to 3.5 inches wide fit the shoulder cap without wrapping over the edge.
- Stacking: if you put several patches on one sleeve, stack them vertically with the same gap between each. An inch of space is a good starting point, adjusted to the size of the patches.
- Keep clear of the elbow: the crease there will break the patch down and may pull the stitching.
- Keep clear of the armhole seam: a patch sewn too close will tug when you lift your arm.
When one sleeve carries a flag, the other sleeve can stay clean or take a single balancing patch. Matching sleeves are not required, but the eye notices when one side is heavily loaded and the other bare.
Back placement
The center back is the largest flat panel on any jacket, which makes it the anchor for big, detailed patches. Most designers treat it as the single focal point and build the rest of the layout around it.
Sizing guidance that works for most adult jackets:
- Center-back patches commonly run 8 to 14 inches wide.
- Full-back motorcycle patches go up to about 16 inches.
- The top edge sits a few inches below the collar seam, and the patch is centered on the spine line, not on the yoke seam.
One trap catches almost everyone: a back design looks different on your shoulders than on a table. Your shoulders curve the fabric, and a patch that looked perfectly centered flat can appear to drift when worn. Have someone photograph your back while you wear the jacket, or hang it on a mannequin or a sturdy hanger shaped like shoulders, and adjust before you commit.
On a leather jacket, remember that you cannot reposition a patch without leaving needle holes. Leather does not heal. That is the strongest reason to spend time on the test-fit stage below.
Biker jacket patch placement
Biker jackets and vests are a special case, because patches carry social meaning. The layout is part style, part etiquette.
Riding style and personal patches
If you ride on your own or with friends and are not in a club, you have a lot of freedom. Common choices are a large back patch, a few small patches on the chest or upper sleeves, and a flag or a rank-style patch on a shoulder. Keep the lower back clear if you wear a belt or back protector under the jacket, and keep patches off the zones where the jacket flexes while you are seated on the bike: elbows, the inner arm and the lower hem.
Three-piece club layout
Motorcycle club vests traditionally use a three-piece back: a top rocker with the club name, a center emblem, and a bottom rocker naming a territory. Social clubs usually use a simpler one- or two-piece setup rather than the three-piece layout with a territorial bottom rocker.
The rule that matters for anyone designing a jacket is straightforward: do not wear rockers, club names or MC lettering unless a club has given them to you. Copying a club’s insignia can be taken as disrespectful and can bring a cease-and-desist letter. Clubs also differ from one another on details, and some are territorial, so the Combat Veterans Motorcycle Association’s own protocol advises checking with local chapter officers or regional representatives when you are unsure of a convention.
Two habits keep you out of trouble. Design your own emblem instead of imitating a club’s. And never touch another rider’s patches; that is widely considered rude and can escalate fast.
If you want a back patch that is clearly your own, our custom embroidered patches and emblems let you build a design from scratch. For a skull or club-style look without a real club’s marks, the embroidered skull biker patch is a ready-made option.
Flag patch placement
Flag patches follow a convention that is easy to get right once you know it.
For a U.S. flag, the Army’s flag etiquette FAQ explains that the patch may be worn on either sleeve. On the right sleeve, the design is reversed so the union (the star field) is at the observer’s right. That makes the flag look as if it is flying forward, as though you are carrying it into the wind. The same source notes that the U.S. Code does not address flag-patch positioning, so organizations decide for themselves; Army uniforms wear the flag on the right shoulder with the star field facing forward.
What that means for your jacket:
- Right sleeve or shoulder: use a reversed flag patch, stars toward the front of the jacket.
- Left sleeve: a standard flag patch, stars at the observer’s left, is fine.
- Other countries: flag patches for other nations are usually placed on a sleeve or the chest. Follow the same logic of keeping the flag on a flat panel and not overlapping other patches.
- Keep it upright and flat: do not set a flag patch at an angle or let it hang near a cuff or seam.
If you would rather start from a jacket that already carries the flag, our American flag jacket collection and the country flag jackets show how the design looks on a finished piece.
Size, spacing and balance
A jacket full of patches can look intentional or chaotic. The difference is mostly size and space.
Use one focal point. Usually that is the back patch. Support it with a few medium patches and finish with small details. If everything is the same size, nothing stands out.
Leave breathing room. Each patch needs enough space around it to read on its own. A good starting gap is half an inch to an inch, bigger around large patches.
Be deliberate with gaps. Even spacing suits an orderly layout. Varied spacing can work for a collage look. What fails is the accidental gap: too small to fill with another patch, too large to ignore.
Here is a quick reference for planning. These are working ranges used widely in custom patch design, not hard rules.
| Position | Typical patch size | Notes |
|---|---|---|
| Left or right chest | 2.5 to 4 inches | Clear of zipper and collar |
| Upper sleeve | 2 to 4 inches | Stack vertically with even gaps |
| Shoulder cap | 3 to 3.5 inches | Stay inside the edge |
| Center back | 8 to 14 inches | Up to 16 inches for full-back motorcycle designs |
Step back and check the design from several feet away, or take a photo and view it small on your phone. If you can still tell what each patch is, the sizes are working.
The overall silhouette matters too. If you want to see how different jackets handle embellishment, our guide on adding patches to jackets walks through the process, and the jacket customization troubleshooting page covers fixes when a layout goes wrong.
Match the attachment method to the jacket
Placement and attachment are linked. A patch that is perfectly placed but fused to the wrong fabric will peel.
- Sew-on: durable on any fabric, and the right choice for leather, suede and heavy wool.
- Iron-on: works quickly on cotton, polyester and blends, but heat is a risk on leather and nylon, so do not use it there.
- Velcro: good if you swap patches often, such as event or rank patches.
- Adhesive: a stopgap for temporary placement tests rather than a permanent bond.
For denim, preshrink the garment before you sew, so the fabric does not tighten and pucker around a patch after the first wash. The University of Nebraska–Lincoln’s extension guide to sewing with denim recommends this step, and it also covers jacket seams, zipper application and hems, which are exactly the features you want your patches to avoid.
If your jacket has a protective inner lining, such as an armored or cut-resistant layer, think about how the layers are built before you sew through them. This page on how jacket materials are tested shows why the inner structure of a jacket matters when you decide where stitching goes.
Lining is another factor. A patch sewn through a thin lining will show up as stitching inside, which can scratch or snag. Our guide to choosing the right jacket lining explains what to consider if you are planning a heavily patched jacket.
The test-fit routine before you commit
This is the step that saves jackets. Allow twenty minutes.
- Lay the jacket flat on a table or bed and arrange all patches without attaching them.
- Reference the features: use seams, pockets and zippers as guides, and measure from them, not by eye.
- Fix them temporarily with low-tack painter’s tape or pins. On leather, use tape on the patch edges only and avoid pins, which leave holes.
- Put the jacket on. Check the center back in a mirror and with a phone photo. Remember the shoulders will shift the design from how it looked flat.
- Move. Raise your arms, sit down, reach forward, and fasten every zipper and button. Recheck each patch.
- Check from a distance of several feet.
- Mark the edges with tailor’s chalk or small removable marks, then attach one patch at a time, starting with the back.
If a patch collides with a button, pocket or zipper pull at any point in step 5, move it. A patch that interferes with the jacket’s function will be the first one you regret.
Perspective: why placement is a design decision
We make jackets to order, so we see the same pattern again and again: the patches people love most are the ones they planned on the jacket itself, not on paper. A jacket is a three-dimensional garment. It curves over the shoulders, folds at the elbows and shifts when you ride, and a good layout respects all of that.
Our advice is to decide on your focal patch first, usually the back, then add smaller pieces around it. If you are ordering a custom piece from us, tell us where the patches will go before we cut the leather, because the panels can be built to give your design a clean, flat area to sit on. That is the advantage of a bespoke jacket: placement is planned with the garment, not fixed afterward.
We build our jackets by hand with premium-grade materials, and we want your patches to look as good in three years as on day one. That means giving them a calm panel, a secure attachment, and enough space to be seen.
Maker
Plan it into a custom jacket
If you are starting from scratch, the easiest way to get placement right is to design it into the garment. Our custom range lets you choose the style, then tell us where your patches and emblems should sit. A custom biker jacket is $249, a custom motorcycle jacket is $299, and a custom varsity or bomber jacket is $249 each. Patches are available through our patch order for $5, so you can build a layout piece by piece.
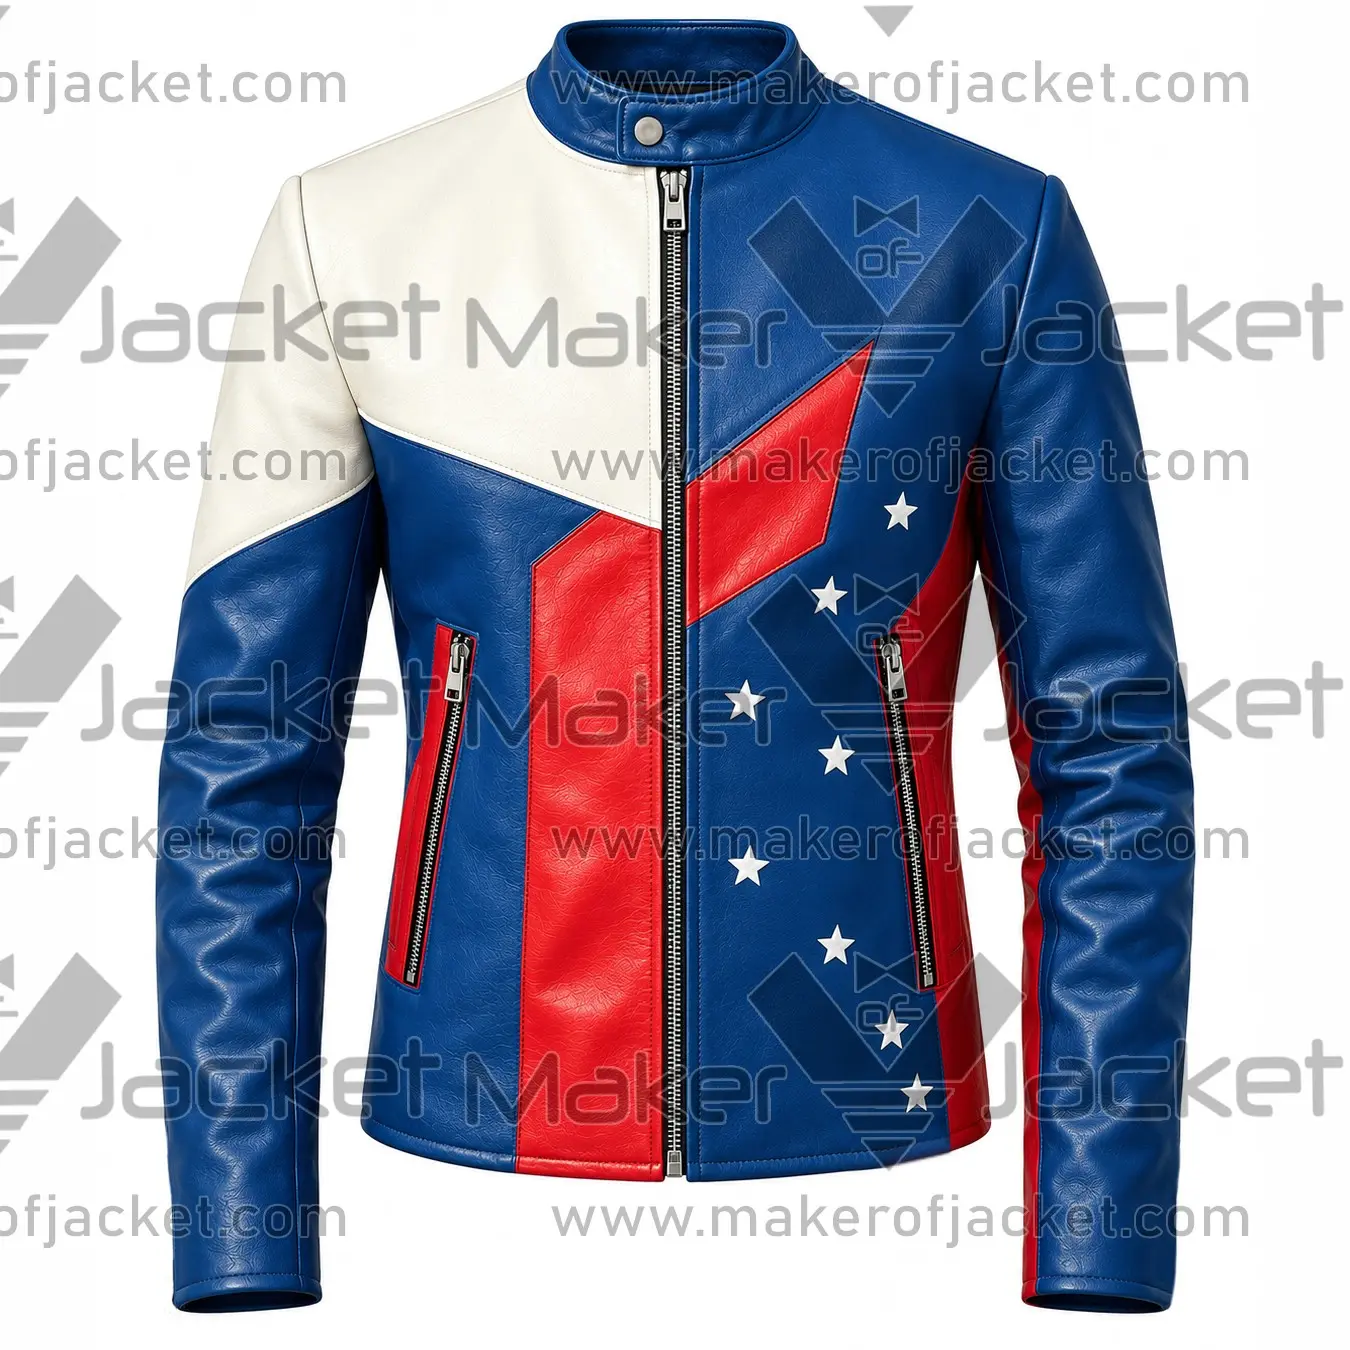
Browse the full customize order range to pick your jacket, or see ready-made options like the USA flag tricolor biker jacket and the world flag patches leather jacket. We offer worldwide free shipping and 24/5 support if you have questions before you order.
Common placement mistakes
- Crossing a seam. The patch will not lie flat and the thread will wear first where the seam sits.
- Covering a pocket opening or a zipper pull. Test with the pocket open and the zipper fully closed.
- Placing patches too low on the back. The jacket rides up when you sit, and a low patch gets hidden by a belt or bag strap.
- Using iron-on on leather. Sew it instead.
- Making everything the same size. There is no focal point and the layout looks cluttered.
- Copying club rockers. Design your own emblem.
- Skipping the wear test. Flat layouts lie.
FAQ
Where do you put patches on a jacket?
Put them on flat panels: the left and right chest, the upper sleeves, the shoulder cap and the center back. Keep them away from seams, zippers, pocket openings, elbows, cuffs and hems, because those areas move and fold. Use one large patch as the focal point and support it with smaller ones.
Which sleeve should the American flag patch go on?
Either sleeve is acceptable, and the U.S. Code does not set a rule for flag patches. On the right sleeve, use the reversed design so the star field faces forward. On the left sleeve, use the standard patch with the stars toward the front of the jacket’s wearer.
How do I place patches on a biker jacket without breaking club etiquette?
Design your own emblems and avoid rockers, club names or MC lettering that a club has not given you. If you are unsure about a local convention, ask the chapter officers of the club in question. Keep your layout away from seams and from the areas that flex while you ride.
How far apart should patches be?
About half an inch to an inch is a good starting gap for small and medium patches, with more space around a large back patch. Keep the spacing consistent for a tidy look, or deliberately varied for a collage. Check it from several feet away.
Can I iron patches onto a leather jacket?
We do not recommend it. Iron-on patches suit cotton, polyester and blends, but heat can damage leather and nylon. Sewing is the safer attachment for leather, and it holds on any fabric.


