How to Fix a Ripped Leather Jacket
A leather jacket is one of those wardrobe pieces that gets better with time. It molds to your body, holds memories, and never really goes out of style. So when it rips, the last thing you want to do is toss it out. The best thing is that most leather tears are completely fixable, often right at home, without spending a fortune.
Whether you’re dealing with a hairline cut on the sleeve, a medium tear on the back panel, or a worn seam that’s finally given out, this guide walks you through everything you need to know.
From assessing the damage to the final conditioning step, you’ll find practical, no-fluff advice based on leather jacket repair tips used by leather care professionals. And if your jacket is a prized or vintage piece, you’ll also know exactly when it’s smarter to hand it off to an expert.
First, Figure Out What You’re Actually Dealing With

Before you touch the jacket, take a close look at the damage. Jumping straight into a repair without understanding the type of tear is one of the most common mistakes, leading to weak fixes that fall apart within weeks.
Leather tears generally fall into a few categories:
- Hairline cuts or surface scratches: These don’t go all the way through the leather. They’re the easiest to fix and can often become nearly invisible with the right filler and dye.
- Medium tears (roughly ¼” to 2″): The leather has opened, but no material is missing. These respond well to a backing patch combined with leather adhesive.
- Large rips or holes with missing leather: This is where DIY gets tricky. Panel replacement or professional help is often the better route here.
- Seam tears: When the stitching along a seam gives out, you’re looking at a re-stitching job, usually combined with an internal patch for reinforcement.
- Scuffs and surface damage: These are treated differently from full tears and have their own repair process (covered in a dedicated section below).
Once you know what you’re working with, you can choose the right method and gather the right materials.
Tools and Materials You’ll Need
A clean, lasting repair depends on having the right supplies. Don’t substitute household glue or fabric tape; those materials aren’t flexible enough for leather and will crack or peel quickly.
Here’s what a solid repair kit should include:
- Leather-specific adhesive: Flexible, clear-drying glue like Barge All-Purpose Cement works well. It bonds strongly and moves with the leather.
- Subpatch or backing fabric: Thin leather, polycotton, or a synthetic mesh patch. This goes behind the tear to reinforce it.
- Leather filler: Used to fill gaps, smooth uneven surfaces, and blend the repaired area.
- Fine-grit sandpaper: 220 to 600 grit, for smoothing filler after it dries.
- Leather cleaner or isopropyl alcohol: To prep the area before any adhesive goes on.
- Leather dye or repair paint: Color-matched to your jacket for a seamless finish.
- Leather conditioner: Applied at the end to restore moisture and flexibility.
- Scissors, tweezers, and a palette knife or toothpick: For precision work during the patch-and-fill steps.
- Sewing needle and waxed polyester thread: Needed for seam repairs or extra reinforcement.
- Seam ripper or sharp knife: To open the jacket lining and access the tear from inside.
A complete leather repair kit from any of these usually runs about $15 to $25 and covers most minor to medium jobs.
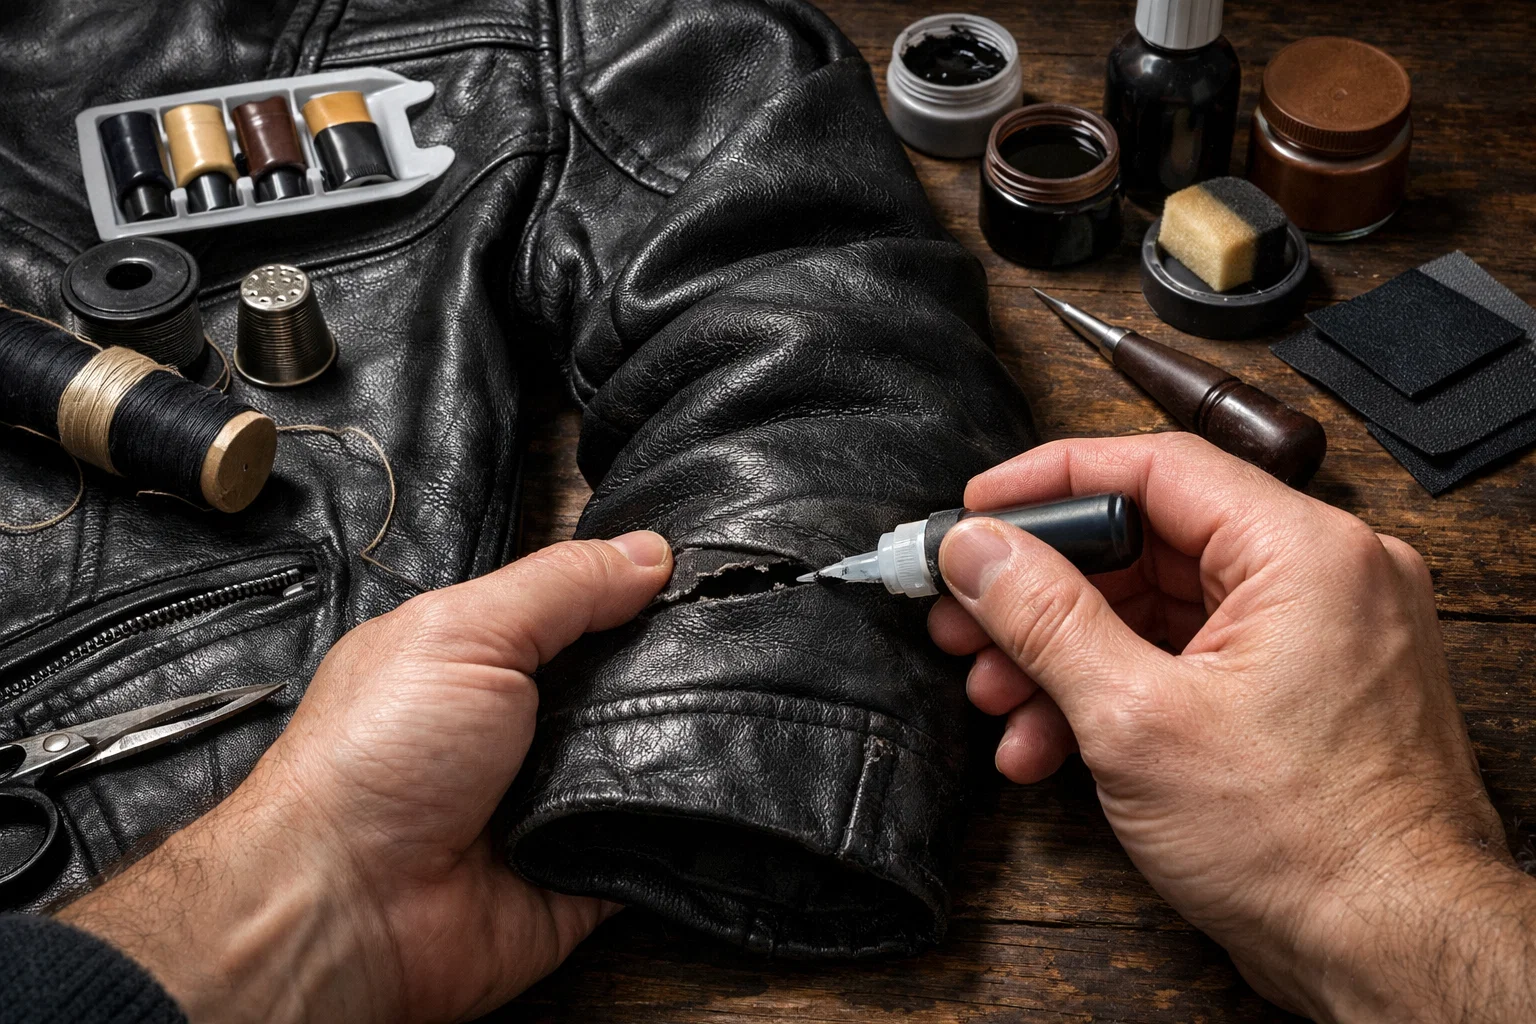
How to Fix a Ripped Leather Jacket: Step by Step
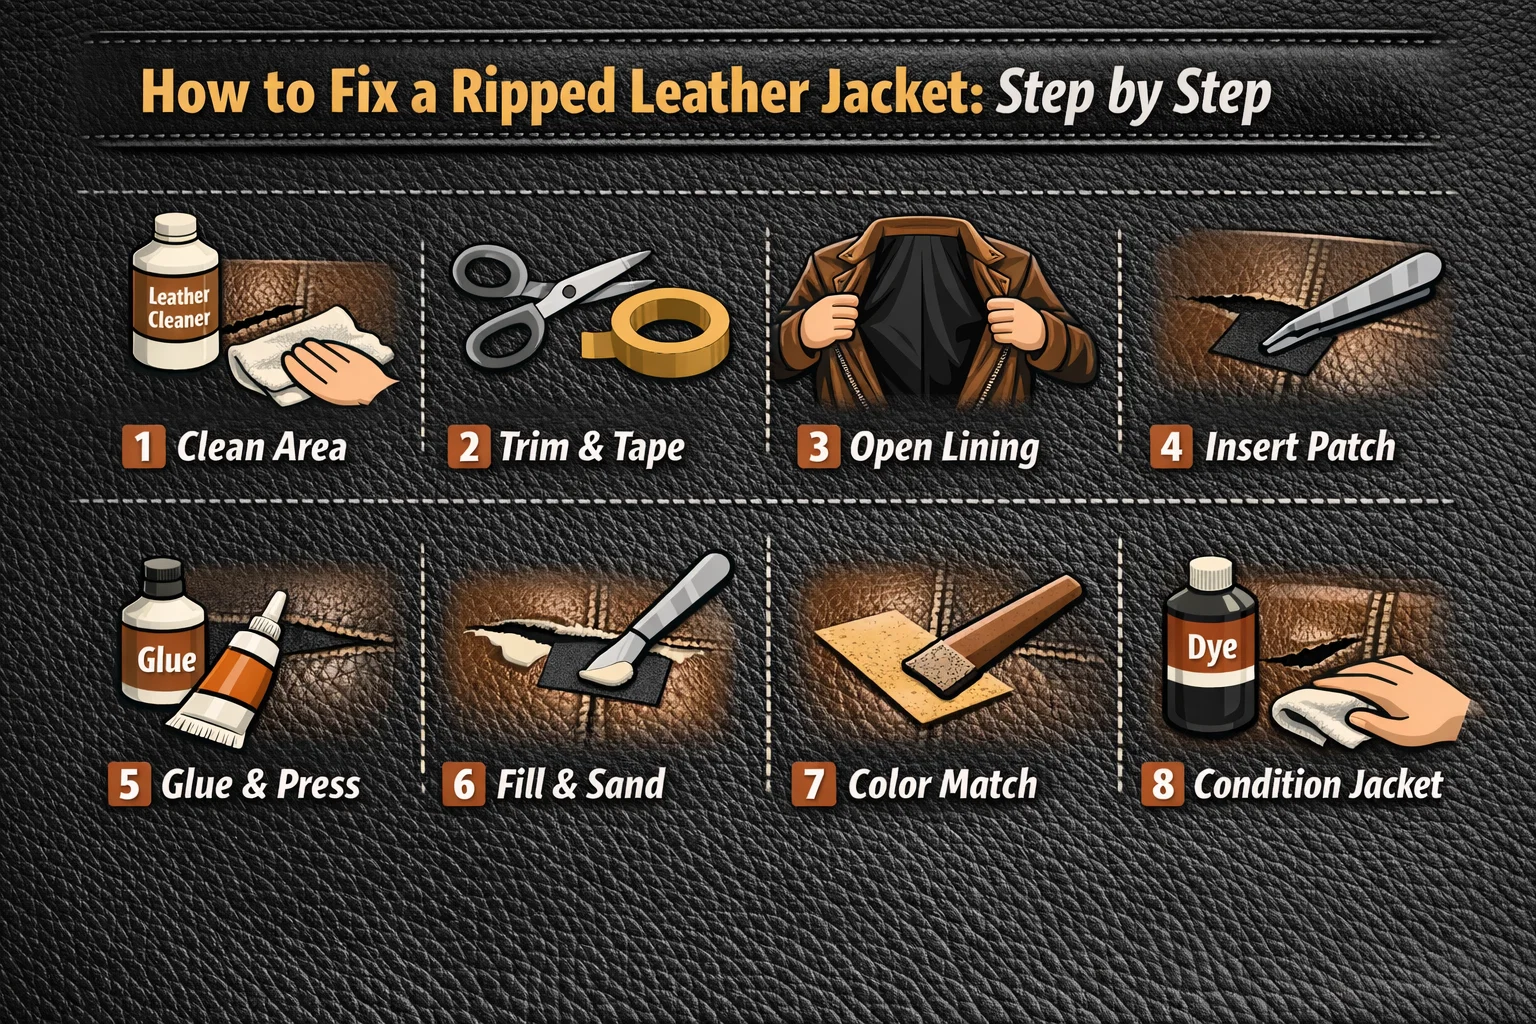
This method works for most medium tears where the leather has opened, but no material is missing. It follows the same process used by professional repair technicians, just scaled down for home use.
Step 1: Clean the Area Thoroughly
Use a soft cloth dampened with leather cleaner or isopropyl alcohol and wipe down the entire damaged area. Remove any dirt, oils, or residue from around the tear. If you skip this step, your adhesive won’t bond properly. Let the leather dry completely before you move on; don’t rush it with a hairdryer, as heat is too harsh on leather.
Step 2: Trim Loose Threads and Reposition the Edges
Carefully trim any frayed threads with scissors. Don’t cut into the leather itself, just clean up the edges. Once trimmed, use the dull end of a needle to gently push the torn leather back into position. Apply a small piece of scotch tape or painter’s tape over the tear to temporarily hold the edges in place. Press the tape onto your skin first to reduce its stickiness, so it doesn’t pull at the leather when you remove it.
Step 3: Open the Lining to Access the Tear
For most tears longer than half an inch, you need to work from the inside. Use a seam ripper or a sharp knife to carefully open the jacket’s inner lining near the damaged area; the arm seam is usually the easiest access point. This gives you room to insert a backing patch cleanly and get a far stronger repair than working from the outside alone.
Step 4: Cut and Insert a Backing Patch
Cut your patch material, thin leather, polycotton, or a fabric scrap, so it’s at least ¼ inch larger than the tear on every side. Round the corners of the patch ripped leather jacket; square corners can bunch up or cause problems when you slide it into place.
Use tweezers to guide the patch behind the tear. Make sure it lies completely flat with no folds or wrinkles. If you’re using leather as the patch material, insert it suede side up so the adhesive gets a better grip.
Step 5: Apply the Leather Adhesive
Apply a thin, even layer of leather glue to the surface of the patch where it sits beneath the torn leather. Also, apply a thin layer along the torn edges themselves. Let both surfaces become tacky; this usually takes 10 to 20 minutes, depending on the product. Then carefully press the torn edges together over the patch, aligning them as closely as possible.
Hold the edges firmly for 30 seconds. Then place a heavy, flat object, such as a stack of books, over the repaired area and leave it for 12 to 24 hours. If you want extra bonding strength, place a flat surface over the repair and press it down firmly before applying the weight. The goal is full, even contact between the leather and the patch.
Step 6: Fill and Smooth Any Gaps
Once the glue has cured, check whether the tear has left any visible gaps or depressions. If it has, apply leather filler with a palette knife or toothpick in thin layers. Let each layer dry fully before adding another; never try to fill in one thick coat. Once dry, gently sand the filled area with fine-grit sandpaper in smooth, circular motions until it lies flush with the surrounding leather.
Step 7: Match the Color
Apply matching leather dye or repair paint in light, even layers using an old cloth or sponge applicator. Always test the color on a hidden seam or inner area first. Build up gradually; two or three thin coats give a far more natural result than one heavy coat. Let each layer dry before adding the next, and finish with a leather sealant in a matte, satin, or gloss finish that matches your jacket’s original look.
When working with different leather jacket colors, the repair approach can vary slightly. Black leather jackets are usually the easiest to restore because black dye blends well and hides small imperfections. Brown leather jackets, especially lighter shades like tan or cognac, require more careful color matching since uneven tones are easier to notice. Dark brown leather jackets tend to be more forgiving, similar to black, but still benefit from thin layered applications. For colored leather jackets such as burgundy, navy, or grey, choose a dye specifically matched to the shade and build the color slowly to maintain the original appearance of the leather.
Step 8: Condition the Entire Jacket
Once all repairs and color work are complete, apply leather conditioner to the whole jacket using a soft cloth in circular motions. Let it absorb for about 20 minutes, then wipe off any excess. Conditioning restores the moisture and flexibility that repairs can strip away, and it also helps the repaired area blend visually with the rest of the leather.
How to Fix Scuffs and Scratches (A Different Process)
Scuffs and surface scratches aren’t the same as tears, and they need a different approach. Don’t use a backing patch here. Instead, scoop a small amount of leather compound or filler and smooth it directly over the scuffed area using a palette knife or applicator.
Hold a blow dryer about six inches away on the lowest heat setting and warm the compound for 30 to 60 seconds to help it set. Then buff it out with high-grit sandpaper (220 or higher) using circular motions until it blends smoothly into the surrounding leather. If the dried compound is still visible, apply one or two coats of matching leather dye and let it dry between coats.
When Stitching Is the Right Move
For tears along seams, or in high-stress zones like shoulders and elbows, leather adhesive alone may not hold long-term. In these cases, stitching gives you the durability the repair needs.
Use a leather needle and waxed polyester thread. Stitch from the inside of the jacket using a saddle stitch or backstitch, both spread force evenly across the stitched line. After stitching, add an internal patch behind the sewn area with adhesive to prevent the repair from opening again under stress. This combination of stitching plus backing is the most durable repair leather jacket tear method available for home use.
DIY vs. Professional Repair: Which One Makes Sense for You?
 Most minor to medium tears, seam separations, and surface damage are well within DIY range. The materials cost $15 to $25, and with patience, the results can be very good.
That said, there are situations where professional help is clearly the better call:
- Very large rips or holes where leather is actually missing
- Tears near zippers, cuffs, or lapels where precision matters most
- Patterned, perforated, or vintage leather where invisible color matching is critical
- Designer or high-value leather jackets where appearance is non-negotiable
Professional leather repair typically costs between $20 and $100 for minor work, and $150 to $250 or more for major restoration. The results are usually seamless and far longer-lasting, often several years, compared to months for a home repair. If your jacket is worth it, the price is worth it.
How to Keep Your Leather Jacket from Ripping Again
A leather jacket tears for a reason, usually because the leather has dried out or because regular stress points have been neglected. Here’s how to stay ahead of future damage:
- Condition every 3 to 6 months. Dry leather cracks and tears far more easily than conditioned leather. In dry climates, conditions are more frequent.
- Store it properly. Use a padded hanger in a cool, dry, dark space. Never fold it or store it in a plastic bag; leather needs airflow.
- Don’t overload your pockets. The extra weight puts constant strain on seams and can reopen a repaired tear.
- Wipe it down after rain or sweat. Moisture that sits in the leather weakens it over time.
- Check stress points regularly. Shoulders, underarms, and elbows wear faster than the rest of the jacket. Catch early signs of wear before they become full tears.
After a repair, condition the jacket monthly for the first three months to keep the repair site flexible and well-integrated.
Final Thoughts
A ripped leather jacket isn’t the end; it’s a repair job waiting to happen. With the right tools, a little patience, and the steps laid out above, you can bring most jackets back to full wearability. Start with the smallest, most controlled method for the damage you have. If the tear is minor, tackle it yourself. If it’s complex, invest in a professional repair. Either way, your jacket deserves better than the bin.
Frequently Asked Questions
Can you repair a small tear in your leather jacket at home?
Yes, you can. Small tears, especially hairline cuts or medium rips, are well within DIY range. With leather adhesive, a backing patch, and matching dye, you can get a clean, durable repair at home for around $15 to $25.
What is the best way for you to fix a ripped leather jacket without damaging it?
The safest method is to clean the area first, insert a backing patch, and use a flexible, leather-specific adhesive; never household glue. Work slowly, let each step fully dry, and test any dye on a hidden area before applying it to the tear.
Which tools or products do you need to repair your leather jacket?
You need leather adhesive, a subpatch or backing fabric, leather filler, fine-grit sandpaper, leather dye, and conditioner. For seam repairs, add a leather needle and waxed thread. A complete leather repair kit covers most of these essentials.
Should you patch a leather rip yourself or take it to a professional?
DIY works well for small to medium tears on everyday jackets. For large holes, damage near zippers or cuffs, or valuable and vintage pieces, a professional repair delivers stronger, more invisible results that last significantly longer.
How much will it cost you to have a professional repair your leather jacket?
Minor professional repairs typically run $20 to $100. Major restoration work, large rips, panel replacement, or full refinishing can cost $150 to $250 or more, depending on the damage, the leather type, and your location.
Can you fully restore a large or deep rip in your leather jacket?
It depends on the damage. Large rips with missing leather are difficult to restore invisibly at home. A professional can replace panels and custom-match color, but even professionally restored jackets may show slight evidence of the repair on close inspection.
