Motorcycle suit design guide: style meets safety in 2026
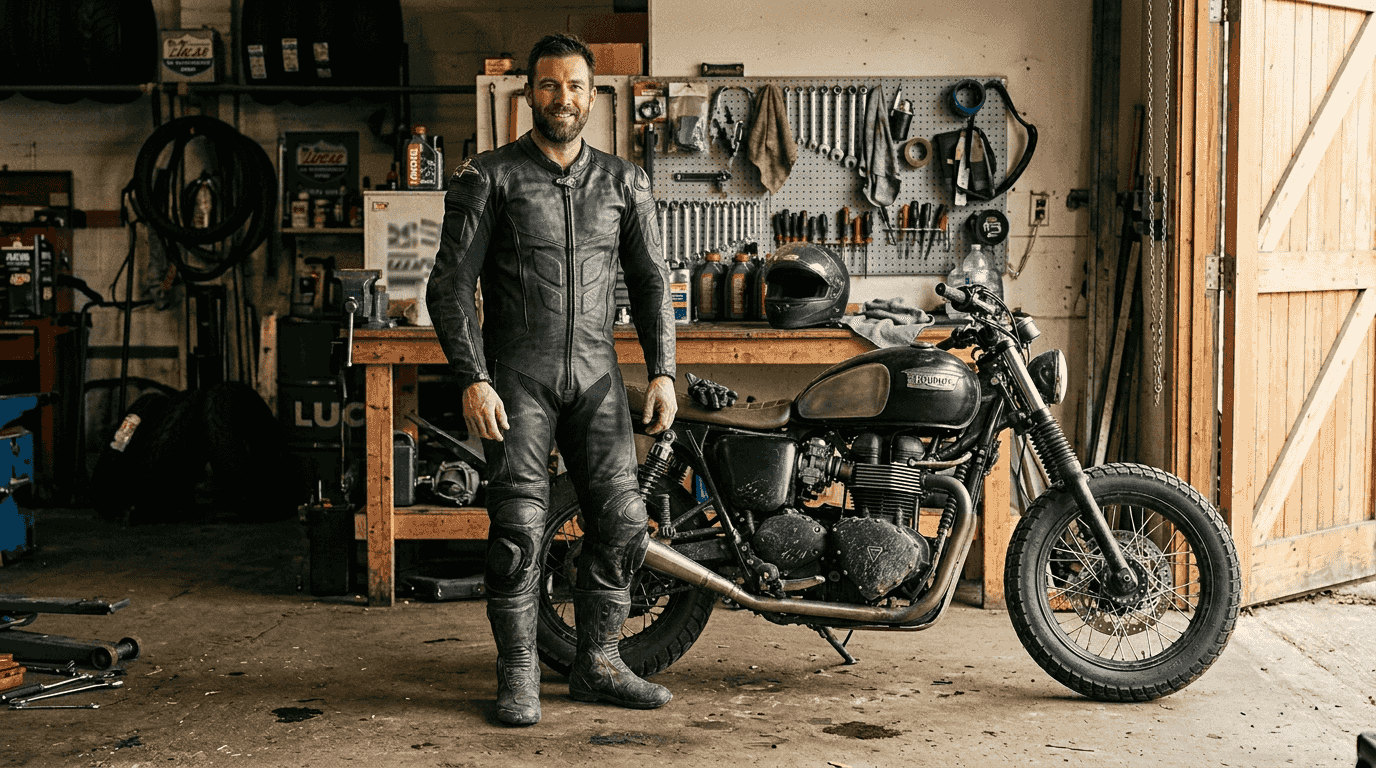
Designing a motorcycle suit step by step that delivers both head-turning style and uncompromising protection feels like walking a tightrope. You want gear that reflects your personality while keeping you safe at speed. Custom motorcycle suits solve this challenge by letting you control every detail, from material selection to protective features. This guide walks you through the complete design process, showing you how to create a suit that performs as well as it looks. Whether you’re a track enthusiast or a weekend rider, you’ll learn to balance aesthetics with the safety features that matter most.
Table of Contents
- Gather Essential Materials And Tools
- Step-By-Step Process To Design And Construct Your Motorcycle Suit
- Common Mistakes And Troubleshooting During Motorcycle Suit Design
- Expected Results And Maintenance Tips For Your Custom Motorcycle Suit
- Explore Custom Motorcycle Suits And Accessories
Key takeaways
| Point | Details |
|---|---|
| Snug fit is essential | Motorcycle suits must fit tightly to keep protective armor in place and maximize safety during impacts. |
| Material matters significantly | Kangaroo leather offers superior abrasion resistance and lighter weight compared to traditional cowhide options. |
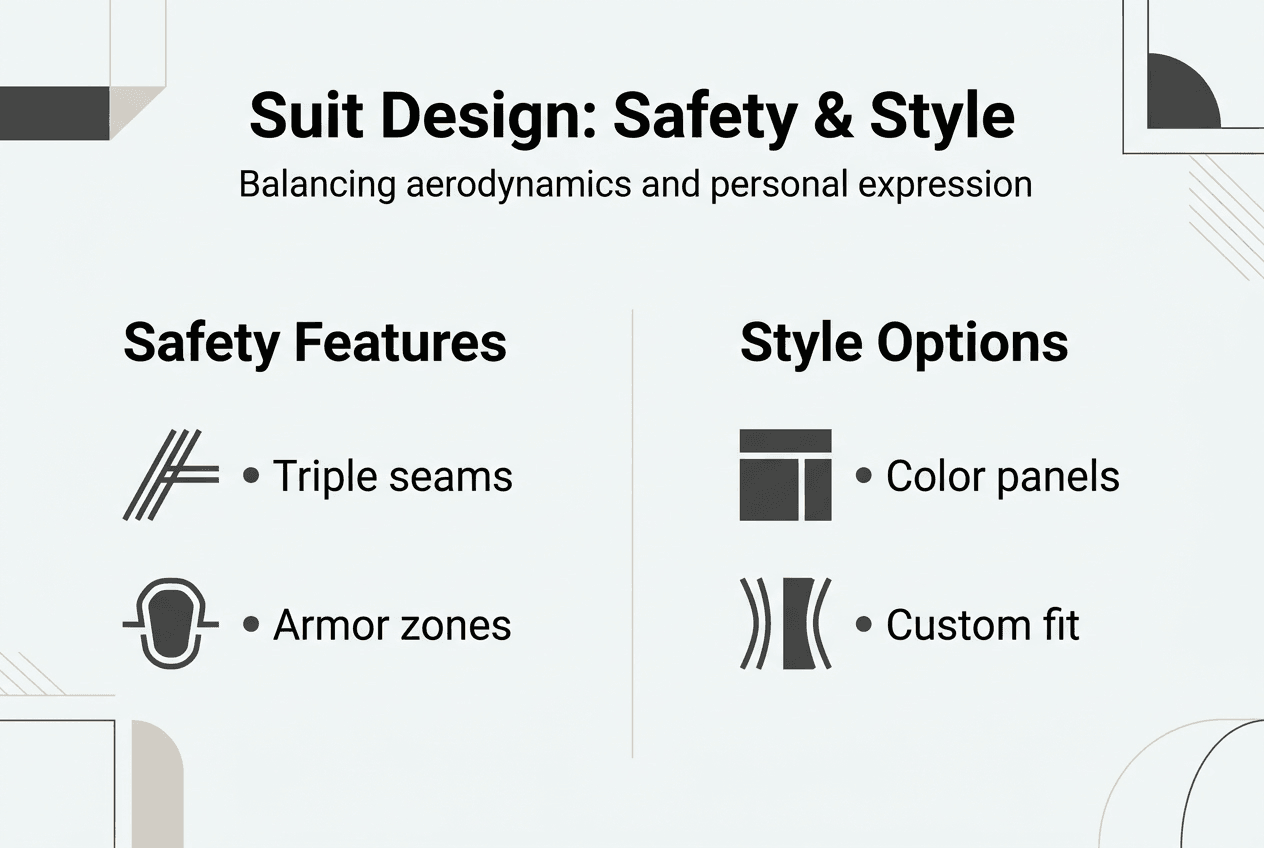
| Triple stitching adds strength | Reinforced seams using triple stitching prevent tearing under stress and are now standard among professional riders. |
| Break-in improves comfort | Properly breaking in your suit over 8 to 12 hours of wear molds the leather to your body shape. |
| Customization balances priorities | You can add style elements like color accents and embroidery without compromising protective features. |
Gather essential materials and tools
Starting with quality materials sets the foundation for a suit that protects and performs. MotoGP suits use about 80 pieces of kangaroo leather because this material combines durability with flexibility. Kangaroo leather provides more abrasion resistance than cowhide while weighing significantly less, making it ideal for high-performance applications. When choosing motorcycle jacket material, consider how different options balance protection, comfort, and weight.
Your material list should include pre-cut leather panels, heavy-duty thread rated for outdoor use, CE-approved armor for shoulders, elbows, back, and knees, plus breathable lining fabric. The thread choice matters tremendously because seams bear enormous stress during crashes. Triple stitching uses three parallel rows of stitches to reinforce every seam, a technique professional racers demanded for added safety.
Tools needed for construction include:
- Industrial sewing machine capable of handling thick leather layers
- Rotary cutters and sharp scissors designed for leather work
- Flexible measuring tape and pattern-making paper
- Leather punch set for creating precise holes
- Edge beveler for finishing seam edges smoothly
- Marking tools that won’t permanently stain leather
Here’s a breakdown of recommended materials and their properties:
| Material | Key Properties | Typical Use |
| — | — |
| Kangaroo Leather | Lightweight, highly abrasion resistant, flexible | Primary suit panels, high-stress areas |
| Cowhide Leather | Durable, heavier, cost-effective | Budget suits, reinforcement patches |
| Kevlar Thread | Heat resistant, extremely strong | Seam stitching, high-impact zones |
| Perforated Leather | Breathable, maintains protection | Ventilation panels, summer suits |
| Stretch Panels | Flexible, allows movement | Joints, lower back, crotch areas |
Pro Tip: Before committing to full-scale construction, create sample seams using your chosen thread and leather scraps. Test these samples by pulling them aggressively to verify your stitching tension and technique will hold under real-world stress. This simple step prevents discovering weak seams after you’ve invested hours in construction.
Organize your workspace with adequate lighting and a large cutting surface. Keep all materials within easy reach to maintain workflow efficiency. Double-check that your sewing machine needle is designed for leather, typically a size 18 or 20 with a cutting point rather than a standard rounded tip.
Step-by-step process to design and construct your motorcycle suit
Precise measurements form the foundation of a protective suit. Measure your chest, waist, hips, inseam, arm length, and shoulder width while wearing the base layers you’ll use during rides. Record measurements in your riding position, slightly crouched with arms extended, because suits must fit your body on the bike, not standing upright. A snug fit keeps armor positioned correctly over vulnerable areas.
Follow these construction steps in order:
- Create a detailed pattern incorporating approximately 80 individual leather pieces, marking protection zones for armor placement and accounting for stretch panels at joints.
- Transfer pattern pieces to leather, ensuring grain direction runs vertically for maximum strength and marking each piece clearly to prevent assembly confusion.
- Cut all pieces carefully using sharp tools, leaving minimal waste while maintaining precise edges that will align perfectly during stitching.
- Pre-fit all major sections by temporarily connecting them with clips or pins, checking alignment and making adjustments before permanent stitching begins.
- Stitch panels together using triple stitching on every seam, maintaining consistent tension and straight lines for both strength and professional appearance.
- Install armor pockets with tight-fitting openings that prevent protectors from shifting during movement or impacts.
- Add stretch panels at elbows, knees, and lower back using accordion-style inserts that expand during movement without creating loose fabric.
- Attach zippers along arms, legs, and torso, ensuring they close smoothly without catching leather and include safety flaps over teeth.
- Finish edges by beveling, burnishing, or binding to prevent fraying and create a polished look.
Riders like Maverick Viñales requested triple stitching on seams for added safety, making it standard practice. This technique significantly increases seam strength compared to single or double stitching methods.
Style customization opportunities include:
- Contrasting color panels on shoulders, arms, or legs
- Custom embroidery featuring names, numbers, or logos
- Perforated leather sections for improved ventilation
- Reflective piping along seams for nighttime visibility
- Unique collar styles or asymmetric zipper placements
When personalizing motorcycle jackets or suits, ensure decorative elements don’t compromise structural integrity. Embroidery should avoid high-stress seams, and color blocking should maintain leather thickness in impact zones. Understanding why wear motorcycle suit helps prioritize safety features over purely aesthetic choices.
Breaking in your finished suit properly enhances comfort and performance. Motorcycle leather suits require 8 to 12 hours of wear or 3 to 5 short rides to mold properly to your body shape. Start with short sessions wearing the suit around your house, performing stretches and movements that mimic riding positions. Gradually increase wear time as the leather softens and conforms.
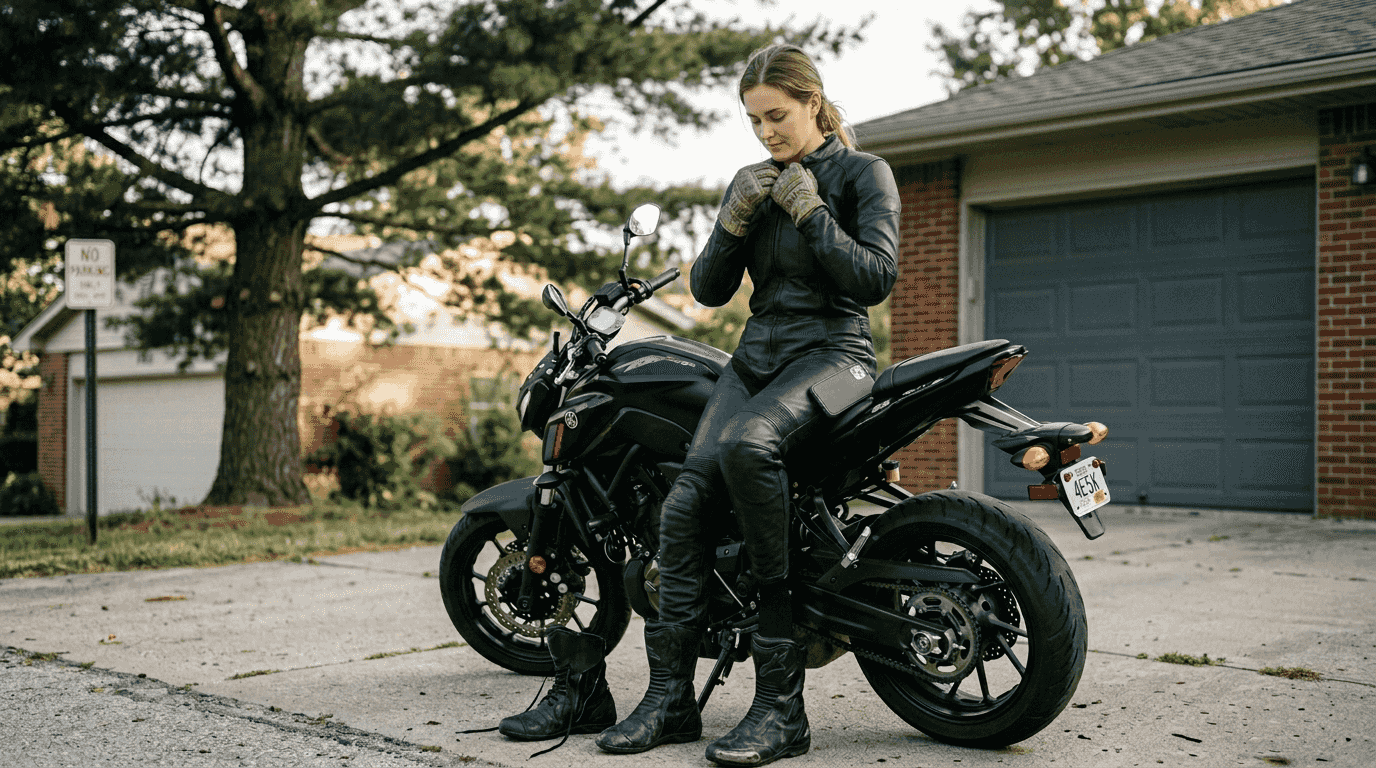
Wear moisture-wicking base layers underneath during break-in to reduce friction against your skin and speed the molding process. The base layer creates a smooth interface that lets leather move more easily while absorbing perspiration that would otherwise stiffen the material.
Pro Tip: Never attempt to speed break-in by soaking your suit in water, applying harsh oils, or using heat sources like hair dryers. These aggressive methods damage leather fibers, reduce abrasion resistance, and can cause premature cracking. Patient, gradual break-in preserves your suit’s protective qualities while achieving the custom fit you need.
Common mistakes and troubleshooting during motorcycle suit design
Loose-fitting suits rank among the most dangerous mistakes. When leather doesn’t hug your body snugly, armor shifts away from the areas it’s designed to protect. During a crash, loose fabric bunches up, and protectors slide out of position, leaving you vulnerable. Always err on the side of tighter fit, knowing the leather will stretch slightly during break-in.
Incorrect stitching techniques create weak points that fail under stress. Single-stitch seams tear easily, and improper thread tension causes stitches to pull through leather. Double stitching improves strength but still falls short of the security triple stitching provides. Every seam in high-stress areas like shoulders, elbows, and knees demands triple reinforcement.
Aggressive methods like soaking suits in water or applying improper oils can damage leather during break-in, compromising both the material’s integrity and its protective capabilities over time.
Rushing the break-in process tempts many riders eager to use their new gear. Patience pays off because properly conditioned leather maintains its protective qualities while conforming to your body. Quick fixes that seem to soften leather faster often weaken the material’s structure, reducing the abrasion resistance that keeps you safe.
Common fitting errors include:
- Ignoring stretch zones at joints, creating restricted movement
- Neglecting rider posture differences between standing and riding positions
- Failing to account for base layer thickness under the suit
- Positioning armor pockets too loosely, allowing protector movement
- Overlooking the need for adjustment straps at waist and limbs
Troubleshooting seam issues starts with identifying the problem. If stitches skip or break, check needle sharpness and thread tension. Puckered seams indicate excessive tension or mismatched fabric layers. Uneven seams result from inconsistent feeding or inadequate pinning before stitching. Address each issue before continuing construction because fixing completed seams requires time-consuming disassembly.
Fitting adjustments mid-process save frustration later. Try on partially assembled sections regularly, checking mobility and comfort. Mark areas that feel tight or restrictive, then adjust patterns before final assembly. Small modifications during construction prevent major alterations after completion. Understanding motorcycle jacket safety features helps identify which areas demand perfect fit versus where slight looseness is acceptable.
Leather conditioning best practices involve using products specifically formulated for protective gear. Avoid petroleum-based conditioners that break down leather fibers. Apply thin coats sparingly, allowing complete absorption before adding more. Over-conditioning creates soft, weak leather that won’t protect effectively. Condition only when leather feels dry or stiff, typically once or twice per season depending on use.
Avoid these critical mistakes:
- Using decorative stitching that weakens structural seams
- Placing armor pockets where they interfere with movement
- Selecting fashion over function in high-impact areas
- Skipping test fits throughout the construction process
- Ignoring manufacturer specifications for armor placement
Expected results and maintenance tips for your custom motorcycle suit
A properly designed and broken-in suit transforms your riding experience. The leather molds to your unique body shape, creating a second skin that moves with you rather than against you. High-quality leather suits that fit snugly offer optimal protection and comfort, eliminating the compromise between safety and wearability that plagues off-the-rack options.
Abrasion-resistant materials like kangaroo leather provide durability during slides and impacts. In crash scenarios, quality leather suits can mean the difference between minor road rash and serious injury. The investment in proper materials and construction pays dividends every time you ride, offering peace of mind that your gear will perform when needed most.
Maintenance practices that extend suit lifespan include:
- Cleaning with leather-specific products after rides in rain or dusty conditions
- Storing on a padded hanger in a cool, dry location away from direct sunlight
- Conditioning leather twice per season or when material feels stiff
- Inspecting stitching and armor regularly for signs of wear or damage
- Avoiding storage in compressed positions that create permanent creases
- Keeping zippers clean and lubricated for smooth operation
Pro Tip: Schedule a thorough inspection of your suit every six months, checking all seams, armor attachments, and zipper integrity. Replace any components showing wear before they fail during a ride. This proactive approach prevents small issues from becoming safety hazards and extends your suit’s usable life significantly.
Aesthetic benefits from custom design let you express personality through your gear. Your suit becomes a reflection of your style, whether you prefer classic racing stripes, modern minimalist designs, or bold color combinations. Custom embroidery adds personal touches that make your suit uniquely yours. When caring for leather gear properly, these style elements maintain their appearance for years.
Performance benefits include improved aerodynamics from the tailored fit, better temperature regulation through strategic ventilation placement, and enhanced mobility from precisely positioned stretch panels. You’ll notice reduced fatigue on long rides because the suit works with your body rather than restricting movement. The confidence that comes from wearing gear designed specifically for your needs elevates every aspect of your riding experience.
Explore custom motorcycle suits and accessories
Bringing your motorcycle suit vision to life requires expertise in both design and construction. Maker of Jacket specializes in creating custom motorcycle suits that balance your style preferences with the safety features you need. Whether you’re starting from scratch or refining an existing design, professional guidance ensures your finished suit meets both aesthetic and protective standards.

You can order custom jacket online and work directly with experienced craftspeople who understand the technical requirements of protective gear. The unique customization journey walks you through material selection, measurement, design approval, and construction, ensuring every detail matches your specifications. From initial concept to final fitting, the process focuses on creating gear that performs flawlessly while reflecting your personal style. Comprehensive resources on leather care help you maintain your investment for years of reliable protection.
FAQ
What materials are best for motorcycle suits?
Kangaroo leather offers exceptional abrasion resistance and lightness, making it ideal for racing suits and high-performance applications. Cowhide provides excellent durability at a lower price point but weighs more and offers slightly less flexibility. Textile suits deliver superior breathability for hot weather riding but sacrifice some abrasion protection compared to leather options. When choosing motorcycle jacket material, consider your riding style, climate, and budget to find the optimal balance.
How long does it take to break in a new motorcycle suit?
Breaking in a leather suit typically requires 8 to 12 hours of wear or 3 to 5 short riding sessions for proper molding and flexibility. Start with brief periods wearing the suit indoors, performing stretches and movements that mimic riding positions. Use moisture-wicking base layers underneath to speed the process by reducing friction and helping leather conform to your body shape more quickly. Patience during break-in preserves the material’s protective qualities while achieving the custom fit that maximizes both comfort and safety.
What safety features should I prioritize in a custom motorcycle suit?
Ensure triple stitching on all seams for strengthened durability, as this technique is now standard among professional riders. Choose suits constructed from abrasion-resistant leather like kangaroo or high-grade cowhide, and verify that protective armor fits snugly in pockets designed to prevent shifting during impacts. Customization should enhance safety through features like reinforced impact zones and strategically placed stretch panels that maintain protection while allowing natural movement. Understanding motorcycle jacket safety features helps you prioritize the elements that provide genuine protection over purely cosmetic additions.
Can I customize the style without compromising safety?
Yes, customization options allow adding color accents, embroidery, and unique design elements while maintaining all necessary safety features. The key is working with experienced designers who understand how to integrate style modifications without weakening protective zones or compromising structural integrity. Professional guidance ensures that decorative stitching avoids high-stress seams, color blocking maintains appropriate leather thickness in impact areas, and any perforations for ventilation are placed strategically. When personalizing motorcycle jackets or suits, prioritize safety features first, then layer style elements that complement rather than compromise protection.
Recommended
- Why Wear a Motorcycle Suit – Safety and Style Unpacked – Maker of Jacket
- Motorcycle Gear Essentials 2025: Style, Safety, and Comfort – Maker of Jacket
- Why Opt for Bespoke Motorcycle Suits: Style Meets Safety – Maker of Jacket
- Motorcycle Jacket Safety Features Guide for Secure Riding – Maker of Jacket
