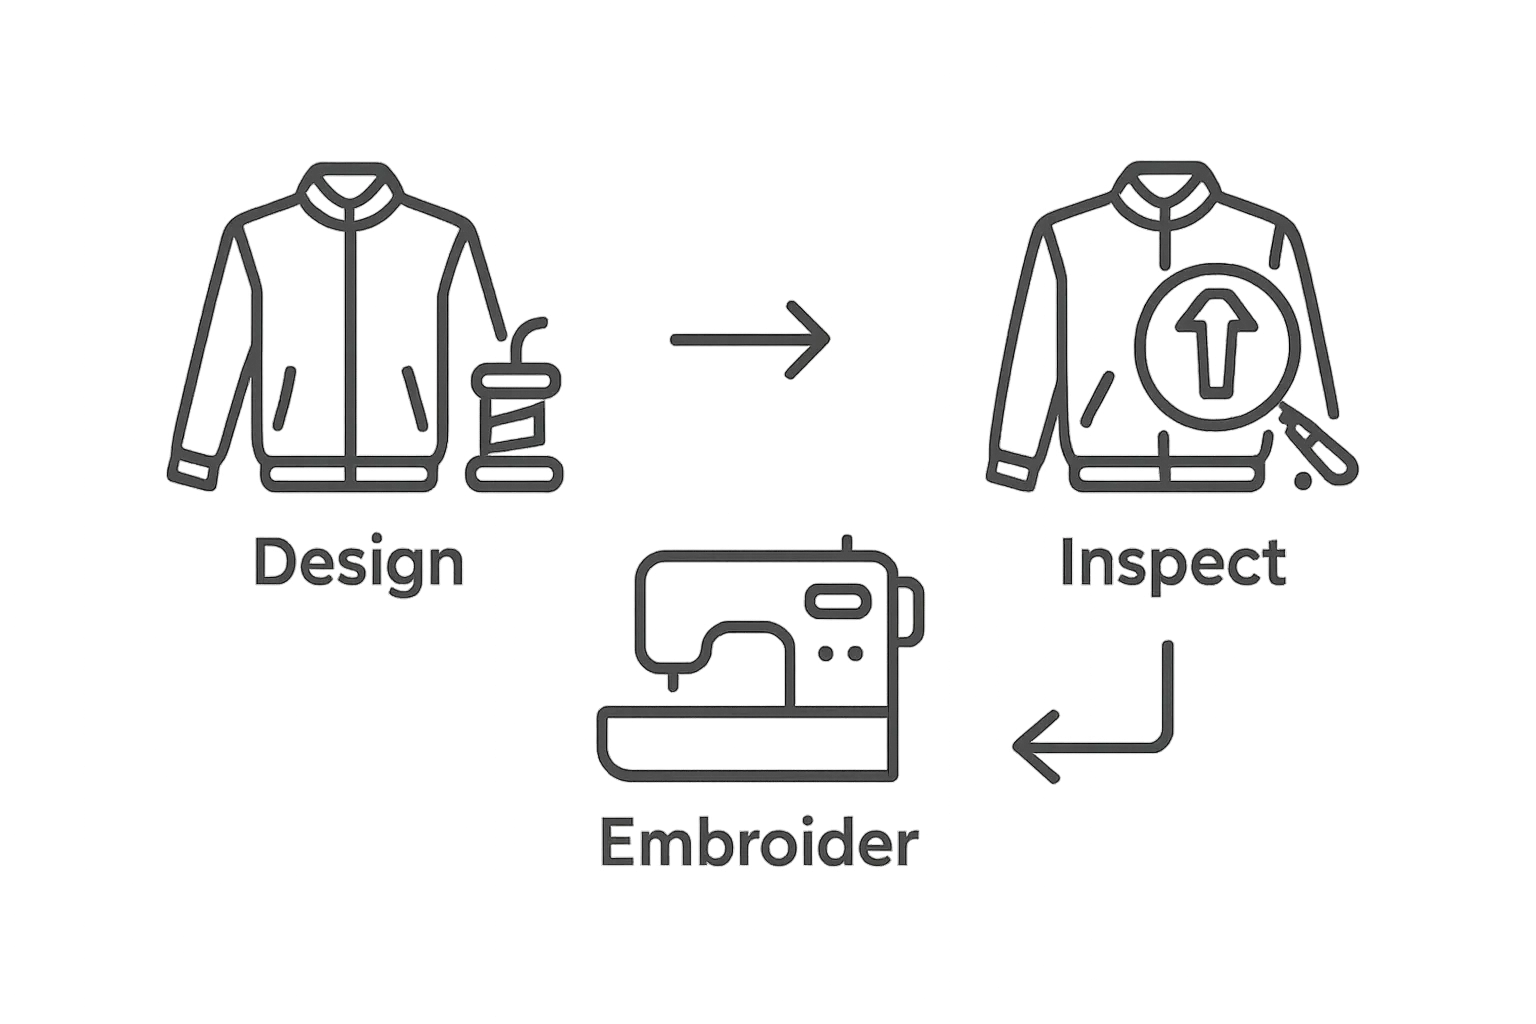
Create Stylish Custom Embroidery Jackets: Step-by-Step Guide

Custom embroidery on jackets is booming right now and the creative possibilities are massive. People are embracing this trend to express their style, but most folks do not realize how much the fabric you choose can make or break your design. A heavyweight cotton or sturdy denim jacket can handle bold, intricate embroidery with ease, while lighter fabrics like silk often warp or pucker under pressure. The right jacket choice is way more important than just looks and it can actually determine if your embroidered masterpiece stands the test of time.
Table of Contents
- Step 1: Choose The Right Jacket Style And Fabric
- Step 2: Design Your Custom Embroidery Pattern
- Step 3: Select Appropriate Embroidery Thread And Colors
- Step 4: Prepare The Jacket For Embroidery
- Step 5: Execute The Embroidery Process
- Step 6: Inspect And Finalize Your Custom Jacket
Quick Summary
| Key Point | Explanation |
|---|---|
| 1. Choose suitable jacket style and fabric | Select a jacket style like denim or leather, considering its texture and durability for the embroidery design. |
| 2. Simple design patterns work best | Start with uncomplicated designs to maintain clarity during the stitching process, ensuring they complement your jacket’s aesthetics. |
| 3. Test thread colors before use | Create color test swatches to ensure the chosen thread colors look good on the fabric under different lighting conditions. |
| 4. Secure fabric properly for embroidery | Use stabilizers and alignment tools to ensure the fabric remains stable and the design is accurately placed during stitching. |
| 5. Conduct a thorough final inspection | Carefully inspect the finished jacket, checking for thread security and design clarity, to ensure quality before wear. |
Step 1: Choose the Right Jacket Style and Fabric
Selecting the perfect jacket for your custom embroidery project is more than just picking a random piece of clothing. Your jacket serves as the canvas for your creative expression, and its style and fabric will dramatically impact the final design and overall aesthetic of your custom embroidery jackets.
When considering jacket styles, think about your personal aesthetic and the intended purpose of the garment. Leather jackets offer a classic, edgy backdrop for embroidery and provide exceptional durability. Denim jackets present a more casual, versatile option with excellent texture for intricate designs. Bomber jackets and varsity jackets are particularly popular for custom embroidery, offering smooth surfaces and structured silhouettes that showcase detailed work.
Fabric Considerations Matter
Fabric selection plays a critical role in successful custom embroidery. Heavier fabrics like thick cotton, leather, and denim provide stable foundations that can support more complex embroidery designs without distortion. Lighter fabrics such as silk or thin cotton might require additional stabilization to prevent puckering or misalignment during the embroidery process.
Consider the weight and stretch of your chosen fabric. Stable, non stretchy materials work best for intricate designs, while knit or highly elastic fabrics can complicate the embroidery process. According to professional embroidery experts at Threads Magazine, selecting the right stabilizer can help compensate for fabric variations and ensure crisp, clean embroidery results.
Practical fabric recommendations for custom embroidery jackets include:
- Heavyweight cotton denim
- Full grain leather
- Twill
- Canvas
- Wool blend materials
Your final fabric choice should balance aesthetic preference, design complexity, and practical wearability. Remember that the fabric will influence not just the appearance of your embroidery but also its long term durability and comfort. Take time to handle different fabric samples, assess their texture, and imagine how your chosen design will look against their unique surface characteristics.
Here is a comparison table to help you assess different jacket fabrics and their suitability for custom embroidery projects.
| Fabric Type | Durability | Best For Embroidery Complexity | Required Stabilization | Comfort Level |
|---|---|---|---|---|
| Heavyweight Cotton | High | Intricate, bold designs | Minimal | High |
| Denim | High | Intricate, graphic details | Minimal | Medium-High |
| Full Grain Leather | Very High | Simple to intermediate | Specialized techniques | Medium |
| Twill | Medium-High | Moderate complexity | Moderate | High |
| Canvas | High | Bold, large patterns | Minimal | Medium |
| Wool Blend | Medium | Graphic or simple embroidery | Moderate | High |
| Silk/Thin Cotton | Low | Simple, minimalistic designs | Essential | High |
Before committing to a specific jacket, test a small embroidery sample on a similar fabric swatch. This preliminary step will help you understand how your chosen design translates onto the material and allow you to make informed adjustments before working on the final piece.
Step 2: Design Your Custom Embroidery Pattern
Designing your custom embroidery pattern transforms a basic jacket into a personalized statement piece. This critical step bridges your creative vision with the technical requirements of embroidery, requiring both artistic imagination and strategic planning.
Begin by sketching your initial design concept on paper or using digital design software. Professional tip: Start with simple, clean designs that complement the jacket’s style and fabric. Complex patterns might look overwhelming or lose detail during the embroidery process. Consider the jacket’s color, texture, and potential placement areas like the back, chest, or sleeve.
Digital design tools can significantly enhance your pattern creation. Professional embroidery designers recommend using specialized software like Adobe Illustrator or dedicated embroidery programs, which allow precise line work, color selection, and thread simulation. These tools help you visualize the final design and make critical adjustments before actual stitching.
When developing your pattern, pay close attention to several key design elements. Line thickness matters significantly in embroidery work small, delicate lines might not translate well onto fabric. Opt for bold, clear lines and graphic elements that maintain their integrity when translated into thread. Color selection is equally important select thread colors that contrast nicely with your jacket fabric to ensure maximum visual impact.
Practical design considerations include:
- Maintaining simple, clean lines
- Selecting high contrast color combinations
- Avoiding extremely intricate details
- Considering the embroidery area size
- Matching design complexity to fabric type
Before finalizing your design, create a digital mockup or print a scaled version to place against your jacket. This allows you to assess scale, positioning, and overall aesthetic. Some designers recommend creating multiple design variations to compare and select the most compelling option.
The verification process for your design involves several key checkpoints. Ensure your pattern fits comfortably within the embroidery area, maintains visual clarity, and represents your intended artistic vision. A successful design seamlessly integrates with the jacket’s style while expressing your unique creative perspective.
Step 3: Select Appropriate Embroidery Thread and Colors
Choosing the right embroidery thread and colors is crucial for transforming your custom jacket design from a concept to a stunning visual masterpiece. This step requires careful consideration of thread quality, color interaction, and the overall aesthetic impact of your chosen materials.
Thread Quality Matters
Not all embroidery threads are created equal. Polyester and rayon threads offer the most vibrant colors and excellent sheen, making them popular for custom embroidery jackets. Cotton threads provide a more matte, traditional look and work exceptionally well for vintage or rustic design styles. According to professional textile experts at the Embroidery Guild of America, thread weight and composition significantly impact the final appearance of your design.
Consider the jacket’s base fabric and intended wear when selecting thread. Heavyweight threads work best on sturdy materials like leather or thick denim, while lighter threads suit more delicate fabrics. Metallic threads can add dramatic flair but require specialized handling and might be less durable for everyday wear.
Color selection goes beyond personal preference. You need to consider how different thread colors will interact with your jacket’s base color and the visual complexity of your design. High contrast combinations create bold, striking effects, while more subtle color palettes offer a refined, sophisticated look. Professional designers recommend creating a color test swatch to preview how your chosen threads will appear against the jacket fabric.
Practical color selection guidelines include:
- Choose threads with colorfast properties
- Select colors that complement the jacket’s base color
- Consider the emotional impact of your color choices
- Test thread colors in natural and artificial lighting
- Verify thread durability and wash resistance
Thread tension and quality control are equally important. Uneven thread tension can cause puckering or distortion in your design, ruining the overall aesthetic. Invest in high quality threads from reputable manufacturers and consider purchasing a small sample pack to test different brands and styles before committing to your final design.
Verify your thread selection by creating a small test embroidery sample. This allows you to assess color accuracy, thread performance, and overall visual appeal before working on the final jacket. A successful thread selection enhances your design, creates visual depth, and ensures your custom embroidery jacket stands out with professional quality craftsmanship.
Step 4: Prepare the Jacket for Embroidery
Preparing your jacket for embroidery is a meticulous process that sets the foundation for a professional quality custom design. This critical step ensures your jacket remains stable during the embroidery process and prevents potential fabric distortion or misalignment.
Cleaning and Prepping the Surface
Begin by thoroughly cleaning your jacket to remove any dirt, oils, or residues that might interfere with the embroidery process. Use a gentle fabric cleaner appropriate for the jacket’s material, and allow it to dry completely. Important: Avoid using fabric softeners or heavy detergents, as these can create a film that disrupts thread adhesion and stitch quality.
According to textile preparation experts at Iowa State University, selecting the right stabilizer is crucial for maintaining fabric integrity during embroidery. Stabilizers provide essential support, preventing fabric stretching and ensuring precise stitch placement. Choose between tear away, cut away, or adhesive stabilizers based on your jacket’s fabric weight and embroidery design complexity.
Positioning is paramount in achieving a professional result. Use temporary fabric marking tools like water soluble markers or chalk to outline your exact embroidery placement. Measure carefully and create precise alignment guides, ensuring your design will be centered and symmetrical. Professional tip: Use a ruler or measuring tape to mark equidistant points, helping you maintain perfect positioning.
Practical preparation steps include:
- Selecting appropriate stabilizer material
- Cleaning jacket thoroughly
- Creating precise alignment marks
- Securing fabric in embroidery hoop
- Verifying design placement
Securing the jacket in an embroidery hoop requires gentle but firm technique. Stretch the fabric smoothly, eliminating wrinkles and ensuring an even surface. The hoop should hold the fabric taut without distorting the material or causing unnecessary tension. If working with delicate or thick materials like leather, consider using magnetic or specialized hooping techniques that minimize potential fabric damage.
Verify your preparation by doing a final visual inspection. Check that your stabilizer is smooth, your alignment marks are clear, and the fabric is stretched evenly. A well prepared jacket significantly increases the likelihood of a flawless embroidery result, transforming your creative vision into a professional quality custom garment.
The table below summarizes essential preparation steps to ensure your jacket is ready for high-quality embroidery.
| Preparation Step | Purpose | Verification Tip |
|---|---|---|
| Clean jacket thoroughly | Removes dirt, oils, and residues | Check for no visible stains or spots |
| Select proper stabilizer | Prevents fabric distortion and maintains alignment | Match stabilizer to fabric thickness |
| Create precise alignment marks | Ensures accurate design placement | Double-check measurements for symmetry |
| Secure fabric in embroidery hoop | Keeps fabric taut and even during stitching | Surface should be wrinkle-free and flat |
| Verify design placement | Confirms the exact area for embroidery | Hold template or printed mockup in place |
Step 5: Execute the Embroidery Process
Executing the embroidery process transforms your carefully prepared design into a tangible work of art on your custom jacket. This pivotal step requires precision, patience, and technical skill to translate your creative vision into perfectly stitched details.
Machine Setup and Initial Configuration
Begin by thoroughly calibrating your embroidery machine. Ensure the tension settings match your selected thread and fabric type. Professional tip: Always run a test stitch on a similar fabric scrap to confirm thread tension, stitch density, and overall machine performance before working on the final jacket. According to professional embroidery technicians at the Industrial Fabrics Association International, proper machine calibration can prevent up to 70% of potential embroidery errors.
Loading your design into the embroidery machine requires careful attention. Most modern machines accept digital embroidery files in formats like .DST, .PES, or .EXP. Double check that your design is correctly sized and oriented for the specific jacket area. Some designs might require manual adjustments to maintain proportions and visual impact.
The actual embroidery process demands constant monitoring. Watch for potential thread breaks, tension issues, or fabric puckering during the stitching. Keep a pair of small scissors nearby to quickly trim loose threads or make emergency adjustments. Maintain a steady, calm approach even if small imperfections occur technical skill comes from patient practice and willingness to learn from each attempt.
Critical execution considerations include:
- Maintaining consistent machine speed
- Monitoring thread tension continuously
- Checking design alignment periodically
- Keeping workspace clean and organized
- Having backup thread spools ready
Color changing sequences require particular precision. If your design involves multiple thread colors, carefully follow the machine’s programmed sequence. Some complex designs might require manual thread changes, so stay attentive and prepared to pause the machine at appropriate intervals.
Verify your embroidery’s quality by performing a comprehensive visual inspection after completion. Check for even stitching, consistent color transitions, and precise design placement. Minor imperfections can often be corrected with careful thread trimming or strategic touch ups. A successful embroidery execution results in a clean, crisp design that perfectly complements your jacket’s style and your original creative vision.
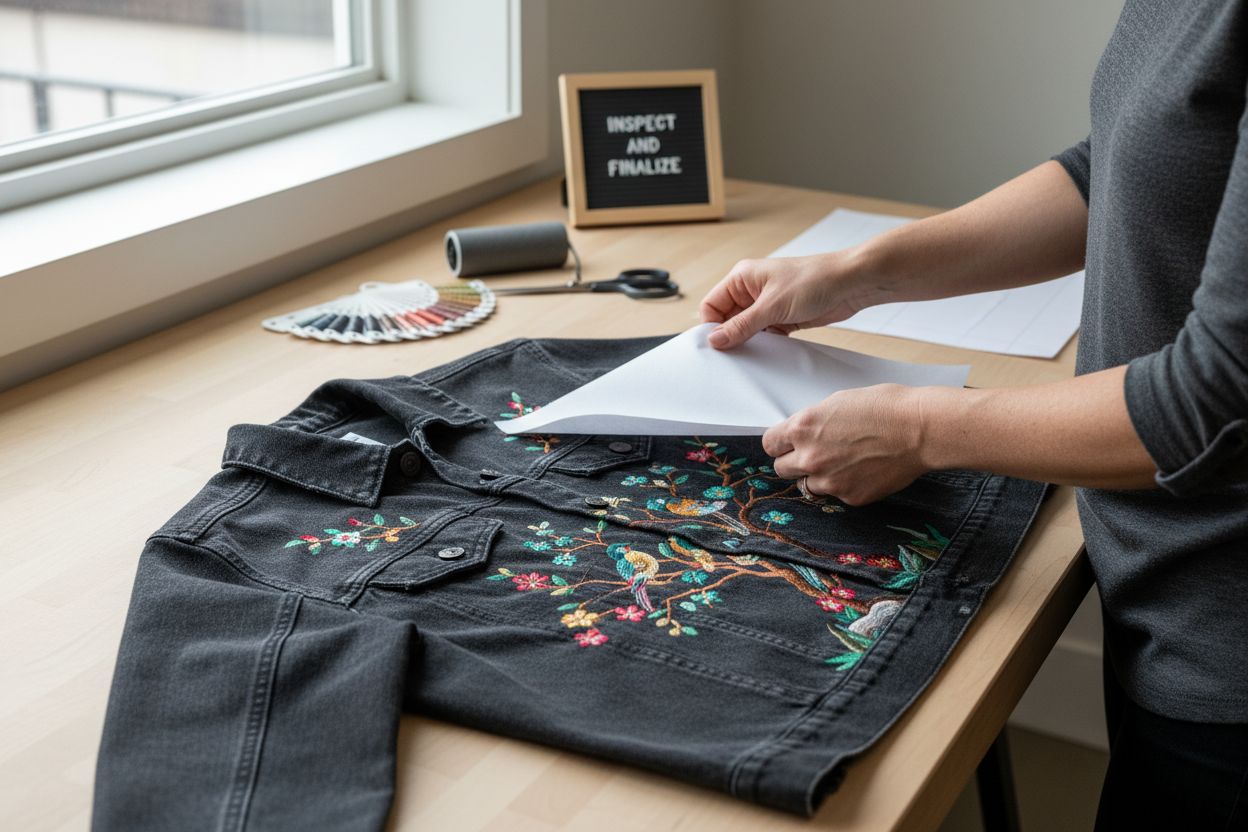
Step 6: Inspect and Finalize Your Custom Jacket
Inspecting and finalizing your custom embroidery jacket represents the culmination of your creative journey, transforming meticulous work into a personalized fashion statement. This critical step ensures your jacket meets professional standards and reflects your original design vision with precision and quality.
Comprehensive Visual Inspection
Begin with a thorough, systematic examination of your embroidered jacket. Use natural and artificial lighting to reveal subtle details and potential imperfections. Professional tip: Hold the jacket at different angles and distances to identify any inconsistencies in thread tension, color variation, or stitch alignment. According to textile quality experts at the Textile Research Institute, careful post production inspection can prevent potential wear and durability issues.
Remove any stabilizer materials carefully, ensuring no residue remains that might compromise the jacket’s appearance or comfort. For tear away stabilizers, gently pull from the embroidery edges, working slowly to prevent thread distortion. Cut away stabilizers require precise trimming with sharp fabric scissors, maintaining a close but clean edge around your embroidered design.
Color verification is crucial during this stage. Confirm that thread colors match your original design intention and appear consistent across different lighting conditions. Some metallic or specialty threads might look slightly different when fully stitched, so allow time for careful visual assessment.
Critical finalization steps include:
- Checking thread security and knot integrity
- Verifying design symmetry and placement
- Removing all stabilizer materials
- Examining color consistency
- Assessing overall design clarity
Post embroidery care involves gentle treatment. If any loose threads are discovered, use small embroidery scissors for precise trimming. Avoid pulling threads, which can cause unraveling or distortion. For leather or delicate jackets, consider professional pressing or steaming to enhance the embroidery’s final appearance and integrate the stitching seamlessly into the fabric.
A successful jacket inspection culminates in a piece that not only meets technical standards but also captures your unique creative expression.
 Your custom embroidery jacket should tell a story through its design, reflecting both artistic vision and skilled craftsmanship. Take a moment to appreciate the transformation from initial concept to finished garment a wearable piece of personalized art.
Make Your Custom Embroidery Vision Come to Life With Maker of Jacket
Struggling to find the perfect jacket style and durable fabrics for your embroidery ideas? Maybe you feel overwhelmed picking a jacket that holds intricate details, or you want a professional-quality finish but do not know where to get started. After learning how fabric quality, thread selection, and design placement can make or break your custom piece, you need a place where your creative vision meets quality materials and craftsmanship. Discover the difference when your ideas and the right jacket come together.
Explore the Maker of Jacket’s collection to find premium bases in leather, denim, or wool—each ready for detailed custom embroidery, just as outlined in the guide.

Now is the best moment to turn your design into a real statement piece. Visit Maker of Jacket to shop jackets built for customization. Every piece includes easy size guides, visuals to preview your ideas, and support to help ensure your embroidery is showcased perfectly. Start your custom project today and enjoy premium quality, secure worldwide delivery, and endless possibilities for self-expression.
Frequently Asked Questions
What types of fabrics are best for custom embroidery jackets?
Heavyweight fabrics like cotton denim, full grain leather, twill, canvas, and wool blend materials are ideal as they provide a stable foundation for intricate embroidery designs.
How can I prepare my jacket for embroidery?
Begin by cleaning the jacket to remove any residues and then select an appropriate stabilizer to prevent fabric distortion. Mark the embroidery placement carefully and secure the fabric in an embroidery hoop.
What are some tips for designing a custom embroidery pattern?
Start with simple, clean designs that match the jacket’s style. Use digital design tools for precision, focus on bold lines, and ensure high contrast color combinations for maximum visual impact.
Why is thread quality important for embroidery?
The quality of your embroidery thread significantly affects the final appearance of the design. Polyester and rayon threads offer vibrant colors and sheen, while cotton threads provide a traditional look. Quality threads reduce issues like tension problems and ensure durability.
