Step-by-step jacket customization guide for unique style
TL;DR:
- Customization allows for personal expression, perfect fit, and improved safety features.
- Proper planning, tools, and materials are essential for durable and accurate jacket modifications.
- Thoughtful, non-trendy designs last longer and reflect genuine style over fleeting fashion trends.
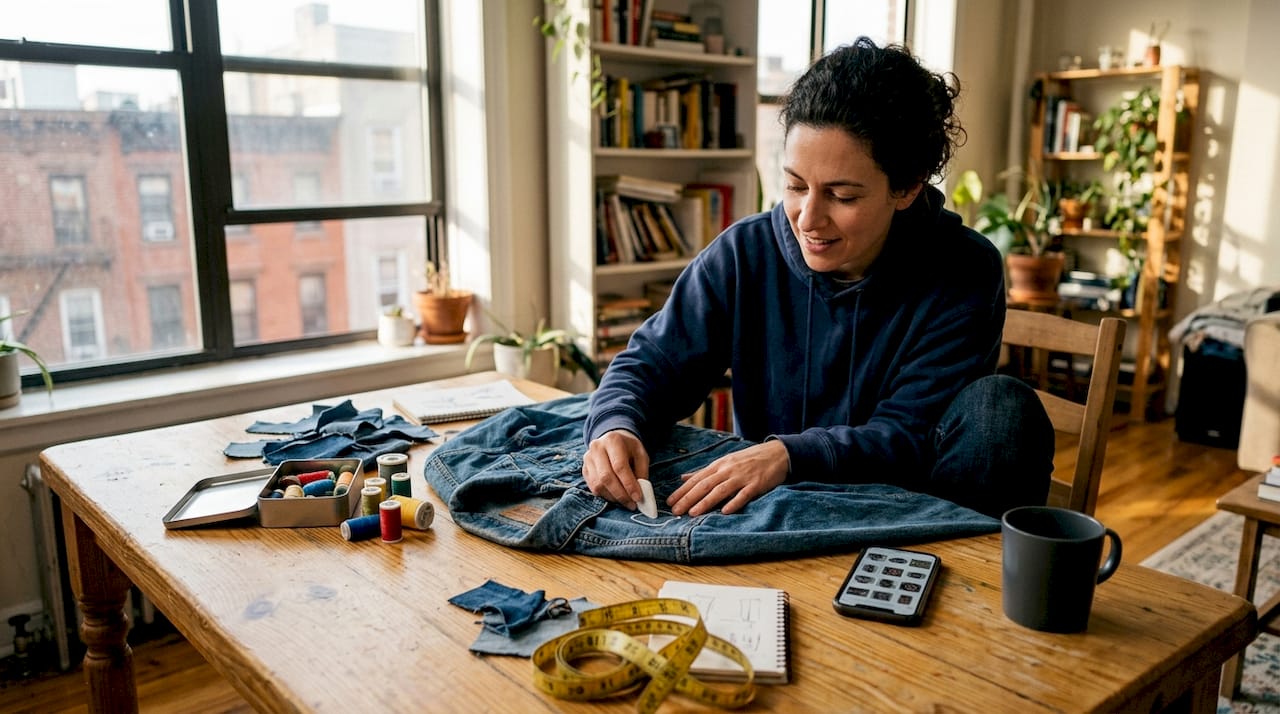
Most jackets off the rack look identical. You see the same cuts, the same colors, the same zero personality. Whether you want something that screams your identity, fits your body perfectly, or keeps you safer on your motorcycle, a store-bought jacket rarely delivers all three. Customization changes that completely. This guide walks you through every stage of the process, from setting your goals and gathering the right tools, to executing the design and keeping your jacket looking great for years. By the end, you will know exactly how to turn a plain jacket into something genuinely yours.
Table of Contents
- Why customize your jacket?
- What you need: Tools, materials, and prep
- The customization process: Step by step instructions
- Tips to avoid common mistakes and ensure durability
- A fresh take: Why thoughtful customization outlasts trends
- Ready to start your own custom jacket journey?
- Frequently asked questions
Key Takeaways
| Point | Details |
|---|---|
| Personalize for expression | A step-by-step process lets you create a jacket that truly matches your personality and needs. |
| Plan and prepare | Gather materials and map your design before starting to avoid costly mistakes. |
| Safety matters | Motorcycle jackets should never lose protection—limit patches and avoid key safety zones. |
| DIY vs. pro options | DIY is fun and cheaper, but professionals give perfect fit and lasting quality for special jackets. |
| Maintenance is key | Regular care keeps your custom jacket stylish and durable for years. |
Why customize your jacket?
Customizing a jacket is not just about looks. It is about ownership. When you wear something you had a hand in creating, it carries a different weight. Fashion-conscious riders and style-driven individuals alike are discovering that jacket personalization explained goes far beyond slapping a logo on a sleeve.
Here are the core reasons people choose to customize:
- Personal expression: Your jacket becomes a visual signature, reflecting your taste, values, or fandoms without saying a word.
- Perfect fit: Off-the-rack sizing rarely accounts for your specific proportions. Customization solves that.
- Functional upgrades: Motorcycle riders often need added reflectivity, armor pockets, or reinforced stitching that standard jackets skip.
- Emotional value: A jacket you designed or modified holds sentimental weight that a mass-produced piece never will.
- Cost-per-wear advantage: A high-quality custom jacket you love wearing every day costs far less per use over its lifetime than a cheaper piece you abandon after a season.
For motorcycle riders specifically, customization is not purely aesthetic. Placement of patches, the type of material used, and structural modifications can directly impact safety. That is why knowing your goal before you start is so important.
When it comes to the approach, you have two main paths. DIY is cheaper and creative but risks damage and poor fit; professional customization ensures perfect fit, durability, and uses premium materials. Neither is wrong, but they serve different needs and budgets.
Exploring personalized jacket ideas before committing to a direction can spark inspiration and help you avoid costly mid-project pivots.
Pro Tip: Write down your single clearest goal before buying anything. Are you going for pure style, a better fit, or functional safety upgrades? That one decision shapes every choice that follows.
What you need: Tools, materials, and prep
With your motivation clear, gather your essentials to start off right. Jumping into customization without the right setup is the fastest route to a ruined jacket.
Here is a breakdown of what each approach requires:
| Item | DIY route | Professional route |
|---|---|---|
| Sewing machine or needle | Required | Handled by tailor |
| Fabric chalk or marker | Required | Not needed |
| Iron-on adhesive | Optional | Not applicable |
| Patches or embroidery thread | You source | Supplier provides |
| Leather conditioner | Recommended | Included in service |
| Design mockup | Strongly advised | Provided by studio |
| Seam ripper | Useful for adjustments | Not needed |
Beyond tools, you need to think through your materials checklist before touching the jacket:
- Jacket type: Leather, textile, denim, and nylon all behave differently under heat, thread, and adhesive.
- Patch type: Iron-on, sew-on, and embroidered patches each have different durability profiles.
- Thread quality: Low-grade thread breaks down faster, especially on high-flex zones like underarms and shoulders.
- Backing material: For embroidery, a stabilizer backing prevents puckering and keeps the design crisp.
Preparation matters as much as execution. Clean your jacket thoroughly before starting. Oils, dust, and residue prevent adhesives from bonding and make chalk marks inaccurate. Measure twice, especially if you are adjusting fit. A professional-grade embroidery customization guide can help you understand thread density and stitch types before you commit.

If you are ordering online, review the process for customizing a jacket online so you know exactly what information to submit and what to expect at each stage.
As noted earlier, DIY is cheaper but risks damage and poor fit; professional customization ensures durability. If your jacket is valuable or the design is complex, a professional is almost always worth the extra cost.
Pro Tip: Before applying anything to your real jacket, sketch the full design on paper and test patch placement on an old piece of fabric. This saves you from irreversible mistakes on the actual garment.
The customization process: Step by step instructions
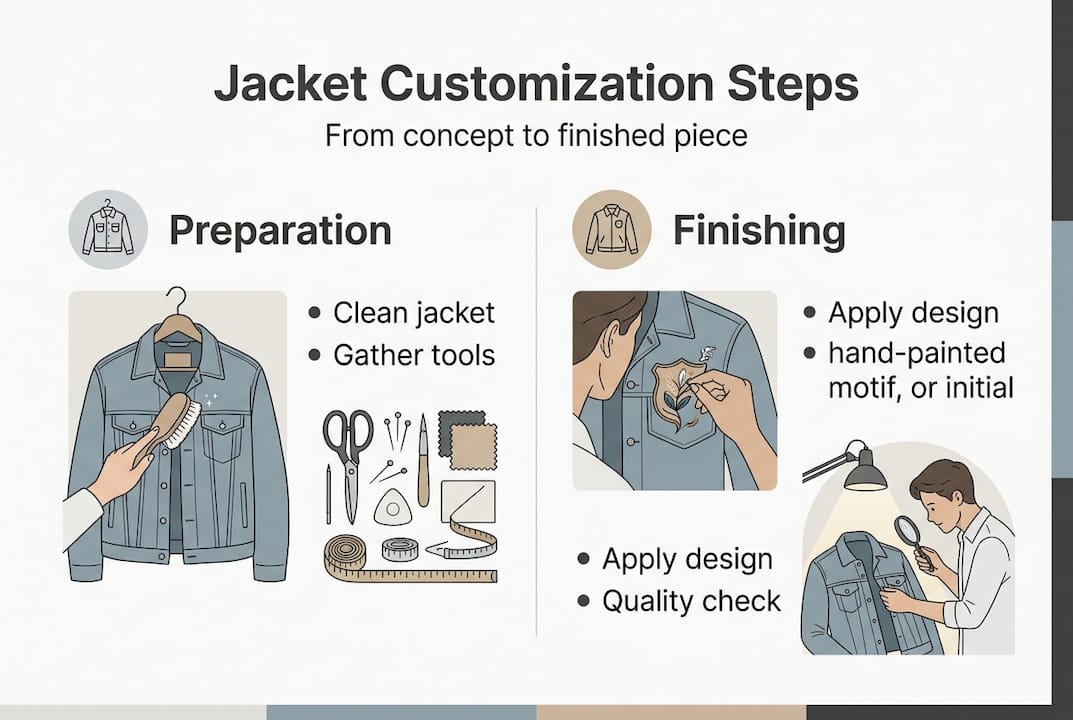
Armed with the right materials, bring your vision to life with these steps.
- Clean and condition the jacket. Wipe down leather with a conditioner. Wash textile or denim jackets and let them dry completely. Starting clean prevents adhesion failures and staining.
- Map your design. Use fabric chalk to mark exactly where each patch, embroidery hoop, or design element will sit. Step back and check alignment from a distance before committing.
- Cut and prepare patches. Trim any excess backing from sew-on patches. For iron-on types, follow the manufacturer’s heat settings exactly. Rushing this step causes peeling edges.
- Attach patches or begin embroidery. Sew-on patches are the most durable option. Use a backstitch along the edges for strength. For embroidery, hoop the jacket section firmly and use the correct stabilizer to prevent fabric distortion. The custom embroidered jackets guide covers stitch types in detail.
- Adjust fit if needed. If you are taking in seams or adding panels, work from the inside out. Always baste (temporary stitch) first before permanent stitching.
- Final safety check for motorcycle jackets. Inspect every modification against the jacket’s original protective zones. For riders who want to personalize motorcycle jackets, this step is non-negotiable.
- Inspect and finish. Check all edges for loose threads. Apply a waterproofing spray if needed. Let everything cure or set fully before wearing.
For riders, this safety note is critical:
Avoid covering armor, reflective strips, or high-flex zones like underarms. Do not overload the jacket with patches. A maximum of 4 to 6 medium patches preserves both protection and structure.
Here is a quick comparison of finishing options:
| Factor | DIY finishing | Professional finishing |
|---|---|---|
| Cost | Low | Medium to high |
| Time | 1 to 3 days | 4 to 8 weeks |
| Quality consistency | Variable | High |
| Risk of damage | Moderate | Low |
If you want to go deeper on the planning side, the design bespoke jacket guide walks through how to brief a professional studio effectively.
Pro Tip: Mark planned patch areas with chalk and photograph them before sewing. If something looks off in the photo, it will look off in real life too.
Tips to avoid common mistakes and ensure durability
Following the process is crucial, but sidestepping mistakes ensures lasting results. Even experienced customizers make avoidable errors that shorten a jacket’s life or ruin the look entirely.
Here are the most common mistakes and how to avoid them:
- Patch overload: Too many patches add weight, stress seams, and reduce flexibility. Keep it intentional.
- Off-center placement: Always measure from a fixed reference point like the collar or center seam, not by eye.
- Ignoring material compatibility: Iron-on patches can melt or discolor certain synthetic fabrics. Always test on a scrap first.
- Skipping waterproofing: Adding patches or embroidery can compromise a jacket’s original water resistance. Reapply a waterproofing spray after any modification.
- Damaged seams: Pulling thread too tight during sewing puckers the fabric and weakens the seam over time. Tension matters.
For jacket customization that improves fit, avoid removing too much material at once. Take small adjustments in stages.
One often-overlooked stat: the custom jacket process typically takes 4 to 8 weeks for professional orders. That timeline reflects the care involved, and it is also why the cost-per-wear math works so strongly in favor of custom pieces. A jacket you love wearing for five or more years costs a fraction per use compared to a fast-fashion piece you replace annually.
For leather jacket customization specifically, condition the leather every few months and store it away from direct sunlight. Leather dries out and cracks when neglected, especially around embroidered or patched areas where the surface has been stressed.
As a reminder, DIY is cheaper but risks damage and poor fit; professional customization ensures durability. If a mistake would ruin a jacket you care about, the professional route is the smarter investment.
Pro Tip: Document your entire process with photos at each stage. If you ever want to replicate the design, adjust it, or hand the jacket off for professional finishing later, you will have a clear reference to work from.
A fresh take: Why thoughtful customization outlasts trends
Here is something the fashion industry does not want you to think about too hard. Trends are designed to expire. The jacket that feels essential this season is engineered to feel dated by next year. Custom jackets operate on a completely different logic.
When you invest real thought and effort into a design, it does not chase a trend. It reflects something true about you, and that does not go out of style. We have seen customers return years later to share that their custom piece is still their most-reached-for jacket. That is not nostalgia. That is the result of intentional design.
Originality does not have to be loud. Sometimes it is a single embroidered detail, a tailored shoulder, or a patch placed exactly where it means something to you. Those choices outlast any seasonal color palette.
If you want to express your unique style in a way that holds up over time, the answer is always thoughtfulness over trend-chasing. Build something that fits who you are, not who the market says you should be right now.
Ready to start your own custom jacket journey?
You now have a full picture of what jacket customization involves, from setting your goal to protecting your finished piece. Whether you are planning a DIY project or want expert hands on your design, the next step is just getting started.
At Maker of Jacket, we specialize in turning your ideas into premium, wearable reality. Browse our full range of options when you order your perfect custom jacket, or dig deeper into how to customize jackets for fit and style. If you prefer a guided experience, walk through our customization process step by step and see how simple it is to get exactly what you want. Your jacket. Your rules.
Frequently asked questions
How long does custom jacket customization usually take?
Full customization takes 4 to 8 weeks for professional orders. Simple DIY projects can be finished faster if you already have all your materials and tools ready to go.
Is it safe to add patches or embroidery to motorcycle jackets?
Yes, as long as you avoid covering armor or reflective strips and high-flex zones. Keep patch count to 4 to 6 medium pieces to preserve the jacket’s protective structure.
What’s the most cost-effective way to customize a jacket?
DIY is cheaper but risks damage; professional customization delivers better fit and durability. Weigh your budget against how much the jacket means to you before deciding.
How do I keep a customized jacket in good condition?
Follow the care instructions for your specific fabric, avoid direct sunlight during storage, and treat custom sections gently to prevent thread wear or patch lifting over time.
