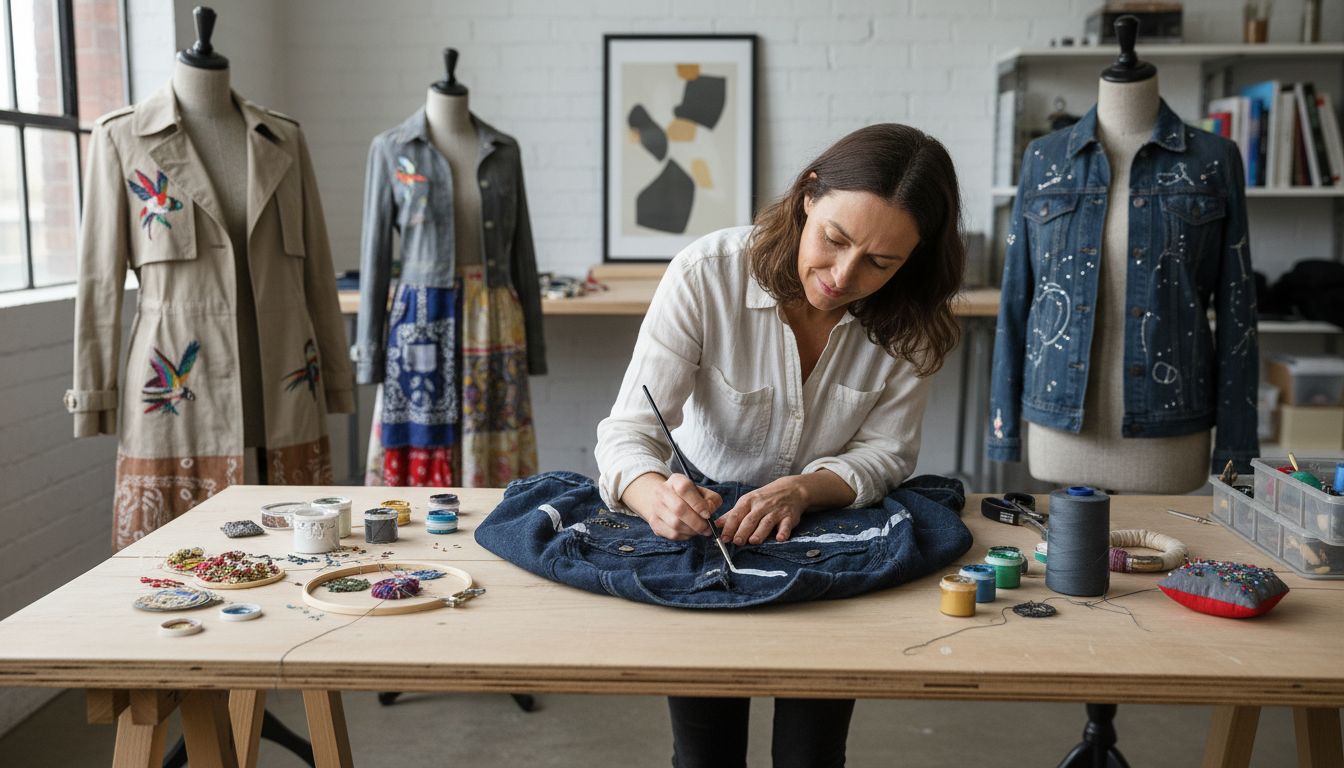
How to Upcycle Clothing for Unique Style and Sustainability

Did you know the average person throws away about 81 pounds of clothing every year? Upcycling offers a creative way to turn those forgotten garments into one-of-a-kind pieces, giving new life to items that might otherwise end up in the landfill. With a shift toward sustainable fashion, more people are discovering how simple tweaks and bold designs can revitalize their wardrobes and reduce waste at the same time.
Table of Contents
- Step 1: Select Clothing Pieces For Upcycling
- Step 2: Gather Tools And Plan Your Design
- Step 3: Customize With Patches, Paint, Or Embellishments
- Step 4: Sew, Cut, Or Alter To Fit Your Vision
- Step 5: Check Quality And Style For A Polished Result
Quick Summary
| Key Point | Explanation |
|---|---|
| 1. Choose durable clothing for upcycling | Look for garments with strong fabric, interesting designs, and minimal wear to ensure successful transformations. |
| 2. Organize your workspace effectively | Keep materials accessible and create a smooth workflow to enhance your creative process while upcycling. |
| 3. Personalize with creative embellishments | Use patches, paint, and unique details to express your style and breathe new life into existing clothing. |
| 4. Carefully plan garment alterations | Assess needed adjustments before modifying the garment to ensure it fits your vision and style preferences. |
| 5. Perform quality checks on the final piece | Ensure that the upcycled garment is well-constructed, comfortable, and authentically reflects your personal aesthetic before wearing it. |
Step 1: Select clothing pieces for upcycling
Unlocking the potential of your wardrobe starts with smart clothing selection for upcycling. Your goal is transforming forgotten garments into fresh fashion statements that reflect your unique style.
Begin by scanning your closet for pieces with promising potential. According to research from the Altering Society ASG, the ideal candidates are clean garments in good condition. Look for clothing items that might seem worn but have strong foundational fabric and interesting design elements.
Check each potential upcycling piece carefully. You want fabric that feels sturdy and shows minimal wear. Research from the Institute for Ecological and Recycling Efforts IERE recommends evaluating the material closely. Consider these key factors:
- Fabric durability and overall structural integrity
- Interesting color combinations
- Unique patterns or textures
- Potential for creative transformation
Pro tip: Minor imperfections can actually become design opportunities. A small tear might become an intentional distressed detail. A faded section could inspire artistic color blocking.
Remember that upcycling is about seeing potential where others see obsolescence. Your creativity turns ordinary clothing into extraordinary fashion statements. Ready to start your textile transformation journey?
In the next step, you will learn how to prepare your selected pieces for their remarkable makeover.
Here’s a summary of each upcycling step and what to focus on:
| Step | Main Focus | Key Tips |
|---|---|---|
| Select Clothing Pieces | Choose strong, clean garments | Seek sturdy fabric Embrace minor flaws |
| Gather Tools & Plan | Organize workspace, collect materials | Use thrifted extras Sketch designs first |
| Customize & Embellish | Add patches, paint, or details | Test techniques Choose meaningful motifs |
| Sew, Cut, or Alter | Adjust fit and style | Mark changes before cutting Try no-sew options |
| Check Quality & Style | Inspect final piece for wearability | Confirm comfort Wash before wearing |
Step 2: Gather tools and plan your design
Now that you’ve selected your upcycling candidates, it’s time to transform your creative vision into a concrete plan. This step is about preparing your workspace and mapping out your clothing transformation strategy.
According to research from Creative Nest, sustainable crafting starts with smart material sourcing. Check thrift stores, local swap groups, or raid your own closet for supplementary materials like buttons, threads, and fabric scraps that can enhance your project.
Your upcycling toolkit should include some essential items:
- Sharp fabric scissors
- Measuring tape
- Straight pins
- Sewing machine or needle and thread
- Fabric chalk or washable marker
- Iron and ironing board
Interesting technological approaches are emerging in design planning. Researchers at MIT have developed the ‘Refashion’ software system MIT Sustainability, which allows creators to digitally map out clothing transformations before cutting a single thread.
Pro tip: Sketch your design ideas before starting. Even a rough drawing can help you visualize the final product and prevent costly mistakes. Think about how you want the garment to look wear after your transformation.
Organize your workspace to keep materials accessible and create an efficient workflow. Having everything in reach prevents interruptions and keeps your creative momentum flowing.
Ready to turn your upcycling concept into reality? In the next step, you’ll learn how to prepare your chosen garment for its remarkable makeover.
Step 3: Customize with patches, paint, or embellishments
This is where your creativity truly shines. Transforming a basic garment into a personalized masterpiece requires imagination and a few strategic design techniques.
According to the ‘Upcycle Your Style’ project from Colorado State University, adding embellishments is a powerful way to breathe new life into existing clothing. You can choose from several customization methods:
- Sewing decorative patches
- Applying fabric paint
- Adding embroidered designs
- Attaching decorative buttons or studs
- Creating strategic fabric overlays
For patch application, select designs that represent your personal style. World Flag Patches can add an interesting international flair to your garment.
When using fabric paint, select textiles that accept color well. Prepare your surface by washing and thoroughly drying the garment. Use painter’s tape to create clean lines or stencils for precise designs.
Research from the Soil Association reminds us that upcycling is not just about personal style but also reducing textile waste.
Pro tip: Always test your paint or embellishment technique on a small hidden area first to ensure the result matches your vision.
Ready to see your garment transform? The next step will help you finalize and perfect your unique creation.
Step 4: Sew, cut, or alter to fit your vision
Now comes the transformative moment where your upcycling project truly takes shape. This step is about translating your creative vision into tangible clothing modifications.
According to the Altering Society ASG, carefully analyze the alterations needed to make the garment work for you. Assess your skills and the potential of the piece before diving in.
Start by trying on the garment and marking areas that need adjustment. Common alterations include:
- Shortening or lengthening hemlines
- Taking in or letting out seams
- Removing sleeves
- Creating new necklines
- Adding strategic fabric panels
The ‘Upcycle Your Style’ project from Colorado State University encourages participants to approach alterations as a form of personal expression. Each cut and stitch tells a story about your unique style.
If you are not confident with sewing, start with simple no sew techniques like fabric glue or iron on patches. Decorative Types of Leather Stitches can provide inspiration for more advanced techniques.
Pro tip: Always leave extra fabric when cutting. You can always remove more, but you cannot add back what you have already cut.
Ready to bring your upcycled masterpiece to life? The final step will help you finish and style your newly transformed garment.
Step 5: Check quality and style for a polished result
Congratulations on reaching the final stage of your upcycling journey. This is where you transform your creative experiment into a wearable piece of personal fashion art.
According to the Altering Society ASG, the last critical step is ensuring your garment is clean, comfortable, and perfectly aligned with your personal style.
Begin by trying on the finished piece and performing a thorough quality check. Look for:
- Smooth seams and even stitching
- Comfortable fit and movement
- Secure embellishments
- No loose threads or fraying edges
- Alignment of design elements
The ‘Upcycle Your Style’ project from Colorado State University emphasizes creating garments that genuinely reflect your personal aesthetic. This means your upcycled piece should not just look good but feel authentically you.
Consider photographing your creation from multiple angles. This helps you critically assess the transformation and provides a great way to document your creative process.
Pro tip: Wash the garment according to its fabric instructions to set any new colors or embellishments and ensure durability.
Now strut your stuff and show the world your unique upcycled masterpiece.
Elevate Your Style with Custom Jackets That Match Your Upcycled Vision
Upcycling your clothing is a powerful way to breathe new life into your wardrobe while embracing sustainability and personal expression. If you have discovered the joy of transforming garments through creative patches, new cuts, and personalized details, imagine taking your unique style even further. At Maker of Jacket, we understand the passion for distinctive fashion. Whether you want a biker, bomber, or varsity jacket, each piece can be customized to reflect the same spirit of originality and eco-conscious craftsmanship that you value in upcycling.
Discover how you can enhance your wardrobe with a custom jacket that speaks to your style and sustainability goals. Visit Maker of Jacket today to explore a wide range of customizable leather jackets and motorcycle apparel that align with your upcycling journey. Start your transformation now and experience the confidence that comes with a garment tailored just for you.
Frequently Asked Questions
How do I select clothing pieces for upcycling?
To select clothing pieces for upcycling, look for clean garments in good condition with durable fabric and interesting design elements. Focus on items that show minimal wear and consider minor imperfections as opportunities for creativity.
What tools do I need to upcycle clothing effectively?
Essential tools for upcycling clothing include sharp fabric scissors, measuring tape, straight pins, a sewing machine or needle and thread, and fabric chalk. Gather these items before starting your project to ensure a smooth workflow.
How can I customize my upcycled clothing?
You can customize your upcycled clothing by adding patches, fabric paint, or embellishments like buttons and embroidered designs. For instance, use fabric paint to create a unique design, ensuring to test your technique on a small area first to achieve the desired effect.
What are some common alterations I can make during the upcycling process?
Common alterations include shortening or lengthening hemlines, adjusting seams, or modifying necklines. Start by trying on the garment and marking the areas that need adjustment to align the design with your vision.
How do I check the quality and style of my upcycled garment?
To check the quality and style, try on the finished piece and assess the fit, stitching, and overall look. Look for smooth seams and secure embellishments, ensuring the garment aligns with your personal aesthetic.
What should I do after completing my upcycle project?
After completing your upcycle project, wash the garment according to its fabric instructions to set new colors and ensure durability. Then, strut your stuff and share your unique creation with the world!
