

What Is Custom Embroidery: A 2026 Guide for Beginners

TL;DR:
- Custom embroidery involves stitching personalized designs directly onto fabric with specialized machines, creating durable, textured logos ideal for branding. It requires digitizing artwork into stitch files, choosing appropriate techniques like flat, puff, or appliqué, with costs based on stitch count and order size. Proper artwork preparation and skilled digitizing are essential for high-quality results that enhance brand perception and longevity.
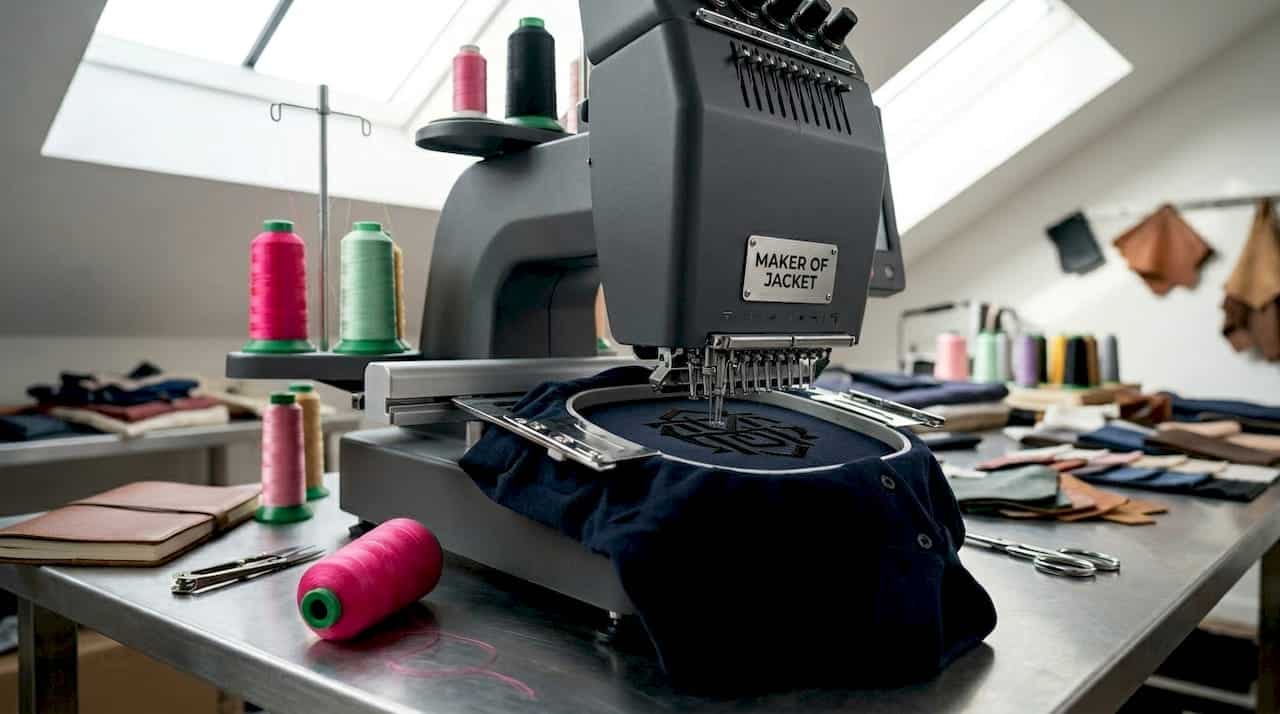
Custom embroidery is the process of stitching personalized designs directly onto fabric using specialized machines and digitized artwork files. Unlike screen printing or heat transfer, embroidery threads are stitched into the fabric itself, creating a raised, textured finish that resists fading and cracking over time. That durability makes it the preferred method for business logos on polo shirts, team uniforms, branded hats, and personalized gifts. Whether you are an individual looking to add a monogram to a jacket or a small business owner ordering 200 branded caps, understanding how custom embroidery works will save you time, money, and frustration.
What is custom embroidery and how does it work?
Custom embroidery is defined as the application of a personalized design to fabric through a series of stitches produced by a commercial or home embroidery machine. The machine follows a digitized file that maps every stitch path, stitch type, and thread color in sequence. The result is a design that feels three-dimensional and looks professional on everything from cotton polos to leather jackets.
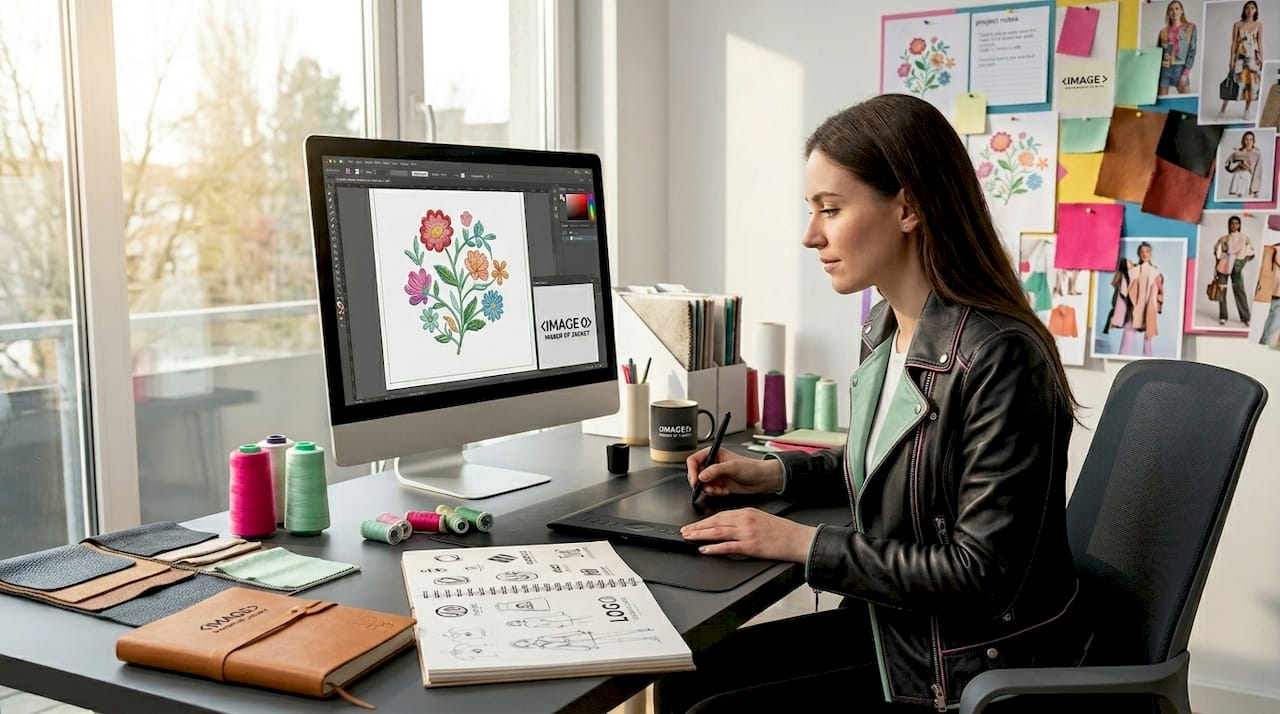
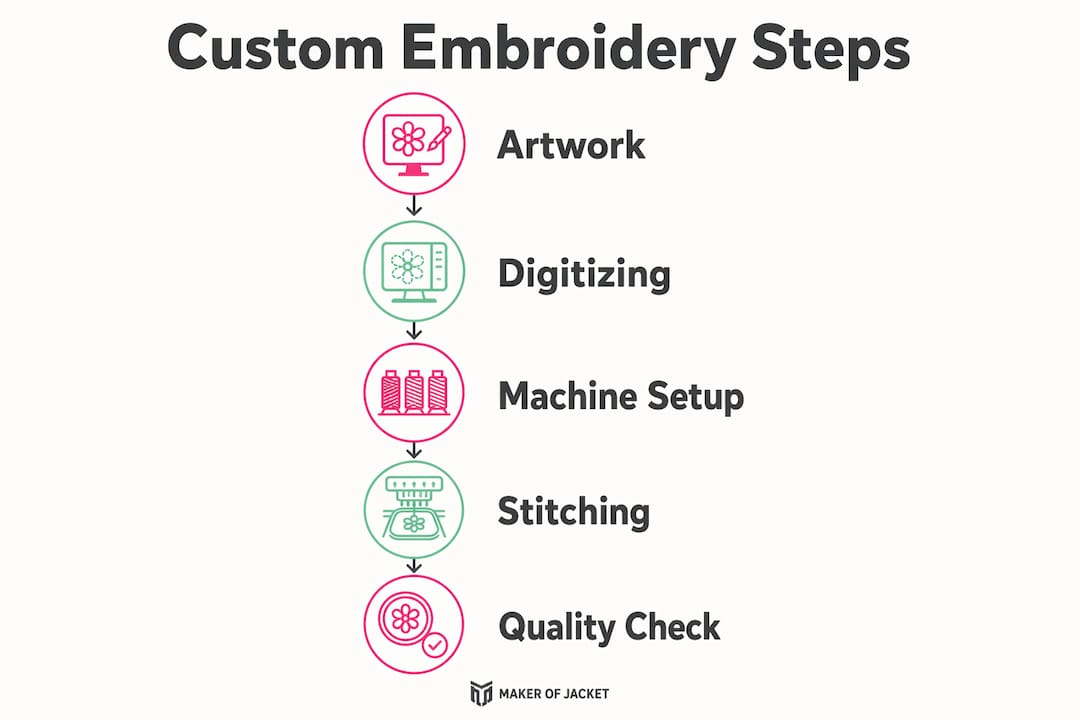
The process starts with your artwork, which could be a logo, monogram, or illustration. That artwork cannot go directly into a machine. It must first be converted into a stitch file through a process called digitizing. Once the file is ready, it is loaded into the machine via USB or direct transfer, and the machine stitches the design onto the garment held in a hoop. The entire run for a single item typically takes between 5 and 20 minutes depending on design complexity.
Custom embroidery defined this way covers both one-off personal projects and large commercial production runs. The core steps are identical either way: artwork, digitizing, machine setup, and stitching.
What is embroidery digitizing and why is it essential?
Digitizing is the manual process of plotting every stitch path, stitch type, and stitch density for an embroidery machine to follow. It is not an automated conversion. Automated conversions do not produce quality embroidery files because the software cannot judge how thread will behave on fabric, where underlay stitches are needed, or how to handle curves without puckering.
A skilled digitizer makes those decisions by hand using software like Wilcom, Hatch, or Brother PE-Design. The output is a machine-ready file in a format the embroidery machine can read. Common file formats include DST for commercial machines, PES for Brother and Baby Lock machines, and JEF for Janome machines. Using the wrong format causes errors and wastes material, so confirming format compatibility before ordering is non-negotiable.
The good news is that digitizing is a one-time cost. The resulting file can be reused across multiple production runs without paying again, which makes the upfront investment worthwhile for any design you plan to use repeatedly. Professional digitizing services typically charge around $10 per design with turnaround times around 12 hours, making it accessible even for small orders.
Key considerations when sourcing digitizing:
- Always request a stitch-out sample before approving a full production run
- Confirm the file format matches your embroidery machine or service provider
- Provide vector artwork (AI, EPS, or high-resolution PNG) for the cleanest digitizing result
- Ask whether the digitizer has experience with your specific product type, such as hats versus flat garments
Pro Tip: If you are ordering through a custom embroidery service rather than running your own machine, ask whether digitizing is included in the quote or billed separately. Many services bundle it for orders above a minimum quantity.
Types of custom embroidery: which technique fits your project?
Embroidery is not a single technique but a broad craft with distinct methods suited to different design goals. Choosing the right technique improves both the visual outcome and production efficiency. The four most common types used in commercial custom embroidery are flat embroidery, 3D puff embroidery, appliqué, and specialty stitches.
Flat embroidery is the standard. Stitches lie directly on the fabric surface, making it ideal for detailed corporate logos, small text, and designs with multiple colors. 3D puff embroidery uses a foam insert under the stitching to create a raised, bold effect. It works best for simple shapes and large lettering, particularly on structured hats. Appliqué involves stitching a separate piece of fabric onto the base garment, which reduces stitch count on large designs and adds a layered, dimensional look. Specialty stitches include metallic threads, chenille, and chain stitch, each adding a distinct texture or sheen.
| Technique | Best for | Key advantage |
|---|---|---|
| Flat embroidery | Logos, small text, detailed designs | High detail, color accuracy |
| 3D puff embroidery | Bold lettering, hats, simple shapes | Raised visual impact |
| Appliqué | Large designs, team patches, decorative panels | Fewer stitches, faster production |
| Specialty stitches | Fashion apparel, premium branding | Unique texture and finish |
Picking the wrong technique is one of the most common mistakes in custom embroidery projects. A fine corporate logo with thin lines and small text will look sharp in flat embroidery but blurry and distorted in 3D puff. Conversely, a large block letter on a snapback cap looks flat and underwhelming without the puff foam. Match the technique to the product and the design, not just personal preference.
How does cost structure work for custom embroidery projects?
Standard custom embroidery costs between $5.00 and $10.00 per item for typical orders, with complex or large designs reaching $30 to $50 or more per piece. The primary cost driver is stitch count, not physical design size. A small but densely stitched logo costs more than a larger but simpler one. This surprises most first-time buyers who assume a smaller design automatically means a lower price.
Setup and digitizing fees are typically one-time charges. Setup fees average around $30 per design, and once paid, the file is yours to reuse. Ordering greater quantities lowers the per-item cost because setup and digitizing fees are spread across more pieces. A run of 100 polos will cost significantly less per unit than a run of 10.
Here is a general pricing reference for common items in 2026:
| Item | Stitch range | Estimated cost per piece |
|---|---|---|
| Embroidered hat (simple logo) | 5,000 to 8,000 stitches | $6 to $10 |
| Polo shirt (chest logo) | 8,000 to 15,000 stitches | $8 to $15 |
| Jacket back (large design) | 20,000 to 50,000 stitches | $20 to $50 |
| Tote bag (full design) | 15,000 to 30,000 stitches | $12 to $30 |
Pro Tip: Simplify your design before submitting it for digitizing. Removing thin outlines, reducing color count, and converting gradient fills to solid blocks can cut stitch count by 20 to 40 percent without visibly changing the design at embroidery scale.
Best practices for designing artwork that embroiders well
Good embroidery starts with good artwork preparation. The most common reason a finished embroidery looks poor is not the machine or the operator. It is the original artwork or the digitizing decisions made from it.
- Keep text at a minimum height of 1/4 inch (6.35 mm). Lettering smaller than this risks becoming unreadable once stitched, as thread width physically limits how fine the letterforms can be.
- Avoid gradients and photographic shading. Embroidery cannot replicate fine gradients or tiny details accurately. Complex shading requires a printed or woven patch instead.
- Limit your thread palette to 6 to 8 colors. Each color change adds machine time and increases the chance of registration errors. Simplifying the palette also reduces cost.
- Specify thread colors using Madeira, Isacord, or Robison-Anton thread color numbers rather than Pantone codes. Embroidery thread and ink are different mediums, and a direct Pantone match is rarely possible.
- Use stabilizers correctly. Stabilizer materials placed inside garments prevent puckering during stitching. Cut-away stabilizers suit stretchy fabrics like knits, while tear-away stabilizers work for woven fabrics. Skipping or choosing the wrong stabilizer is the fastest way to ruin an otherwise perfect design.
- Submit vector files when possible. AI, EPS, or SVG formats give the digitizer clean paths to work from and produce sharper stitch files than rasterized JPEGs or PNGs.
Following these six steps eliminates the most common artwork-related failures before production begins.
How to use custom embroidery for personal and small business projects
Custom embroidery for businesses delivers a professional appearance that printing cannot match at the same durability level. For small business owners, the most practical applications are chest logos on staff uniforms, branded hats for promotional giveaways, and embroidered tote bags for retail packaging. Each of these items gets handled repeatedly, washed frequently, and seen by many people. Embroidery holds up where printed transfers peel and crack within months.
For individuals, the most popular uses include:
- Monogrammed jackets, bags, and accessories for personal gifts
- Team and club uniforms with names and numbers
- Custom patches for motorcycle jackets, varsity jackets, and denim
- Wedding party gifts such as embroidered robes or tote bags
- Pet accessories including personalized bandanas and collars
The advantage of embroidery over printing goes beyond durability. The textured finish signals quality. A polo shirt with an embroidered logo reads as more premium than the same shirt with a printed logo, even when the garment itself is identical. For small businesses building brand recognition, that perception difference matters. You can explore jacket embroidery styles to understand how placement and technique choices affect the final look on outerwear specifically.
For team orders, working with a supplier who handles both digitizing and production under one roof reduces errors and speeds up turnaround. Makerofjacket, for example, specializes in custom jackets for teams and handles the full process from design consultation to finished garment.
Key takeaways
Custom embroidery produces durable, professional results because stitches are physically integrated into the fabric, making it the most reliable method for branding and personalization on apparel.
| Point | Details |
|---|---|
| Digitizing is non-negotiable | Every design needs a human-created stitch file before any machine can produce it. |
| Stitch count drives price | Cost scales with stitch density, not design size, so simplifying artwork saves money. |
| Technique choice matters | Flat, puff, and appliqué each suit different design goals and product types. |
| One-time setup pays off | Digitizing fees are paid once and the file reused across unlimited production runs. |
| Artwork quality determines output | Vector files, correct text sizing, and limited color palettes produce the sharpest results. |
Why I think most people underestimate the digitizing step
Most buyers focus on the final product and treat digitizing as a formality. That is the wrong approach. In my experience working with custom apparel, the digitizing step determines 80 percent of the final quality. A skilled digitizer compensates for thread behavior, fabric stretch, and stitch direction in ways that automated tools simply cannot replicate. When a logo looks blurry or a design puckers on the finished garment, the problem almost always traces back to a poor digitizing file, not the machine or the operator.
The other mistake I see constantly is choosing a technique based on aesthetics alone without considering the end product. 3D puff looks impressive in photos, but it is a poor choice for a soft unstructured hat or any design with fine detail. Flat embroidery on a jacket back looks understated compared to puff, but it handles complex artwork far better. Match the technique to the product first, then refine the aesthetic.
My honest recommendation: spend the extra $10 to $20 on professional digitizing rather than using a free automated converter. The difference in output quality is not subtle. It is the difference between a design that looks handmade and one that looks like it came from a premium brand. For anyone ordering custom embroidered leather or motorcycle jackets, this is especially true because the fabric texture and construction demand precise stitch control that only a skilled digitizer can deliver.
— Maker
Add custom embroidery to your next jacket order
Makerofjacket specializes in premium custom jackets with full embroidery personalization, from chest logos and sleeve patches to full back designs. Whether you want a single bespoke piece or a team order of bomber or varsity jackets, the platform handles every step including design consultation, digitizing, and production. Embroidery placements include chest, back, sleeves, and collar, with options for flat, puff, and specialty thread finishes. Every order ships worldwide with free shipping on US orders. Start your design on the custom jacket page and see how embroidery transforms a jacket from clothing into a statement.
FAQ
What is custom embroidery in simple terms?
Custom embroidery is the process of stitching a personalized design onto fabric using a machine guided by a digitized file. The result is a durable, textured design that resists fading and cracking.
How much does custom embroidery cost per item?
Standard orders cost between $5.00 and $10.00 per item, with complex or large designs reaching $30 to $50 or more. Setup and digitizing fees average around $30 per design and are charged once.
What file formats does embroidery digitizing produce?
The most common formats are DST for commercial machines, PES for Brother and Baby Lock machines, and JEF for Janome machines. Using the wrong format causes production errors, so always confirm compatibility with your service provider.
Can embroidery reproduce any design?
Embroidery cannot accurately reproduce fine gradients, photographic shading, or very small text below 1/4 inch in height. Designs with those elements work better as printed or woven patches.
What is the difference between flat and 3D puff embroidery?
Flat embroidery stitches lie directly on the fabric surface and suit detailed logos and small text. 3D puff embroidery uses foam under the stitching to create a raised effect, best for bold lettering and simple shapes on structured hats.
Recommended
- Create Stylish Custom Embroidery Jackets: Step-by-Step Guide – Maker of Jacket
- Create Custom Embroidered Leather Jackets Step by Step – Maker of Jacket
- How to Design Custom Embroidered Motorcycle Jackets Easily – Maker of Jacket
- Jacket Embroidery: Transforming Fashion With Personalization – Maker of Jacket


