

7 Motorcycle Safety Gear Checks U.S. Riders Must Do Before Riding

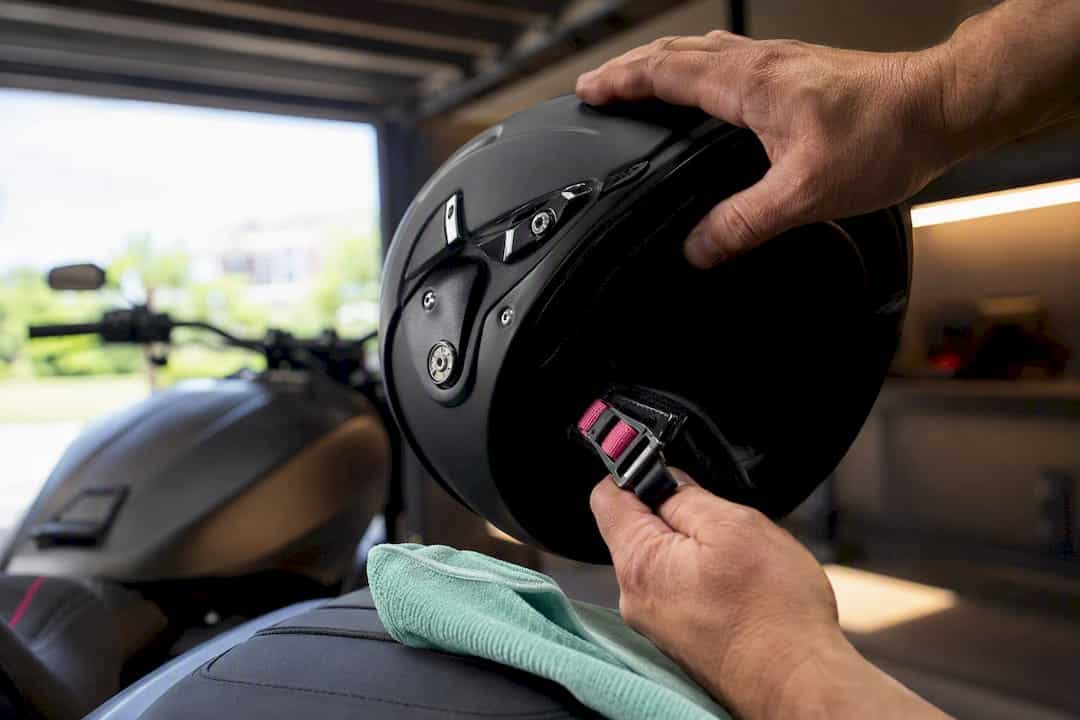
Before every ride, you need seven things ready: a DOT-compliant helmet, eye or face protection, a protective jacket, protective pants, full-fingered gloves, over-the-ankle boots, and visibility gear. Check the DOT label on your helmet, confirm a snug fit, and run through a quick pre-ride inspection. This article walks through each item, shows how to check certification and fit, and explains how to build the inspection habit into your routine.
TL;DR:
- Checking the DOT label on your helmet to confirm impact, penetration, and retention standards is essential for proper protection.
- Properly fitting gear, including snug helmets and armor secured over joints, significantly reduces injury risk during a crash.
- Using reflective and high-visibility gear improves safety, especially in low-light or rainy conditions when your silhouette is harder to see.
- Regularly inspecting and maintaining your gear, like replacing compressed foam armor and conditioning leather, ensures it remains effective over time.
- Advanced protective technology such as airbag vests and smart helmets offers extra impact mitigation, but do not substitute for foundational safety gear and correct fit.
Table of Contents
- Motorcycle Safety Gear Checklist: Head-to-Toe Essentials
- Visibility, Weather Gear, and Hearing Protection
- How to Check Helmet Certification and Fit
- Pre-Ride Checks and the Rider Radar Habit
- Quick Maintenance and Packing Checklist Before You Ride
- Maintaining Your Safety Gear So It Keeps Working
- Storing and Cleaning Gear the Right Way
- Back Protectors and Chest Protectors: The Armor Most Riders Skip
- Airbag Vests and Smart Helmets: Where Gear Technology Is Headed
- What Riders Get Wrong About Jacket Material and Armor Fit
- Build Your Motorcycle Kit With Custom-Fit Protection
- Where These Recommendations Come From
- Sources
Motorcycle Safety Gear Checklist: Head-to-Toe Essentials
Riding gear works from the top down, so run through it in the same order every time. Miss a step and you’ve got a weak link in the chain.
Helmet. Look for a DOT sticker on the back or side, confirming it meets FMVSS No. 218 standards. Press down on the crown, squeeze the cheeks, and tug the chin strap. Nothing should shift.
Eye and face protection. A full face shield blocks bugs, gravel, and wind in one piece; goggles work if you’re running an open-face or half helmet, but they leave your cheeks and jaw exposed. Either way, check the shield for scratches that scatter headlight glare at night.
Jacket and pants. Leather resists abrasion better than most textiles in a slide, but heavy textile with CE-rated armor at the shoulders, elbows, hips, and knees is a legitimate alternative, especially in hot climates where mesh panels help. Move your arms and knees through a full range of motion before you buy. If the armor slides away from the joint, the fit is wrong.
Gloves. Full-fingered only, with reinforced knuckles and palm sliders, plus a wrist strap that keeps the glove from flying off in a fall.
Boots. Over-the-ankle, slip-resistant sole, low heel. Tuck the laces so they can’t catch on a foot peg or shifter.
Run this in under a minute before you swing a leg over:
- Helmet strapped, DOT label visible
- Face shield or goggles clean and scratch-free
- Jacket zipped, armor seated at shoulders and elbows
- Pants covering full leg length, knee armor in place
- Gloves on, wrist strap secured
- Boots laced and tucked, ankles covered
Pro Tip: Keep a spare face shield or a can of anti-fog spray in your jacket pocket. A scratched or fogged shield at dusk is one of the most avoidable reasons riders lose visibility exactly when they need it most.
Protective clothing does more than cushion a crash. It also cuts down on dehydration and the kind of wind-driven distraction that comes from grit and debris hitting bare skin, which keeps your attention where it belongs.
Visibility, Weather Gear, and Hearing Protection
A helmet and jacket only protect you once something goes wrong. Visibility gear is what keeps things from going wrong in the first place.
- Add reflective trim to your jacket’s shoulders, back, and cuffs. It matters most at dusk, in rain, and on overcast days when your silhouette blends into traffic.
- High-visibility yellow or orange outer layers help more in low light than in bright sun, when contrast already does most of the work.
- A dedicated rain suit beats a “water-resistant” jacket for anything longer than a quick shower. Breathable waterproof membranes cost more but avoid the sauna effect on warm rides.
- In cold weather, layer thin base layers under your jacket instead of one thick one. Numb fingers and stiff hands slow your reaction time on the brake lever and throttle.
- Wind noise at highway speed can run louder than a lawnmower for hours at a stretch. Foam plugs or custom-molded inserts protect your hearing without blocking traffic sounds you actually need to hear, a point the MSF’s operator training materials raise directly.
How to Check Helmet Certification and Fit
Get this step wrong and everything else on the checklist matters less.
- Read the label. A genuine DOT sticker sits on the back of the shell and reflects the maker’s own certification under 49 CFR § 571.218, which spells out impact, penetration, and retention testing standards.
- Measure your head. Wrap a soft tape around the widest point above your eyebrows, then match it to the maker’s size chart rather than guessing off a size you wore in a different brand.
- Wear it before you buy it. Keep it on for 30 to 45 minutes in the store. Pressure points that feel minor at minute five often turn into a real problem by minute thirty.
- Test the fit. Bite down gently. The helmet should move with your jaw, not slide against your skin. Fasten the strap and try rolling the shell forward and back. It shouldn’t budge.
Watch for red flags: plastic snap buckles instead of D rings, shells that feel suspiciously light, thin foam liners you can compress with a thumb, or a DOT sticker that looks glued on rather than molded in. NHTSA’s helmet guidance flags all of these as signs of a novelty helmet sold to look legal without meeting the actual standard.
For body armor, sit in your normal riding position and move through a full range of motion. Armor should stay planted over the joint it’s built to protect, not slide off during a shoulder check or a knee bend.
Pre-Ride Checks and the Rider Radar Habit
Gear protects you after something happens. A pre-ride check and good scanning habits cut down on how often something happens at all.
- Run T-CLOCS. Tires (pressure and tread), Controls (levers, cables, throttle snap-back), Lights (headlight, brake light, signals), Oil and other fluids, Chassis (frame, suspension, chain), and Stand (springs back cleanly). The MSF operator manual built this checklist specifically because a two-minute inspection catches the failures that turn into roadside breakdowns or worse.
- Practice the 12-second rule. Scan the road about 12 seconds ahead of your position. At 30 mph that’s roughly 528 feet; at 45 mph it’s about 792 feet; at 60 mph you’re covering nearly 1,000 feet, since a bike at that speed moves about 88 feet every second.
- Layer in SEE. Search the road ahead, evaluate what could turn into a hazard, then execute a response before you’re forced into one.
Pro Tip: On a quiet road, pick a landmark and time how long it takes to reach it at your normal cruising speed. Adjust your scanning target until it consistently lands about 12 seconds out. That’s Rider Radar in practice, not theory.
Quick Maintenance and Packing Checklist Before You Ride
Beyond T-CLOCS, a few 30-second checks catch problems before they catch you:
- Squeeze the front brake lever. It should feel firm, not soft or spongy.
- Press a thumb into each tire. Low pressure changes how the bike handles corners.
- Flick on the headlight, brake light, and both turn signals.
- Glance at coolant and oil levels if they’re visible without tools.
For what to carry: a charged phone, a compact power bank, a small tool kit, a tire plug kit, water, and a basic first-aid pouch cover most situations. Strap gear low and tight to the bike, away from your feet, knees, and the throttle hand, so nothing shifts into your controls mid-ride.
Maintaining Your Safety Gear So It Keeps Working
Gear degrades even when nothing dramatic happens to it. UV exposure breaks down foam liners and stitching over time, and sweat slowly eats away at the moisture-wicking layers inside gloves and jackets.
Inspect your helmet every few months. Check the foam liner for compression, the strap for fraying, and the shell for hairline cracks you might miss in a quick glance. Most manufacturers recommend replacing a helmet every five years even without a crash, since the foam liner compresses under normal use.
Check armor pads for cracking or flattening. Foam armor that’s been compressed in a fall, even a minor tip-over in a parking lot, may no longer distribute impact force the way it did new. CE-rated armor should still spring back to shape after you press it. If it stays dented, replace it.
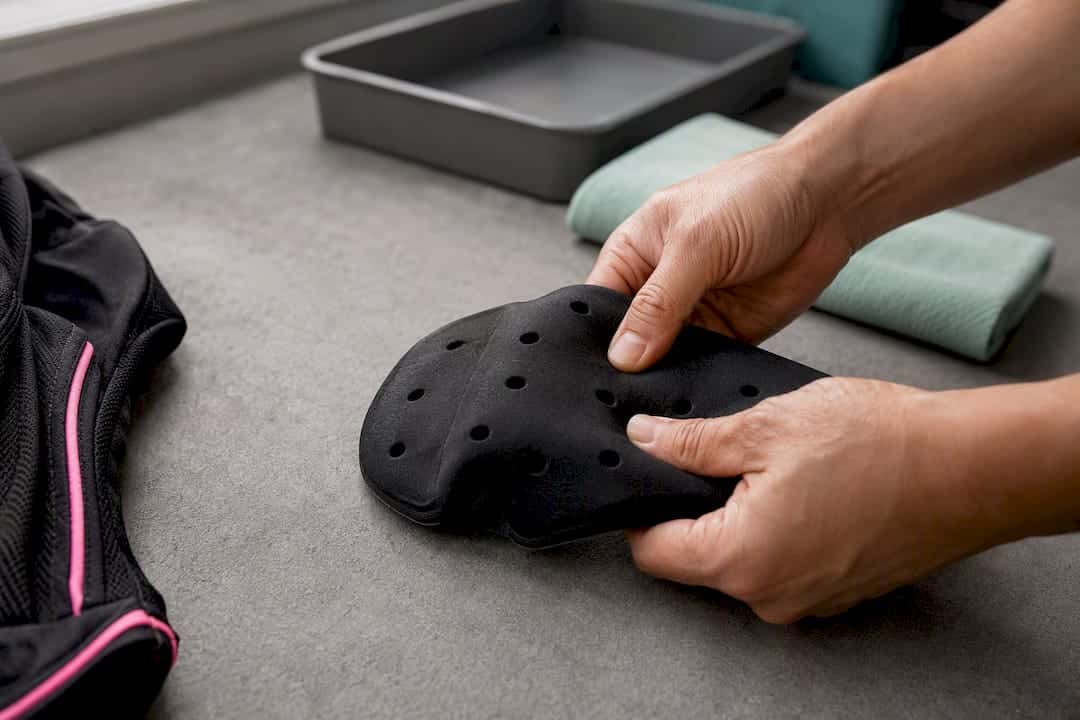
Run gloves and boots through a hand check every season. Look at seams, sole wear, and zipper function. A boot sole worn smooth on the shifting side is a sign it’s due for replacement, not just a cosmetic issue.
Jackets and pants need attention at the closures first: zippers, snaps, and Velcro wear out from repeated use long before the shell fabric does. A jacket that won’t zip fully closed at highway speed lets in wind and rain, and it also means the armor inside is no longer sitting where it should.
Build a habit around this instead of waiting for something to fail: a quick seasonal check, paired with your regular T-CLOCS routine, keeps gear failures from sneaking up on you.
Storing and Cleaning Gear the Right Way
How you store gear between rides matters almost as much as the gear itself.
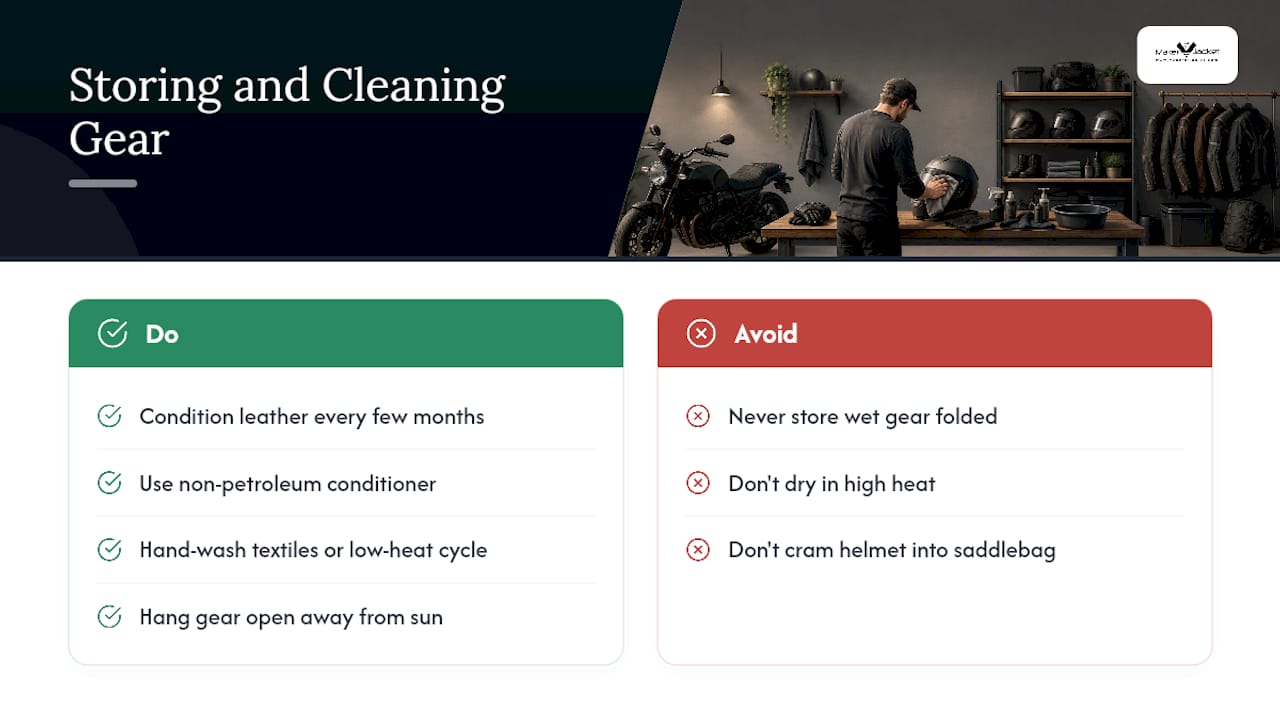
Leather needs conditioning every few months to keep the material from drying out and cracking, especially in dry climates or after repeated rain exposure. A basic leather conditioner works fine; avoid petroleum-based products that can break down stitching over time. Textile gear tolerates a gentle hand wash or a low-heat machine cycle, but skip the dryer. High heat warps armor inserts and shrinks waterproof membranes.
Never store a wet jacket or pants folded in a bag. Trapped moisture breeds mildew and weakens seams. Hang gear open on a wide hanger, away from direct sunlight, which fades color and dries out leather faster than almost anything else.
Helmets need airflow too. Store yours on a shelf or a helmet stand rather than crammed into a saddlebag, where the shell can pick up pressure dents over weeks. Wipe the interior liner with a damp cloth after sweaty rides. A liner that’s never cleaned holds onto bacteria and breaks down faster.
Gloves and boots benefit from a boot tree or simply standing them upright to dry fully between rides. Damp gloves left balled up in a saddlebag develop odor and the leather stiffens unevenly as it dries.
None of this takes more than a few minutes a week, and it’s the difference between gear that protects you for years and gear that quietly loses effectiveness while still looking fine on the outside.
Back Protectors and Chest Protectors: The Armor Most Riders Skip
Shoulder and elbow armor gets most of the attention, but the spine and chest see plenty of impact force in a slide or a fall, and standalone armor covers zones your jacket alone often doesn’t reach.
A back protector distributes impact across your spine instead of letting a single vertebra take the hit. Some jackets come with a basic foam back pad built in, but a separate CE-rated back protector, worn under the jacket, offers far more coverage and better impact absorption for serious riding.
Chest protectors matter more than most riders assume, particularly for anyone riding aggressively or off-road, where a fall can drive the chest into a tank, a guardrail, or another rider. They shield the sternum and ribs from direct impact in ways a jacket’s soft shell simply can’t.
Fit both the same way you’d fit shoulder or knee armor: sit in riding position, move through your normal range of motion, and confirm the protector doesn’t shift away from the spine or sternum. A back protector that rides up past your shoulder blades when you lean forward isn’t protecting the section of spine most likely to take an impact.
If you already own a jacket with built-in safety features, check whether it has room for a separate back protector insert. Many armor-ready jackets include a pocket sized for exactly this upgrade.
Airbag Vests and Smart Helmets: Where Gear Technology Is Headed
Motorcycle gear has moved well past foam padding in the past few years. Airbag vests, similar in concept to what’s built into some car seatbelts, use a sensor system tied to a tether or electronic trigger that detects the sudden deceleration of a crash and inflates a vest around the torso and neck in a fraction of a second. Some systems tether to the bike; others run fully wireless with onboard sensors and a rechargeable battery.
Smart helmets have added features that used to belong only in cars: built-in Bluetooth for calls and music, rear-facing cameras that display traffic behind you inside the visor, and integrated turn signal indicators visible to riders behind you. A few models now include crash detection that can send your location to an emergency contact automatically if the helmet senses a severe impact and you don’t respond.
None of this replaces the fundamentals. A DOT-compliant helmet and proper armor placement still form the baseline every rider needs before adding anything electronic. But for riders logging serious highway miles or riding in group formations, these upgrades close gaps that traditional gear can’t, particularly the seconds lost between a crash and getting help on the way.
Expect prices to come down and adoption to widen as more manufacturers build sensor-based protection into standard jacket lines rather than treating it as an aftermarket add-on.
What Riders Get Wrong About Jacket Material and Armor Fit
Riders spend most of their gear budget on the helmet and then treat the jacket as an afterthought. That’s backward. Leather still outperforms most textiles in a slide because of how it resists abrasion against pavement, but the armor placement inside the jacket matters just as much as the shell material itself.
A jacket that fits well in the shoulders while standing often bunches or gaps once you’re leaning forward over the tank. Armor pockets need to hold padding directly over the joint through your actual riding posture, not just when you’re standing in a fitting room. Customizable sizing and adjustable armor pockets solve a problem that off-the-rack sizing can’t: every rider’s torso length and riding stance are different.
Author credentials and any proprietary fit-testing data will be added here.
— Maker
Build Your Motorcycle Kit With Custom-Fit Protection
Some manufacturers build motorcycle jackets designed around fit customization, rather than relying solely on standard size charts. Many jackets come armor-ready, with pockets positioned for shoulder, elbow, and back protector inserts, so the upgrades covered above actually have somewhere to go.

Before ordering, measure your chest, shoulders, and arm length against a size guide rather than guessing off a shirt size, since jacket sizing runs differently across brands and styles. Decide on your armor setup, shoulder and elbow pads at minimum, before finalizing the order, and confirm the return policy in case the fit needs an adjustment once the jacket arrives. Our motorcycle riding padded jacket is a solid starting point if you want to see what armor-ready construction looks like before customizing your own. Head to our customization page to start building a jacket sized and armored the way your riding actually demands.
Where These Recommendations Come From
- NHTSA’s motorcycle safety page: fatality statistics and baseline gear recommendations
- MSF’s motorcycle operator manual: T-CLOCS checklist and Rider Radar training guidance
- 49 CFR § 571.218: the federal standard behind DOT helmet certification
- The 12-second rule: scanning distance math at common riding speeds
Sources
- Motorcycle safety: helmets, motorists, road awareness | NHTSA
- Motorcycle operator manual | MSF
- The 12-Second Rule That Could Help Prevent A Motorcycle Crash
- § 571.218 Standard No. 218; Motorcycle helmets | CFR


