

Get Level 2 Protection Without the Bulk: CE Armor Levels for Riders

CE armor levels are lab-tested thresholds from the EN 1621 standards, measuring how much impact force in kiloNewtons actually reaches your body. Level 1 is the baseline; Level 2 cuts transmitted force roughly in half. For anything faster than a low-speed commute, Level 2 is the safer default, especially in a back protector. Check the tag sewn into your armor pad before you assume either.
TL;DR:
- Level 2 CE armor significantly reduces transmitted impact force, halving forces from about 18 kN to less than 9 kN for back protectors.
- Modern impact-absorbing materials like viscoelastic gels enable Level 2 protection in thinner, more flexible armor designs, improving comfort.
- Proper fit and correct placement are crucial for CE-rated armor to perform as tested, especially for back protectors that can slide or fold if ill-fitting.
- Always check the armor label for the EN standard and level, including the year suffix, to ensure the rating matches your riding conditions and expectations.
- Replacement is recommended after significant impacts or approximately every five years, due to material degradation that reduces protective performance.
Table of Contents
- What CE Armor Levels Actually Mean Under EN 1621
- How the Lab Test Actually Works
- Choosing Between Level 1 and Level 2 by Riding Style
- Materials That Let You Get Level 2 Without the Bulk
- Buying and Upgrading: A Practical Checklist
- How Maker of Jacket Approaches Armor Specs
- Why Most Buying Advice on This Gets the Priority Backward
- Sources
What CE Armor Levels Actually Mean Under EN 1621
CE stands for “Conformité Européenne,” the marking that shows a product has passed a specific European safety test. For motorcycle gear, that test comes from the EN 1621 family of standards, and it’s the closest thing riders have to an objective, apples-to-apples comparison between one pad and another. Four sub-standards cover four body zones, and each one runs its own version of the same basic test: drop a weight on the armor, measure how much force gets through, and see if it stays under the limit.
Here’s how the standard breaks down by body area:
- EN 1621-1 covers limb protectors: shoulders, elbows, hips, and knees.
- EN 1621-2 covers back protectors, where the stakes are highest because spinal injuries are so much harder to recover from.
- EN 1621-3 covers chest protectors and adds a force-distribution requirement at Level 2, so the impact spreads out rather than concentrating on one spot.
- EN 1621-4 covers inflatable protectors, the airbag-style vests and suits that inflate on impact.
The numbers that matter most are the transmitted-force thresholds. For limb armor under EN 1621-1, Level 1 requires an average transmitted force below 35 kN with no single test result over 50 kN. Level 2 tightens that to an average below 20 kN. Back protectors under EN 1621-2 follow a stricter curve: Level 1 requires a mean below 18 kN with no single reading above 24 kN, while Level 2 demands a mean under 9 kN with a 12 kN ceiling on any individual hit.
That gap between limb and back thresholds isn’t an accident. A shoulder or knee can absorb and dissipate force through soft tissue and joint movement in ways a spine simply cannot, so regulators built in a much tighter margin for back protection.
One detail riders often miss: the standard itself gets updated periodically, and you’ll sometimes see a year suffix like EN 1621-1:2012 stamped on a label. Older armor tested under a previous revision isn’t automatically unsafe, but if you’re comparing two pads, matching year suffixes gives you a cleaner comparison. Some versions of the standard also include cold and heat testing, since foam and gel behave differently at 5°F than they do at 100°F, and a pad that performs well at room temperature can stiffen or soften enough at temperature extremes to change its rating.
How the Lab Test Actually Works
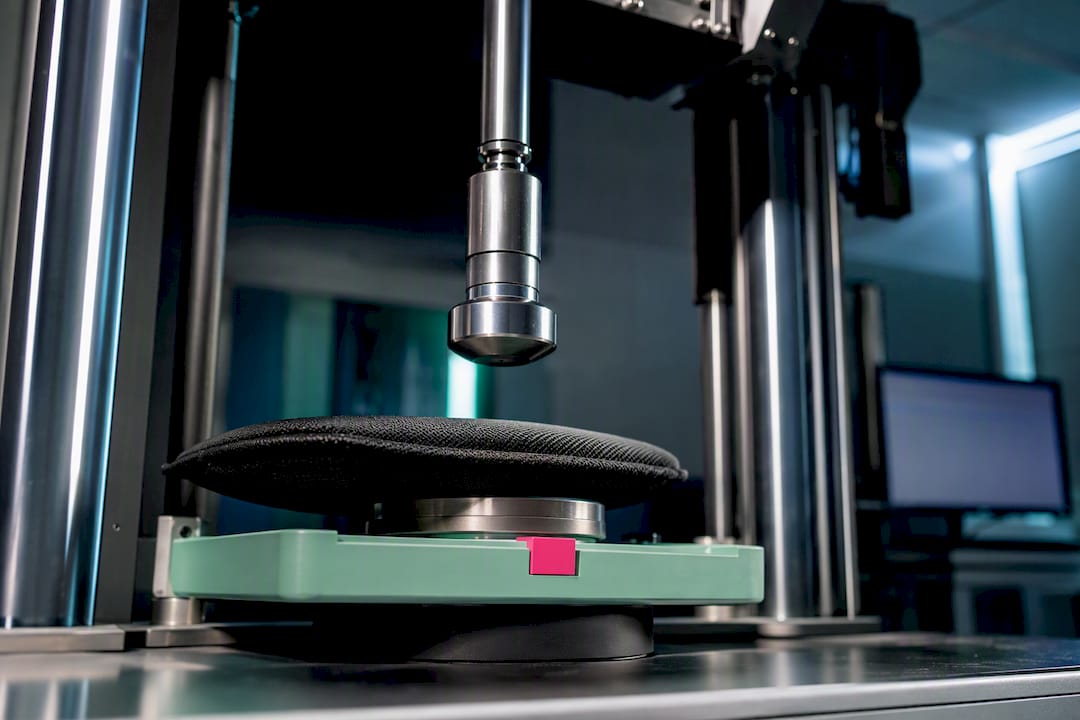
The EN 1621 test setup is mechanically simple, which is part of why it’s trusted. A guided drop tower releases an impactor, typically a mass around 5 kilograms, onto the armor sample from a fixed height. Under the pad sits an anvil connected to a force sensor. The impactor strikes, the pad absorbs and spreads the energy, and whatever force makes it through to the anvil gets recorded in kiloNewtons.
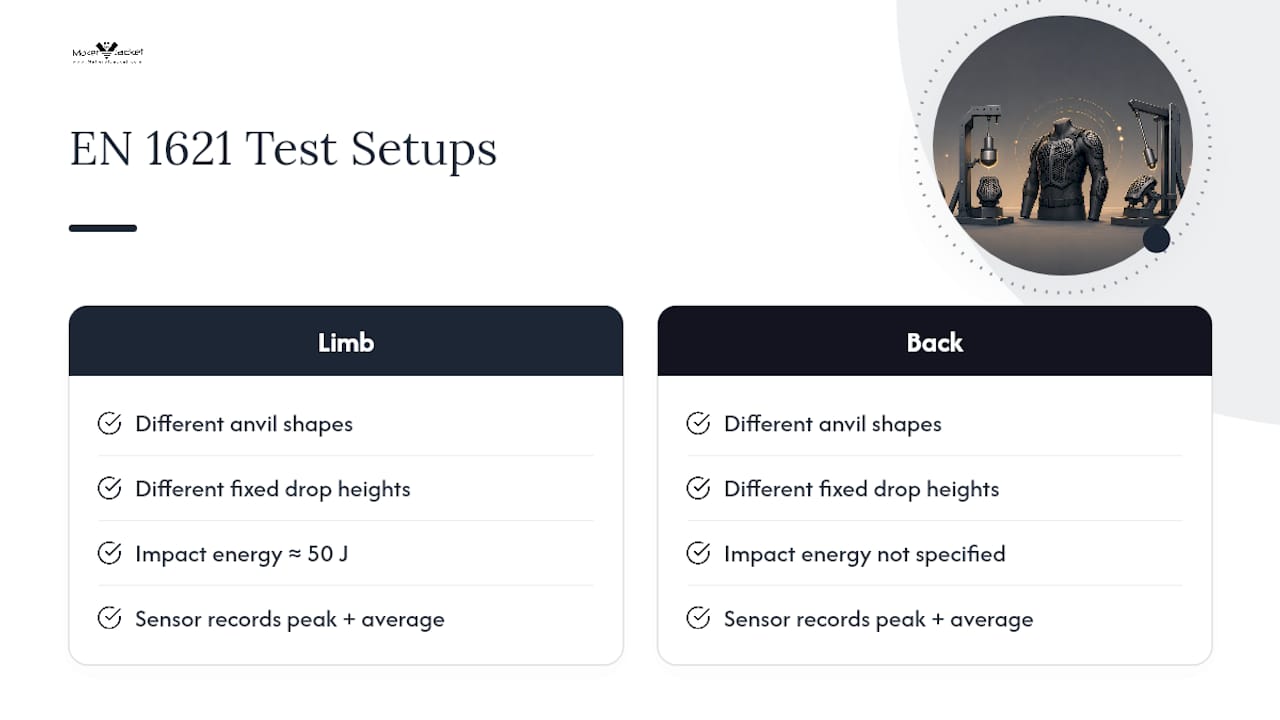
Limb tests and back tests use different anvil shapes and different drop heights, because a knee strike and a back strike don’t hit the body the same way. Typical limb tests run at roughly 50 joules of impact energy, chosen to approximate a real fall at moderate speed rather than a catastrophic, high-speed slam. The sensor captures both a peak reading, the single sharpest spike of force, and an average across multiple test strikes, since a pad has to perform consistently, not just ace one lucky drop.
What this actually means for your body: kiloNewtons aren’t an intuitive unit, so here’s the translation. Force transmission scales with how much energy your tissue and bone have to absorb directly rather than through the armor. Cutting transmitted force from 18 kN down to 9 kN, the jump from Level 1 to Level 2 on a back protector, roughly halves the load your spine takes in an equivalent impact. That’s the entire value proposition of Level 2 in one sentence.
A quick reality check belongs here, too. Lab tests use a controlled drop at a fixed angle onto a flat anvil. Real crashes involve unpredictable angles, road surface, speed, and what you actually land on, which means EN 1621 numbers describe a standardized simulation, not a guarantee of what happens on asphalt. The rating tells you the pad performed to spec in a repeatable lab scenario. It doesn’t promise a specific outcome in your specific fall.
Choosing Between Level 1 and Level 2 by Riding Style
The numeric gap is real, but the more useful question for most riders is: does it matter for how I actually ride? Sometimes the honest answer is no. A Level 1 elbow pad on a bike you ride five miles to the coffee shop at 30 mph is not the same risk profile as the same pad on a canyon run at 70 mph, even though the pad itself hasn’t changed.
Here’s how to think about it by scenario:
- Short, low-speed commuting. Level 1 limb armor is a reasonable baseline if you’re mostly in stop-and-go traffic under 35 mph. The crash energy at those speeds is lower, and Level 1 still meets a real, tested threshold.
- Urban riding with mixed speeds. Once you’re regularly hitting 45 to 55 mph on arterial roads, the case for Level 2 gets stronger, particularly for the back.
- Highway and touring. Sustained higher speeds mean higher potential impact energy in a fall. Level 2 across limbs and back is the sensible default here, not an upgrade for enthusiasts only.
- Track days. Track organizers increasingly expect or require Level 2 back protection, and for good reason: track speeds and low-side crash dynamics put more force through the spine than street riding typically does.
- ADV and off-road. Drops and low-speed tip-overs are frequent, but so are awkward falls onto rocks and ruts. Level 2 limb armor plus a well-fitted back protector covers both the frequent minor spills and the occasional harder hit.
A simple rule of thumb cuts through most of the decision fatigue: prioritize Level 2 for your back protector regardless of riding style, since spinal injuries carry the worst long-term consequences of any impact zone. For limbs, choose the highest level that still fits comfortably and that you’ll actually wear on every ride. A Level 2 elbow pad left in a drawer because it felt bulky protects nobody.
Pro Tip: If cost or comfort forces a trade-off, spend your upgrade budget on the back protector first. Elbows and knees usually have more give in a fall; your spine has almost none.
The old objection to Level 2, that it meant thicker, stiffer, hotter armor, has mostly lost its teeth. Materials engineering closed most of that gap, which is the next thing worth understanding before you shop.
Materials That Let You Get Level 2 Without the Bulk
Older CE armor relied on multi-layer foam or rigid plastic shells to spread impact force, and that approach worked, but it came with a size and weight penalty. You could feel the armor through your jacket, and it didn’t breathe.
Modern viscoelastic and non-Newtonian materials changed the equation. Brands like D3O build pads that stay soft and flexible during normal riding, then lock rigid on sudden impact, absorbing and redirecting force in the same instant. SAS-TEC uses a similar viscoelastic gel principle, and several hybrid designs now combine a thin non-Newtonian core with a supportive shell to hit Level 2 numbers in a pad roughly the thickness of an older Level 1 design.
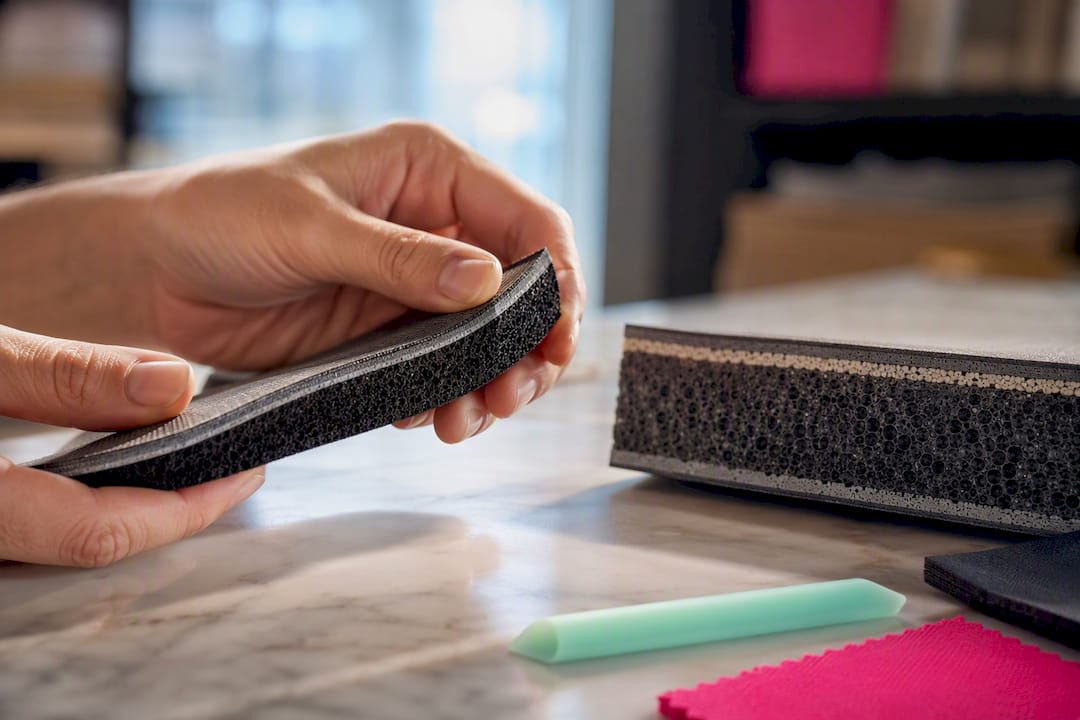
That matters for a simple reason: thickness alone tells you almost nothing about protection level. A thick block of low-density foam can still fail to meet Level 1, while a thin engineered pad can clear Level 2 with room to spare. Judge armor by its EN 1621 rating and level, not by how much space it takes up in your jacket.
Fit matters just as much as material. A back protector that’s too short for your torso, or one that folds or buckles when you lean into a riding position, won’t transmit force the way it did on the lab anvil, no matter what the tag says. Check these before buying:
- Sit in your actual riding position, leaned forward, and confirm the pad stays flat against your spine.
- Match the coverage shape to your needs: central back (CB) pads cover the spine only, while full back (FB) pads extend to cover the kidneys and lower ribs.
- Confirm the pad sits inside a pocket sized for it, not just loosely tucked in, since sliding armor loses alignment exactly when you need it most.
If you’re shopping for an upgrade, how armor integrates into a jacket’s design is worth understanding before you buy, since pocket placement varies more between jackets than most riders expect.
Buying and Upgrading: A Practical Checklist
Before you trust any armor claim, do this in order:
- Find the tag on the pad itself, not the jacket’s marketing copy. CE-rated armor has its own label sewn into or printed on the pad, separate from the jacket’s care tag.
- Read the EN number and level. You’re looking for something like “EN 1621-1: 2012, Level 2.” No number, no level, no real claim.
- Check for temperature markings and the year suffix, which tell you the pad was tested across a temperature range and under a current version of the standard.
- Confirm a manufacturer ID is present. Legitimate CE armor always ties back to an identifiable maker, per labeling requirements from Fempro Armour’s breakdown of CE marking.
Once armor is in your jacket, two events should trigger replacement: any significant crash impact, even if the pad looks fine afterward, and simple age. Industry guidance from Revv Rider recommends replacing armor after impact and working on roughly a five-year cycle, since viscoelastic materials and foams degrade and lose absorption performance over time even without a crash.
Pro Tip: Watch for vague “CE approved” language on a jacket’s product description with no EN number attached. That phrase alone tells you nothing. Always inspect the pad’s own tag before you buy.
If you’re building a new setup rather than patching an old one, Maker of Jacket’s guide to matching jacket features to riding style walks through how armor level should factor into the jacket you pick in the first place.
How Maker of Jacket Approaches Armor Specs
Every padded jacket and moto suit includes armor pockets sized for CE-rated inserts, and product galleries show where those pockets sit before purchase. Size guides on listings help match torso length to back protector coverage.
If you want a specific CE level confirmed on a listing, or you’re requesting a custom build with particular armor placement, our customization process lets you specify it directly rather than guessing from a photo. Riders upgrading an older jacket can also check our padded motorcycle jacket line for options built around Level 2 pockets from the start. Support is available if you’re unsure which armor spec fits your riding.
Why Most Buying Advice on This Gets the Priority Backward
Most gear guides treat CE level as the headline number and fit as an afterthought. That’s backward. A Level 2 back protector that folds when you lean forward, or slides out of a loose pocket, is delivering something closer to Level 1 performance in the moment it actually matters. The rating describes lab performance under ideal placement. Your jacket has to reproduce that placement every single ride.
The bigger shift worth paying attention to is what materials engineering has done to the old trade-off. Riders used to skip Level 2 because it meant a stiffer, hotter pad. That excuse has mostly expired. Viscoelastic cores now hit Level 2 numbers in profiles barely thicker than yesterday’s Level 1 foam, which means comfort is no longer a defensible reason to under-protect your spine.
If you take one thing from all this: buy the back protector’s rating first, fit second, and treat both as non-negotiable before you even look at price.
— Maker
Sources
- EN 1621 – Motorcyclists’ clothing protecting against mechanical impact. — SATRA
- Motorcycle armor CE certification — D3O
- Motorcycle armor — Wikipedia
- CE rating explained — Revv Rider


