How to Measure for a Custom Jacket: Expert Guide
TL;DR:
- Accurate measurement is essential for a well-fitting custom jacket, requiring proper tools, posture, and assistance.
- Key measurements include chest, waist, shoulders, sleeve length, jacket length, bicep, and wrist circumference, with options for layered clothes.
- Verifying measurements through rechecking and professional review ensures a perfect fit tailored to your body and intended use.
Getting a custom jacket made is exciting until the finished piece arrives and nothing fits right. Sleeves too long, chest too tight, shoulders pulling forward. Knowing how to measure for a custom jacket correctly before you order is the single thing that separates a piece you wear for years from one you donate after two wearings. This guide covers every measurement you need, the tools that make the job accurate, common mistakes people make, and how to verify your numbers before you commit to an order.
Table of Contents
- Key takeaways
- What you need before you start measuring
- Step-by-step measurements for your custom jacket
- Measuring for jackets worn over layers
- Common mistakes that ruin custom jacket sizing
- Verifying and finalizing your measurements
- My honest take on getting measurements right
- Ready to put your measurements to work
- FAQ
Key takeaways
| Point | Details |
|---|---|
| Use a flexible tailor’s tape | A soft tape contours your body accurately; a stiff or metal tape will skew every number. |
| Measure with a helper | Shoulder width and sleeve length are nearly impossible to measure on yourself without losing accuracy. |
| Apply the three-finger chest rule | Slide three fingers under the tape at your chest to confirm breathing room and freedom of movement. |
| Measure over your intended midlayer | For outerwear, wear your thickest layer while measuring to build in the ease you actually need. |
| Send body measurements, not jacket measurements | Direct body measurements give your tailor the data to draft a fit around your actual shape. |
What you need before you start measuring
The right tools and setup take about five minutes to arrange and save hours of frustration later.
What to gather:
- A soft, flexible tailor’s measuring tape (cloth or plastic). A soft tailor’s tape is the only way to follow body curves correctly. Metal hardware-store tapes are built for flat surfaces, not torsos.
- A full-length mirror positioned so you can check tape placement on your back.
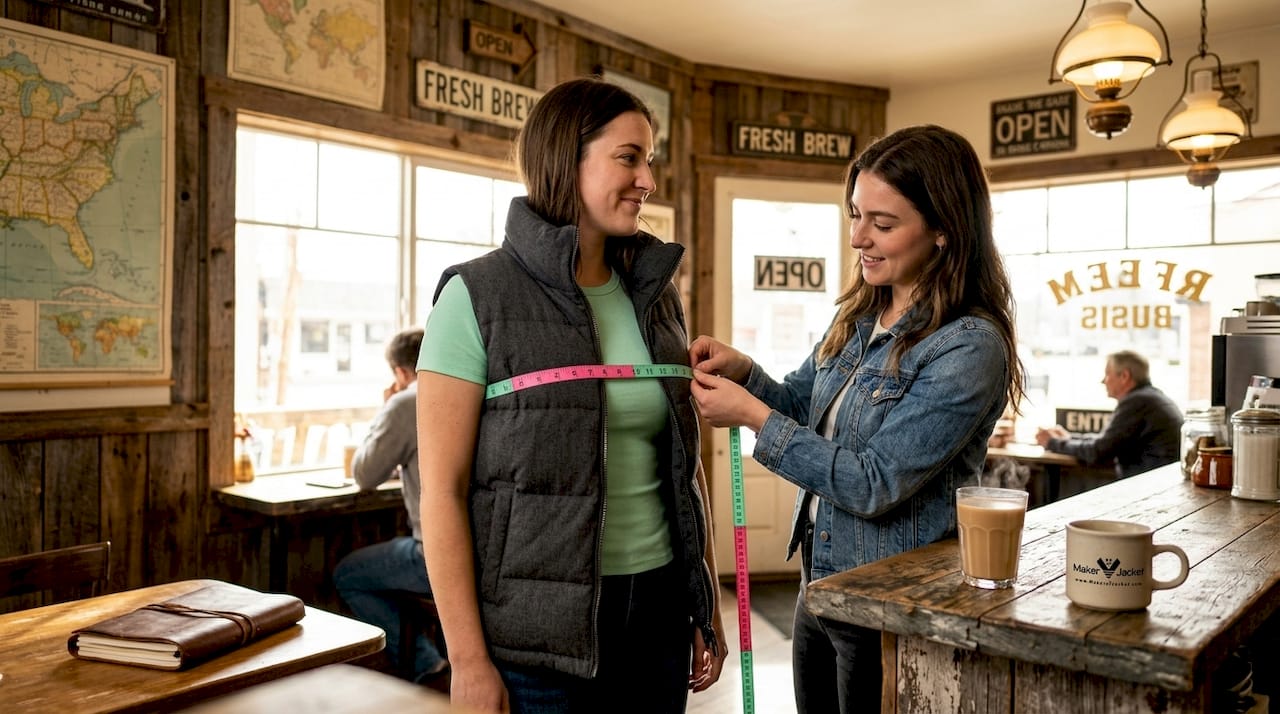
- A helper. This matters more than people expect. Assisted measuring is the standard for precision because you physically cannot hold a tape flat across your own shoulder blades and read it at the same time.
- A notepad or phone to record each number immediately. Memory fails between the tape and the keyboard.
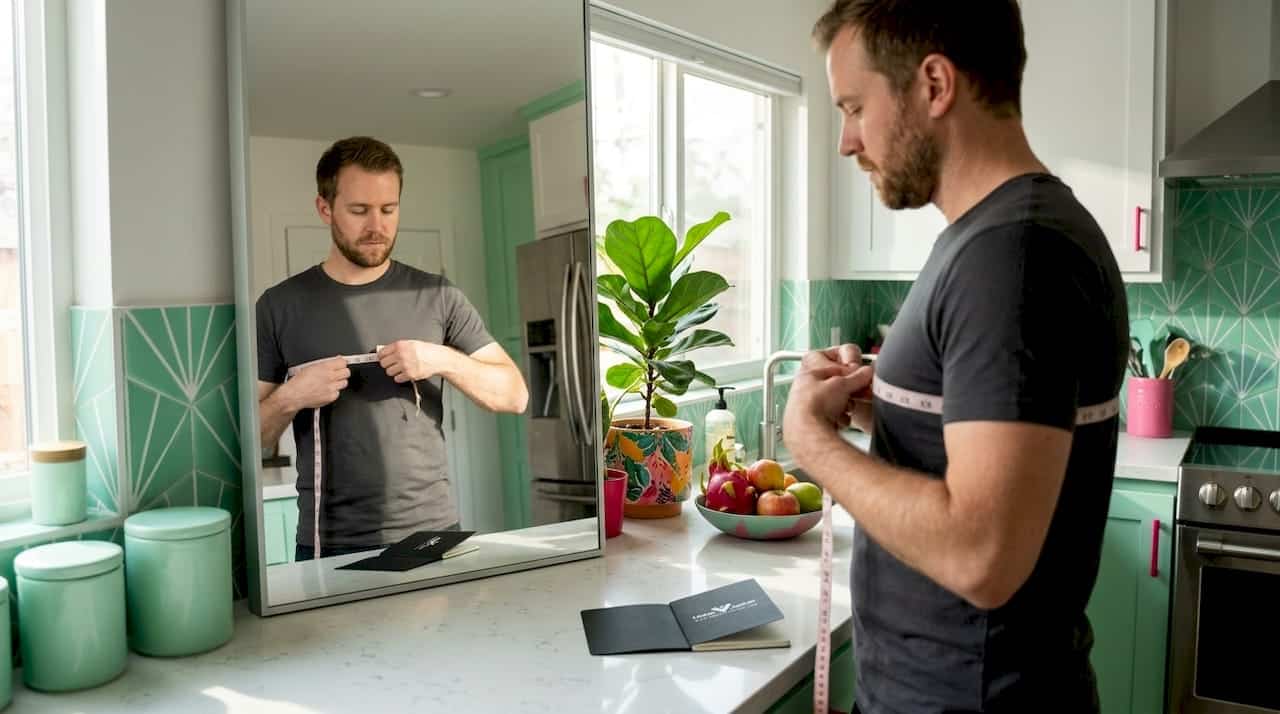
What to wear:
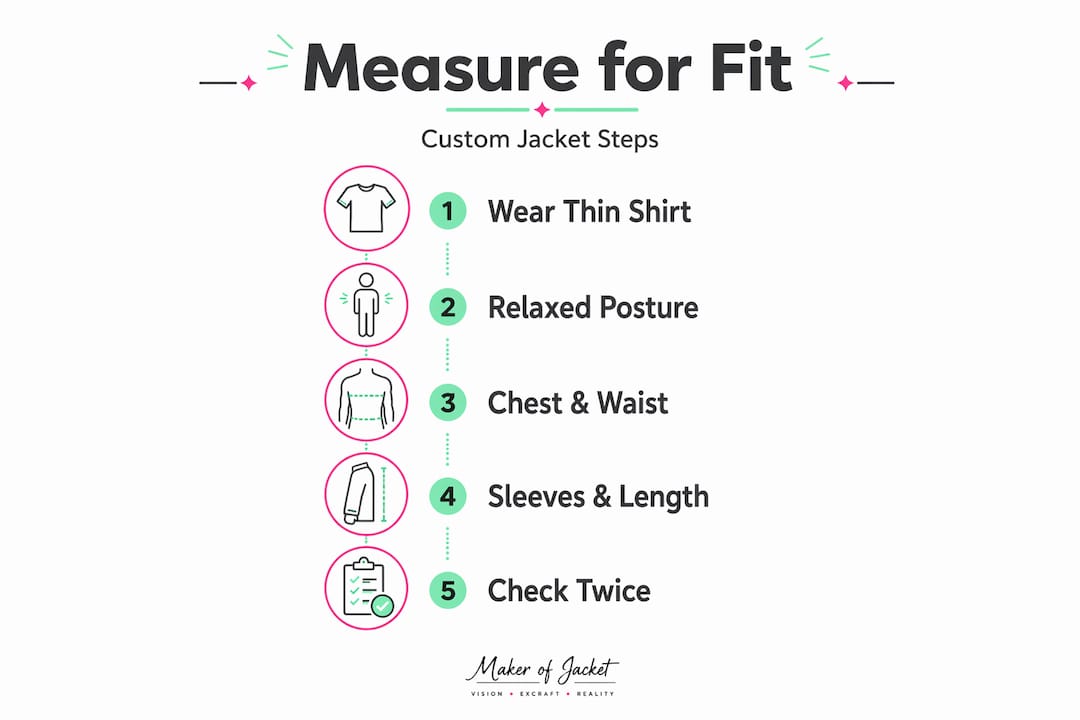
Skip the heavy sweater and the puffy vest. Wear a fitted t-shirt or thin dress shirt that sits close to your body. The goal is measuring you, not your layers. The only exception is when you are measuring for outerwear built to go over insulation, which gets its own section below.
Posture during measurement:
Stand naturally. Feet about hip-width apart, arms relaxed at your sides, spine upright but not forced into a military stance. Measuring while standing relaxed ensures your numbers reflect your actual posture rather than a pose you can never replicate while wearing the jacket.
Pro Tip: Take all your measurements twice and average the two numbers. Small inconsistencies in tape tension account for more variation than most people realize.
Step-by-step measurements for your custom jacket
Work through these in order. Recording as you go prevents mix-ups.
- Chest. Wrap the tape around the fullest part of your chest, under your arms and across your shoulder blades. The tape should be level all the way around. Apply the three-finger chest rule: after taking the snug measurement, confirm you can slide three fingers under the tape without forcing it. That confirms you have breathing room. Write down the snug measurement. Your tailor or custom jacket maker will add the appropriate ease separately.
- Waist. Measure at your natural waist, which is the narrowest point of your torso. For most people, this sits about an inch above the navel. Keep the tape horizontal and relaxed. Do not suck in or push out.
- Shoulders. Ask your helper to position the tape from one acromion (the bony tip of your shoulder) to the other, running straight across your upper back. This bone-to-bone shoulder measurement is the single most consequential measurement for jacket fit. A shoulder seam that lands even half an inch off its mark changes how the entire jacket drapes.
- Sleeve length. Stand with your arm hanging naturally at your side, then bend your elbow to roughly 15 degrees. Your helper places the tape at the outer tip of your shoulder seam and runs it down the outside of your arm to the wrist bone. Measure both arms. Body asymmetries are common enough that differing sleeve lengths are something tailors account for regularly. Never assume both sides match.
- Jacket length. Decide where you want the jacket to end on your body first, then measure from the base of your neck (where the collar sits) straight down the center back to that point. Hip-length, waist-length, and three-quarter-length jackets all have different reference points, so be specific.
- Bicep circumference. Measure around the fullest part of your upper arm with your arm relaxed. This controls how much room you have through the sleeve when your arm is in motion, and it matters especially for biker jackets and fitted bomber styles.
- Wrist circumference. Wrap the tape around your wrist at the wrist bone. This determines cuff sizing, which affects whether the sleeve lies flat or bunches.
Pro Tip: Mark your measurements in a simple table rather than a list. Label every measurement by name and include the unit. Sending “18, 16, 34, 32” with no labels forces your tailor to guess, which defeats the purpose of custom work entirely.
Here is a quick reference for the measurements to capture:
| Measurement | Where to measure | Notes |
|---|---|---|
| Chest | Fullest point, under arms | Record snug; tailor adds ease |
| Waist | Narrowest point, above navel | Tape horizontal, relaxed |
| Shoulder width | Acromion to acromion, across back | Requires helper for accuracy |
| Sleeve length | Shoulder tip to wrist bone | Measure both arms separately |
| Jacket length | Base of neck to intended hem | Specify style preference |
| Bicep circumference | Fullest part of upper arm | Arm relaxed at side |
| Wrist circumference | At the wrist bone | Determines cuff fit |
Measuring for jackets worn over layers
If your custom jacket is built for outdoor use, cold weather, or riding, the measurements above need one major adjustment.
The rule is straightforward: measure while wearing the thickest midlayer you realistically plan to wear under the jacket. For rain shells and insulated jackets, experts recommend building in 2 to 4 inches of chest ease beyond your bare chest measurement. Skipping this step is one of the most common reasons people receive a technically accurate jacket that still feels strangled at the chest after they put on a fleece underneath.
A practical check is the grab test. Once you have your midlayer on, take a pinch of fabric at the back and side of the jacket and try to pull it away from your body. You should be able to grab about two inches of material on each side comfortably. Less than that and the jacket will compress your insulation during movement, which also kills the thermal performance of whatever you are wearing underneath.
The fit priorities also shift depending on what the jacket is for:
- Casual fashion jackets prioritize a closer silhouette. A small amount of ease is enough.
- Rain shells and ski jackets need enough room to layer a midweight fleece or down jacket underneath without restricting arm movement during a full reach.
- Motorcycle jackets need armor pocket placement and a slightly extended back hem accounted for in the length measurement, since a riding position pulls the jacket up at the back.
“Measure for where you will actually wear it, not for how it looks on a mannequin. A rain jacket that fits perfectly over a t-shirt at the counter will fight you on the trail.”
Common mistakes that ruin custom jacket sizing
Even experienced buyers get these wrong. Go through each one before you finalize your measurements.
- Using a metal or stiff tape. This produces flat measurements that do not account for the curve of your torso. The number looks clean on paper but builds the wrong shape into your jacket.
- Measuring alone. Self-measurements frequently miss shoulder width and sleeve length because you cannot hold the tape in place, maintain proper position, and read the number simultaneously.
- Chest inflation. Taking a deep breath and holding it when the tape goes around your chest adds an inch or two that is not really there. Your jacket will be baggy at rest and only correct when you are mid-inhale.
- Measuring over bulky clothing. Every millimeter of extra fabric under the tape shows up as extra width in the finished jacket.
- Ignoring asymmetry. Most people have one shoulder slightly lower than the other, or arms of slightly different lengths. Measuring both sides and noting the difference gives your tailor the information to build that into the pattern.
- Sending jacket measurements instead of body measurements. Relying on existing garment measurements instead of your actual body dimensions misses personal deviations that only direct measurement captures.
Pro Tip: Before you finalize anything, put on a well-fitting jacket you already own and measure it flat on a table. Compare those garment measurements to your body measurements with ease added. They should align. If they are wildly different, re-take your body measurements.
Verifying and finalizing your measurements
Taking accurate measurements is step one. Confirming them before you order is step two.
- Re-measure at least 48 hours later. Measurements taken when you are tired, after a big meal, or after exercise can vary. A second session on a fresh day often catches small errors.
- Measure a jacket you already love. Lay your best-fitting jacket flat on a clean surface and measure the chest, shoulders, and sleeve length. Compare these garment measurements to your body measurements plus ease. A standard jacket carries 2 to 4 inches of ease over the body chest measurement, so the numbers should correspond accordingly.
- Have a professional check your work. A tailor can verify your numbers in 10 minutes and catch posture-related adjustments that are hard to notice on yourself. Posture variations like stooping shoulders or a dropped shoulder require specific pattern adjustments that no standard size chart accounts for.
- Write a fit preference note. Along with your measurements, tell your tailor whether you prefer a close, medium, or relaxed fit. Measurements describe your body. Fit preference tells the tailor how much of that body the jacket is meant to hug.
- Confirm measurement units. Inches or centimeters. This sounds obvious until someone receives a jacket with 34-centimeter sleeves when they submitted 34-inch measurements.
| Method | Best for | Limitation |
|---|---|---|
| Self-measurement at home | Quick initial sizing baseline | Misses shoulder and sleeve accuracy |
| Friend-assisted measurement | Most body measurements accurately | Requires some technique knowledge |
| Professional tailor check | Full accuracy with posture notes | Requires an in-person appointment |
| Existing jacket comparison | Confirming ease and length | Only works if that jacket fits well |
My honest take on getting measurements right
I have worked with enough custom jacket clients to tell you that most fitting problems trace back to one of two things: measurements taken alone, or measurements taken over the wrong clothing. People know they should measure carefully. The part they underestimate is how much posture and asymmetry change the equation.
I have seen clients submit perfectly taken chest and waist measurements, only to have the finished jacket pull hard to one side because one shoulder sits lower and nobody noted it. A professional bespoke session takes 30 to 50 minutes and captures 20 or more measurements plus posture notes precisely because the human body is not symmetric and not static.
The other thing worth saying plainly: a good tailor is not just executing your numbers. A skilled tailor reads your posture, asks about your lifestyle, and advises on fit decisions you may not know to ask about. If you can get a professional to review your measurements before you order, that conversation is worth more than any measuring guide. Use this article to prepare for that conversation, not to skip it.
— Maker
Ready to put your measurements to work
You have done the hard part. Now it is time to turn those numbers into a jacket that actually fits. At Makerofjacket, the custom jacket ordering process is built around your measurements, not around standard size templates. You submit your body measurements, choose your style and materials, and the team handles the rest. Whether you are after a classic biker, a fitted bomber, or something fully original, the customization options cover everything from cut and collar to hardware and lining fabric. If you want a walkthrough of the process before you commit, the jacket fitting workflow at Makerofjacket explains every step from measurement submission to final approval. Worldwide free shipping included.
FAQ
What measurements do I need for a custom jacket?
The core measurements are chest, waist, shoulder width, sleeve length (both arms), jacket length, bicep circumference, and wrist circumference. Sending all seven gives your tailor enough data to build a pattern specific to your body.
How do I measure chest size for a custom jacket?
Wrap a soft tape around the fullest part of your chest, keeping it level and under your arms. Use the three-finger rule to confirm the tape is snug but not compressing you, then record the snug number.
Should I measure for a custom jacket over my clothes?
Wear only a thin, fitted shirt during measurement. The one exception is outerwear: if you plan to layer under the jacket, measure while wearing your thickest realistic midlayer to build in the right amount of ease.
How much ease should a custom jacket have?
A standard jacket carries 2 to 4 inches of ease over your body chest measurement. Functional outerwear designed for layering may need even more, depending on the midlayer thickness.
Can I measure myself or do I need help?
You can take most measurements alone, but shoulder width and sleeve length require a helper for accuracy. Self-measurements for these two points consistently miss the mark because you cannot hold the tape correctly and read it at the same time.
