How to Dry Wet Leather: A Complete Guide for 2025
Wet leather spells trouble for even the toughest jackets and bags. If you get to it fast enough, you can stop permanent damage in its tracks—moisture left untreated can double the risk of warping or cracking. Most people panic and reach for hairdryers or heaters, thinking speed is the answer. The surprising truth is that slow and careful drying will save your leather, while shortcuts often do the most harm.
Table of Contents
- Step 1: Assess The Extent Of Wetness
- Step 2: Remove Excess Moisture With A Soft Cloth
- Step 3: Use A Natural Drying Method
- Step 4: Maintain Shape And Structure While Drying
- Step 5: Apply Leather Conditioner
- Step 6: Check For Dryness And Quality
Quick Summary
| Key Point | Explanation |
|---|---|
| 1. Assess moisture level thoroughly | Gently press leather with a dry cloth to evaluate how wet it is. Significant dampness indicates serious saturation needing prompt action. |
| 2. Blot, don’t rub excess moisture | Use a soft, absorbent cloth to blot moisture, rotating frequently. Rubbing spreads water deeper into leather, causing damage. |
| 3. Allow natural drying conditions | Dry leather in a well-ventilated area away from heat. Slow, even moisture evaporation preserves leather integrity and shape. |
| 4. Use soft padding for structure | Incorporate soft padding to maintain leather item’s original shape during drying. Avoid hard supports that may distort its form. |
| 5. Condition leather post-drying | Apply a suitable leather conditioner evenly to restore suppleness and protect from future moisture damage after drying. |
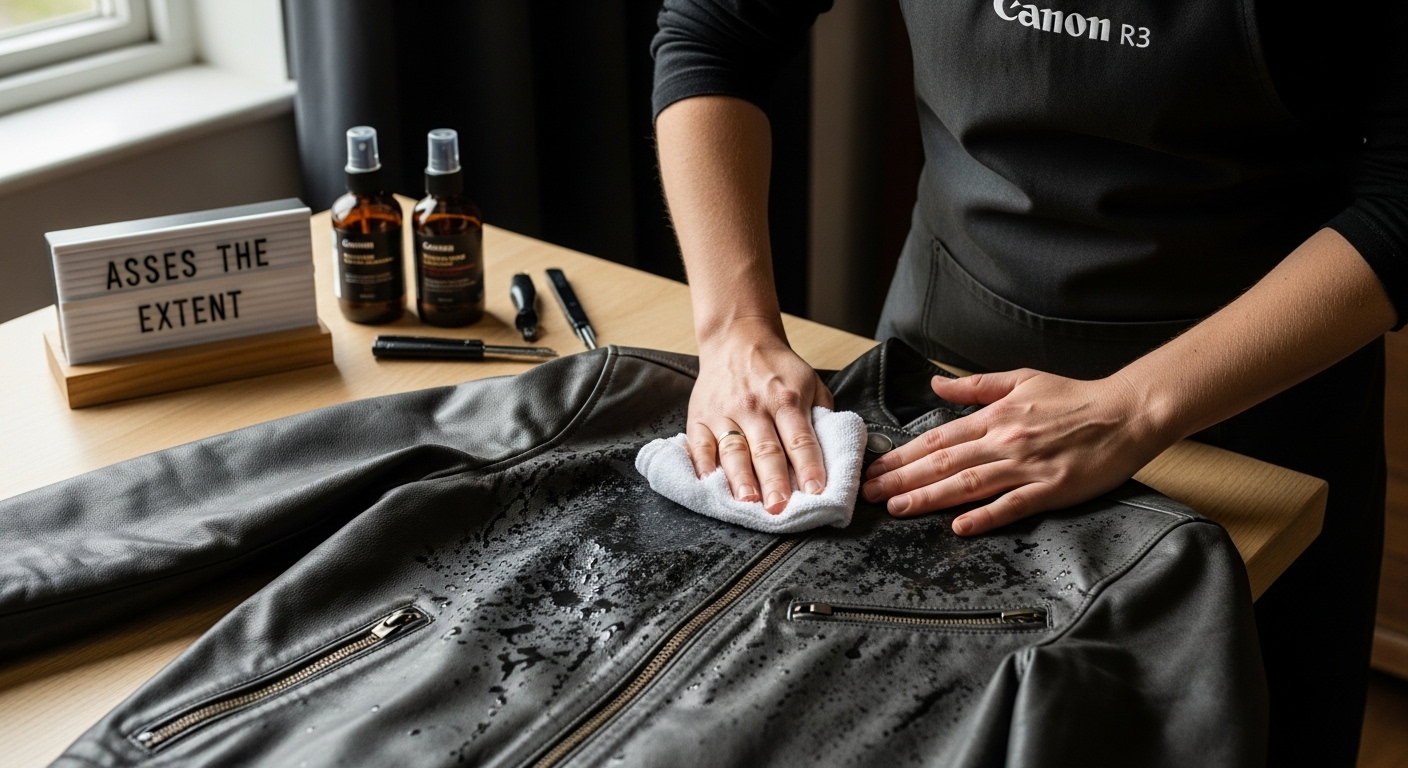
Step 1: Assess the Extent of Wetness
Recovering wet leather requires a strategic approach that begins with carefully evaluating how thoroughly saturated your item has become. Understanding the degree of moisture will determine your subsequent drying strategy and help prevent potential damage to the leather’s structural integrity.
Initial moisture assessment involves more than just a casual glance. Gently press the leather surface with a clean, dry cloth or paper towel to determine the wetness level. If the cloth becomes significantly damp or dark with moisture, you are dealing with a more serious saturation scenario that demands immediate and careful intervention.
Consider the source of moisture as well. Water from clean sources like rain presents different challenges compared to leather exposed to saltwater, muddy conditions, or chemical spills. According to University of Florida’s Institute of Food and Agricultural Sciences, understanding the moisture origin helps select appropriate treatment methods.
Different leather types also respond uniquely to moisture. Suede and nubuck leather are particularly vulnerable and require more delicate handling compared to full-grain or treated leather surfaces. Soft, unstructured leathers absorb moisture faster and can deform more easily, so extra caution is crucial during the assessment phase.
Key indicators that suggest extensive moisture damage include:
- Visible water stains or darkened patches
- Leather feeling significantly heavier than usual
- Noticeable color changes or discoloration
- Wrinkled or distorted surface texture
Remember that timing is critical. The sooner you begin the drying process after identifying moisture, the higher the likelihood of preventing permanent leather damage. Your goal in this initial step is to create a clear, honest assessment that will guide your subsequent leather restoration efforts.
Step 2: Remove Excess Moisture with a Soft Cloth
After assessing your leather’s moisture level, the next critical phase involves carefully removing excess water without causing additional damage. This delicate process requires patience, gentle technique, and the right materials to prevent permanent leather deterioration.
Choose a clean, soft cloth that is highly absorbent but not rough. White cotton towels or microfiber cloths work best because they minimize color transfer and provide optimal moisture absorption. Avoid using colored or rough textured materials that might scratch or stain the leather surface.
According to Consortium of Academic and Research Libraries in Illinois, the key is to blot the surface, never rub. Rubbing can cause the moisture to spread deeper into the leather fibers and potentially damage the material’s structure. Instead, use a gentle pressing motion, allowing the cloth to absorb the moisture without applying excessive pressure.
Start at the leather’s edges and work your way toward the center, rotating your cloth frequently to ensure you are using a dry section. This methodical approach prevents redepositing moisture back onto the surface. For intricate leather items with multiple folds or creases, use the corner of your cloth to carefully press into these areas, absorbing water from hard-to-reach spots.
Key considerations during this moisture removal process include:
- Use light, consistent pressure
- Rotate cloth sections frequently
- Work from outer edges toward the center
- Check cloth absorption between passes
Once you have removed the majority of surface moisture, allow the leather to rest momentarily. The cloth should come away relatively dry, with only minimal dampness remaining. This indicates you have successfully completed the excess moisture removal stage and are prepared to move forward with the next steps of the leather drying process.
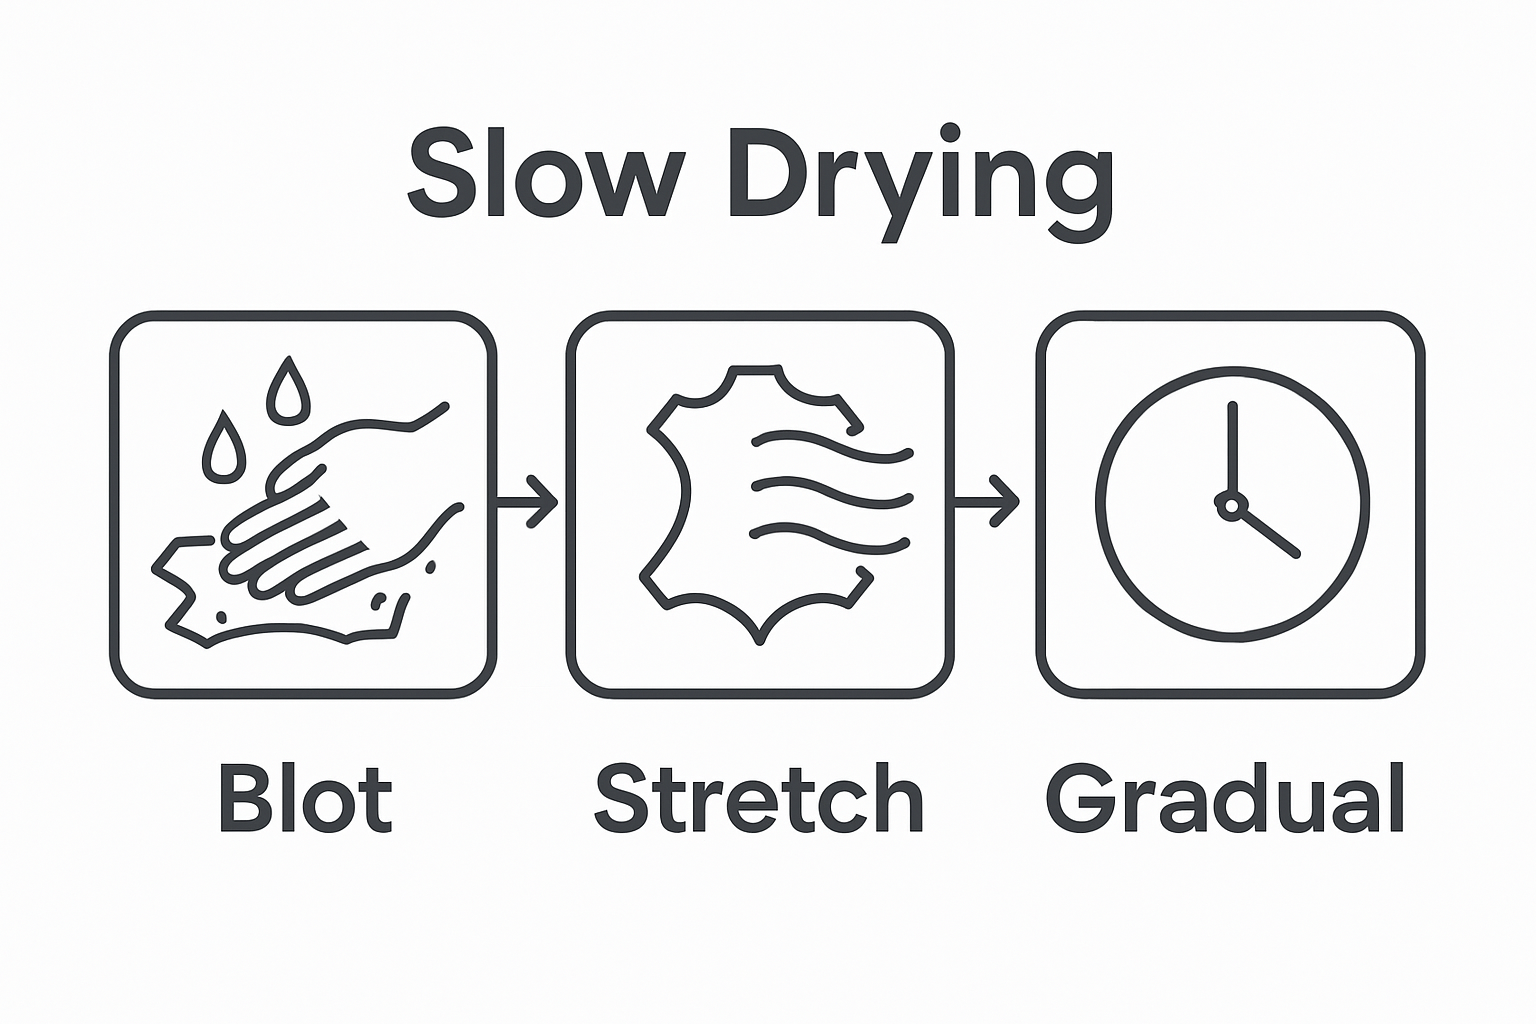
Step 3: Use a Natural Drying Method
Natural drying represents the safest approach to restoring moisture-laden leather, allowing the material to recover without introducing additional stress or potential damage. This method requires strategic positioning and patience to ensure optimal leather preservation.
Select a well-ventilated area with consistent room temperature, avoiding direct sunlight or heat sources that could cause uneven drying or leather cracking. An ideal location might be a room with moderate air circulation, away from windows or heating vents. Position your leather item on a clean, flat surface covered with a dry, breathable towel that allows air to circulate underneath.
According to Natural History Museum of Utah, gentle air exposure is crucial for maintaining leather’s structural integrity. Ensure the leather is laid flat and not folded or bunched, which could create uneven drying zones or trap residual moisture. If drying a garment like a jacket, use padded hangers or lay it spread out to maintain its original shape.
Maintain consistent room conditions during the drying process. Avoid fans or forced air, which can cause rapid moisture evaporation and potential leather warping. The goal is slow, even moisture reduction that preserves the leather’s natural flexibility and appearance.
Depending on the leather’s thickness and initial moisture level, this process might take anywhere from 24 to 72 hours.
Important considerations for natural drying include:
- Keep leather away from direct heat sources
- Maintain consistent room temperature
- Allow ample air circulation
- Check leather periodically for even drying
Monitor the leather’s progress every few hours, gently touching the surface to assess moisture levels. As the leather dries, it should gradually return to its original color and texture. Avoid handling the leather excessively during this time, as this could introduce additional moisture or disrupt the natural drying process.
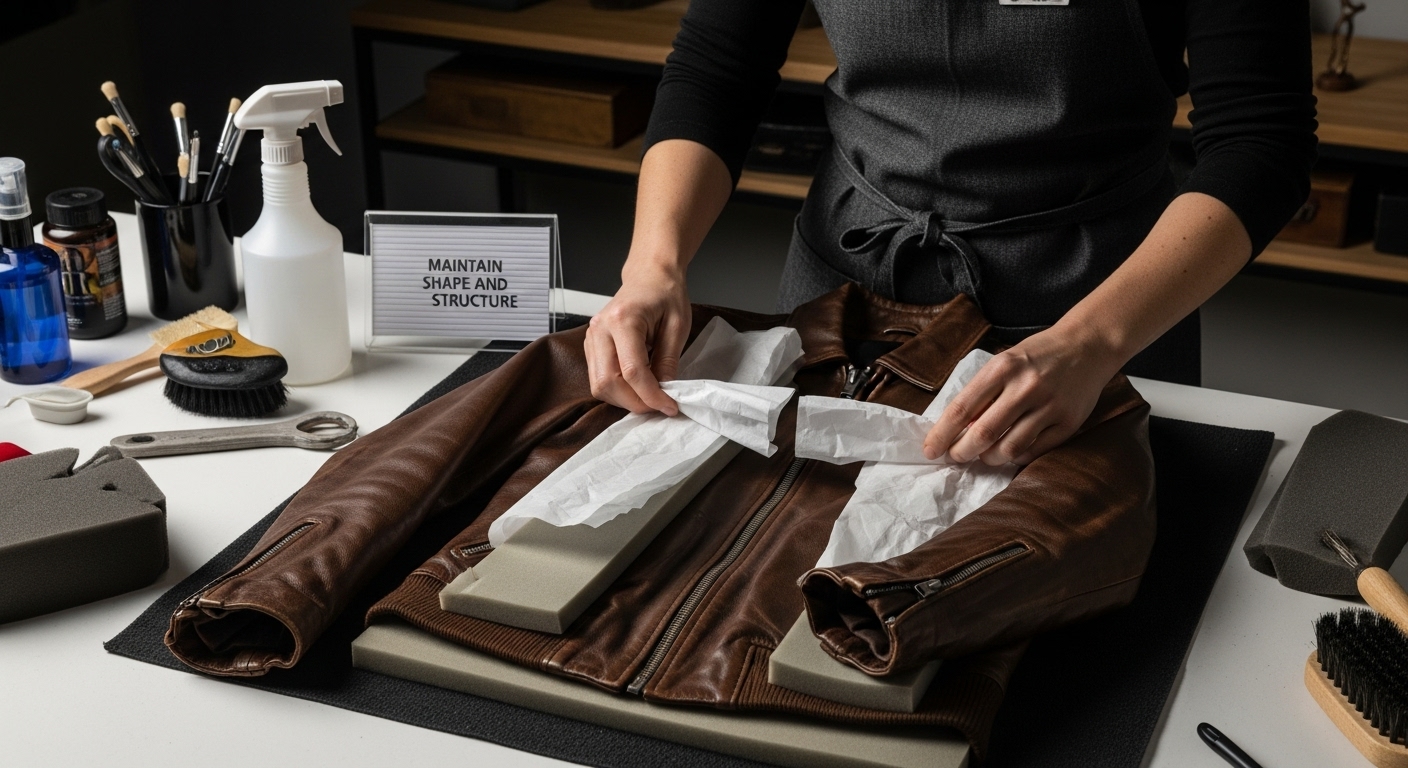
Step 4: Maintain Shape and Structure While Drying
Preserving the original form of your leather item during the drying process is crucial to preventing permanent deformation or structural damage. This delicate stage requires strategic positioning and careful support to ensure your leather maintains its intended shape and appearance.
Soft padding materials become your primary allies in this preservation effort. Clean towels, acid-free tissue paper, or specialized foam inserts can help maintain the leather’s original contours. For leather jackets or structured items, use padded hangers or create a gentle support structure that mimics the item’s natural silhouette. Avoid using wire hangers or sharp-edged supports that might create pressure points or distort the leather’s shape.
According to Consortium of Academic and Research Libraries in Illinois, strategic padding is essential for preventing shrinkage and maintaining structural integrity. For smaller leather items like wallets or bags, stuff them lightly with soft, breathable materials to help them retain their original form. Ensure whatever support material you use is clean and free from moisture or potential color transfer.
Pay special attention to areas prone to creasing or collapsing. Leather sleeves, collars, and intricate design elements require extra care. Gently stuff these areas with tissue paper or soft foam to prevent unwanted folding or flattening during the drying process. For leather garments, consider laying them flat on a clean surface with strategic padding underneath to support their natural shape.
Key strategies for maintaining leather structure include:
- Use soft, breathable padding materials
- Avoid direct pressure on delicate areas
- Mimic the item’s original shape during drying
- Check padding periodically to ensure even support
Periodically adjust your support structure to ensure the leather is drying evenly and maintaining its intended shape. The goal is to create a supportive environment that allows natural drying while preventing any potential distortion or permanent structural changes.
Step 5: Apply Leather Conditioner
Once your leather has completely dried, applying a high-quality leather conditioner becomes the critical final step in restoring its suppleness and protecting it from future moisture damage. This process not only rejuvenates the leather but also creates a protective barrier against potential environmental stressors.
Select a conditioner specifically matched to your leather type. Different leather varieties require unique formulations, so understanding whether you have full-grain, suede, nubuck, or synthetic leather is crucial. For those wanting more details on leather conditioning techniques, research the specific needs of your particular leather item.
According to University of Florida’s Institute of Food and Agricultural Sciences, proper conditioning involves more than simply applying product. Begin with a clean, soft cloth and apply a small amount of conditioner using circular motions. Work in thin, even layers to prevent oversaturation. The key is allowing the leather to absorb the conditioner gradually, which helps restore its natural oils and flexibility.
Apply the conditioner sparingly and methodically. Start at one edge of the leather item and work systematically across the surface, ensuring complete coverage without pooling or excessive application. Pay special attention to areas that experience more stress or friction, such as jacket elbows, bag handles, or wallet creases. These high-wear zones benefit most from careful conditioning.
Critical conditioning considerations include:
- Use clean, lint-free cloths
- Apply conditioner in thin, even layers
- Work in a well-ventilated area
- Allow sufficient absorption time between applications
Wait approximately 15-20 minutes after application to allow the conditioner to fully penetrate the leather fibers. Gently buff the surface with a clean, dry cloth to remove any excess product and create a subtle, protective sheen. Your leather should now appear revitalized, with restored color and a soft, supple texture that resists future moisture damage.
Step 6: Check for Dryness and Quality
After meticulously drying and conditioning your leather, a comprehensive quality assessment becomes the final checkpoint in ensuring your item’s optimal restoration. This critical evaluation determines whether your leather has successfully recovered from its moisture encounter and maintained its structural integrity.
Begin with a visual and tactile examination of the entire leather surface. Look for any signs of uneven drying, such as color variations, unexpected texture changes, or warping. Gently flex the leather to assess its flexibility, which should remain consistent with its original state. A well-dried and conditioned leather piece will feel supple and responsive, without any stiffness or cracking.
According to ASTM International Standards, professional leather assessment involves multiple sensory and physical evaluations. Check for these key indicators of successful leather restoration:
- Consistent color throughout the surface
- Smooth, uniform texture without rough patches
- Maintained original shape and structure
- No visible water stains or residual moisture marks
- Soft, pliable feel when gently manipulated
Pay special attention to areas that were most heavily saturated during the initial moisture exposure. These regions might require extra scrutiny to ensure complete drying and proper conditioning. Run your hand carefully across different sections, feeling for any temperature variations or subtle textural differences that might indicate incomplete drying.
If you detect any remaining moisture or unusual characteristics, do not panic. Repeat the drying and conditioning process with extra care, focusing on the specific areas of concern. Some leather items might require multiple treatment cycles to fully recover, depending on the extent of initial water damage and the leather’s inherent characteristics.
A successful restoration means your leather item looks and feels almost identical to its pre-moisture state.
Below is a checklist you can use to verify your leather item is fully restored after the drying process.
| Checklist Item | What to Look For | Pass/Fail |
|---|---|---|
| Color Consistency | Surface shows uniform color, no dark or faded spots | |
| Texture Uniformity | No rough patches or uneven areas | |
| Shape Retention | Item maintains original shape, no warping | |
| No Water Stains | No visible rings or moisture marks | |
| Soft, Pliable Feel | Leather is supple, not stiff or cracked | |
| Even Dryness | No cold spots or damp patches detected by hand | |
| Subtle Sheen | Healthy, conditioned finish visible |
Protect Your Leather Investment With Confidence
Drying wet leather the right way keeps your precious jackets and accessories looking their best. If you have ever worried about water stains, cracks, or lost shape after a storm or spill, you know how stressful it can be to maintain quality leather. After reading our complete guide on how to dry wet leather, you understand that fast action, gentle care, and proper conditioning make all the difference. But sometimes, even your best efforts are not enough — leather can suffer from permanent warping or faded color, leaving you wishing for a fresh start.

Treat yourself to the feeling of true security and style. Explore the expertly crafted jacket collection at Maker of Jacket. Each piece uses premium leather and modern protection, so you enjoy durability along with custom designs that reflect your taste. Thinking about upgrading after water damage or searching for a jacket you will want to keep dry and timeless? Shop our customizable leather jackets or reach out for a bespoke quote today. Act now and give yourself the peace of mind that comes with owning leather built to last — worldwide shipping and exclusive promotions are waiting for you.
Frequently Asked Questions
How can I tell if my leather is too wet to dry naturally?
Assess the moisture level by gently pressing the leather with a clean cloth. If the cloth absorbs a lot of moisture, your leather is likely too wet, and immediate action is needed.
What is the best method for drying wet leather?
The natural drying method is the safest approach. Let the leather air dry in a well-ventilated area at room temperature, avoiding direct sunlight and heat sources to prevent damage.
How can I maintain the shape of my leather item while drying?
Use soft padding materials like clean towels or acid-free tissue to support your leather’s structure. This helps prevent deformation during the drying process.
When should I apply conditioner to my leather after it has dried?
After the leather is completely dried, apply a high-quality conditioner to restore its suppleness and create a protective barrier against future damage.
