Cleaning Leather at Home: A Step-by-Step Guide
Cleaning leather can feel intimidating when every surface seems delicate and irreplaceable. Yet most people make mistakes that can actually ruin expensive leather items. The surprising part is that with just a few smart steps, you can keep your leather looking flawless for years without needing a professional at all.
Table of Contents
- Step 1: Identify The Type Of Leather
- Step 2: Gather Required Cleaning Supplies
- Step 3: Test On A Small Area First
- Step 4: Clean The Leather Surface
- Step 5: Condition The Leather After Cleaning
- Step 6: Inspect And Maintain For Longevity
Quick Summary
| Key Point | Explanation |
|---|---|
| 1. Identify the leather type first | Understanding your leather’s type is essential for effective cleaning and avoiding damage. Observe textures and natural markings carefully. |
| 2. Use appropriate cleaning supplies | Gather soft microfiber cloths and leather-specific cleaners. Avoid harsh household products that can harm the leather. |
| 3. Test cleaning solutions in a small area | Conduct a patch test on a hidden area to check for adverse reactions before cleaning the entire item. |
| 4. Condition leather after cleaning | Apply a suitable leather conditioner to restore oils and prevent drying. This maintains flexibility and resilience of the leather. |
| 5. Regularly inspect and maintain leather | Conduct biannual inspections to identify issues early on. Proper storage and seasonal care rituals will extend the lifespan of your leather items. |
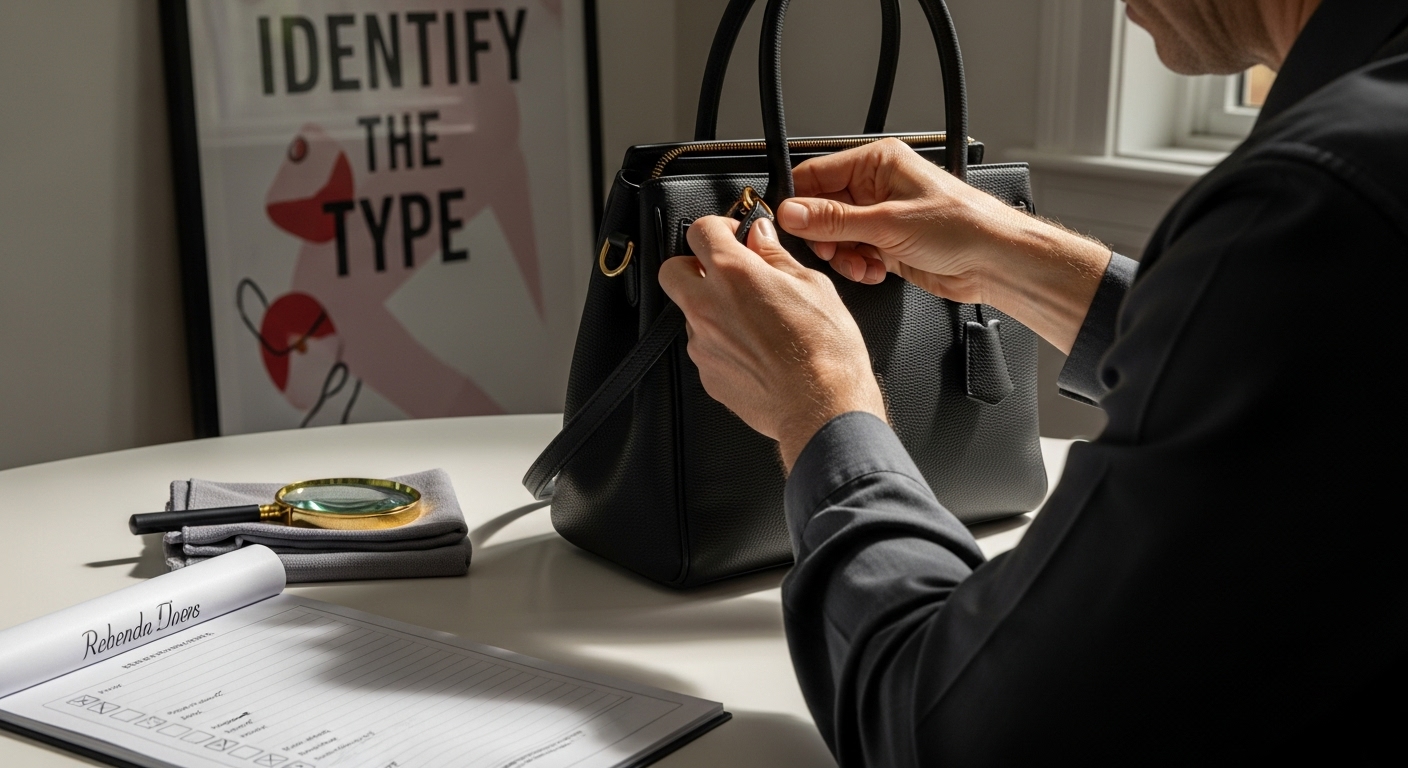
Step 1: Identify the Type of Leather
Understanding the specific type of leather is fundamental to ensuring proper cleaning and maintenance. Different leather varieties require unique care approaches, and misidentifying your leather can lead to irreversible damage. While this step might seem technical, anyone can learn to recognize leather characteristics with careful observation.
Begin by examining the leather surface closely. Genuine leather has distinct textural characteristics that differentiate it from synthetic materials. Run your fingers gently across the surface, feeling for natural grain patterns and slight imperfections. Authentic leather will have subtle variations in texture, unlike perfectly uniform synthetic alternatives. Look for natural markings such as hair follicle patterns, slight color variations, and minor surface irregularities that indicate genuine animal hide.
To confirm your leather type, perform a simple visual and tactile assessment. Learn more about leather identification techniques by examining key indicators. Full grain leather will display the most natural characteristics, showing original skin surface with minimal processing. Top grain leather appears smoother but still maintains some natural texture. Suede and nubuck present a softer, more matte appearance with a distinct fuzzy surface.
If you are uncertain about your leather’s specific classification, consider consulting professional leather experts or referring to the original product documentation. Some leather items come with manufacturer tags or documentation that explicitly state the leather type. Pay attention to how the material feels, stretches, and responds to gentle touch. Genuine leather typically feels warm, slightly pliable, and has a natural depth that synthetic materials cannot replicate.
Once you have identified your leather type, you will be better equipped to select appropriate cleaning techniques and products in subsequent steps of this guide. Each leather variety responds differently to cleaning solutions, so accurate identification is crucial for protecting your valuable leather item from potential damage.
Step 2: Gather Required Cleaning Supplies
Preparing the right cleaning supplies is crucial for effectively maintaining your leather items without causing unintended damage. This step transforms your cleaning approach from potentially risky guesswork to a precise, professional process. Strategic preparation prevents potential leather destruction and ensures you have everything needed before starting your cleaning project.
Select soft, lint-free microfiber cloths as your primary cleaning tools. These specialized cloths prevent scratching and help distribute cleaning solutions evenly across leather surfaces. White or neutral colored cloths work best, as colored fabrics might transfer dye onto your leather item. Avoid paper towels or rough washcloths, which can create microscopic abrasions that compromise leather’s integrity.
Explore our recommended leather care techniques when selecting cleaning solutions. You will need a leather-specific cleaner matching your leather type. Avoid household cleaners or all-purpose products that could strip natural oils or cause discoloration. Professional leather cleaners typically come in specialized formulations designed for different leather grades like full grain, top grain, or suede.
Your essential toolkit should include several key items:
- Soft microfiber cloths (multiple clean ones)
- Leather-specific cleaning solution
- Leather conditioner
- Soft bristle brush (optional, for textured leathers)
- Distilled water
- Clean dry towels for final buffing
Temperature and workspace preparation matter as much as your supplies. Choose a well-ventilated area with consistent room temperature, avoiding direct sunlight or extreme heat. Spread a clean, protective surface like a white towel to catch potential drips and provide a stable workspace. Having all supplies organized and within reach prevents interruptions during the cleaning process and helps maintain a methodical approach to leather care.
Here is a summary table of the essential supplies needed to clean leather at home, including their specific use and key tips for effective application.
| Supply | Purpose | Key Tip |
|---|---|---|
| Soft microfiber cloths | Cleaning and applying solutions | Use white or neutral colors to avoid dye transfer |
| Leather-specific cleaner | Safe cleansing of leather surface | Ensure the cleaner matches leather type |
| Leather conditioner | Restores oils and prevents drying | Apply in thin, even layers |
| Soft bristle brush (optional) | Lifting dirt from textured or grained surfaces | Use gently on textured leathers only |
| Distilled water | Dampening microfiber cloths | Use sparingly to avoid oversaturation |
| Clean dry towels | Buffing and drying leather post-cleaning | Use for immediate moisture removal |
Before beginning, double-check that each cleaning product is appropriate for your specific leather type. Some leather varieties require specialized treatments, and using the wrong product can cause permanent damage. Take a moment to read product labels carefully, ensuring compatibility with your leather item’s specific characteristics.
Step 3: Test on a Small Area First
Before applying any cleaning solution across your entire leather item, conducting a small patch test is a critical protective measure. This step acts as your safety net against potential cleaning disasters, preventing widespread damage that could ruin an expensive leather piece. Think of it as a preliminary reconnaissance mission for your leather cleaning strategy.
Select an inconspicuous area for testing, such as an interior seam, hidden section near a lining, or an edge that is typically not visible when the item is worn or displayed. These locations allow you to assess the cleaning solution’s impact without compromising the leather’s primary aesthetic areas. Natural light helps you observe subtle changes, so position yourself near a window or well-lit space during your test.
Learn more about leather care techniques to understand the nuanced approach required. Apply a minimal amount of your chosen cleaning solution to a clean, white microfiber cloth. Gently dab the test area using minimal pressure, allowing the product to interact with the leather surface. Avoid rubbing vigorously, which might cause unnecessary stress to the material.
After application, wait approximately 10 to 15 minutes and carefully inspect the test spot. Look for several critical indicators of potential damage:
- Color changes or fading
- Surface texture alterations
- Unexpected shine or dullness
- Any signs of discoloration or staining
- Unexpected chemical reactions
Warning signs mean stopping immediately and selecting an alternative cleaning method. A successful test will show no negative changes to the leather’s color, texture, or overall appearance.
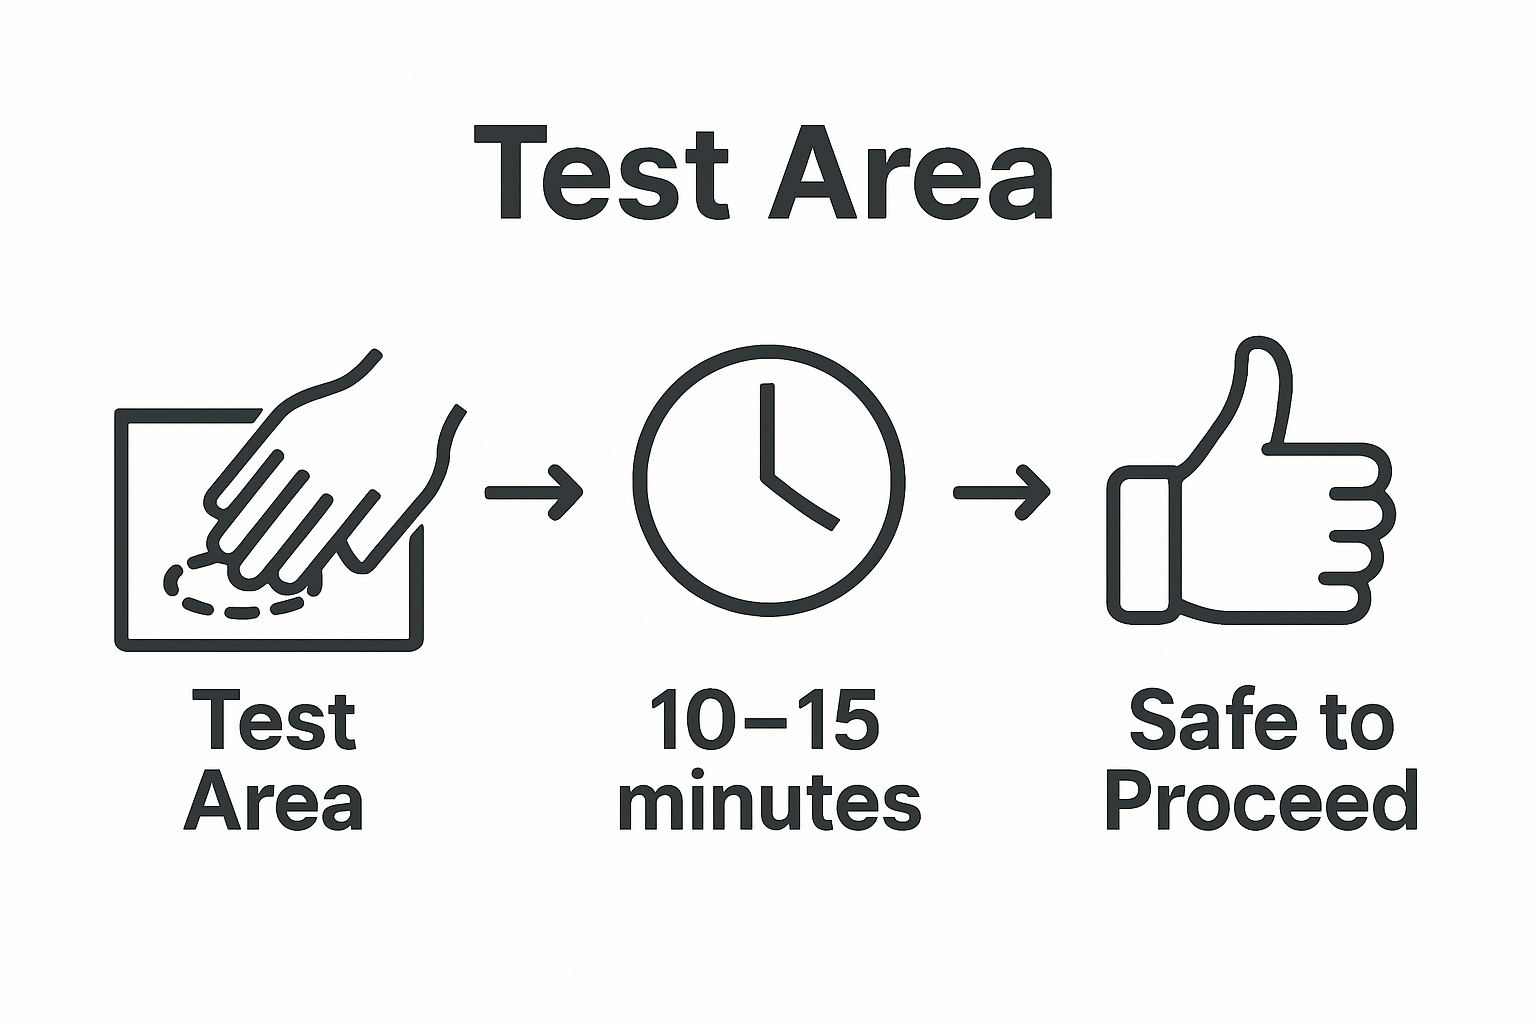 Some leather types might exhibit slight variations, so patience and careful observation are key. If the test area looks unchanged and feels consistent with the surrounding leather, you can proceed confidently to clean the entire item.
Remember that different leather types react uniquely to cleaning solutions. Suede, nubuck, and delicate leather varieties require extra caution and might need specialized cleaning products. When in doubt, consulting a professional leather care specialist can provide personalized guidance tailored to your specific leather item.
Step 4: Clean the Leather Surface
Cleaning leather requires precision, patience, and a gentle touch to preserve its natural beauty and structural integrity. The goal is to remove dirt and grime without compromising the leather’s delicate surface. Your careful approach during this step will determine the long-term appearance and condition of your leather item.
Begin by creating a clean workspace with a soft, flat surface covered with a clean white towel. This setup prevents additional dirt transfer and provides a stable area for your cleaning process. Slightly dampen a clean microfiber cloth with your selected leather cleaner. Important: The cloth should be merely damp, not soaking wet. Excess moisture can cause permanent water stains or damage to leather fibers.
Check out our recommended cleaning tips to ensure you’re using the most effective technique for your specific leather type. Use light, circular motions when applying the cleaner, working in small sections to maintain control and prevent oversaturation. Imagine you are gently massaging the leather surface, allowing the cleaner to lift dirt without aggressive scrubbing. Pay extra attention to heavily soiled areas, but maintain consistent, light pressure throughout the cleaning process.
Pay special attention to potential problem areas:
- Seams and stitching where dirt accumulates
- Creases and folds that trap moisture and grime
- Handles or contact points with more significant wear
- Areas exposed to frequent skin or hand contact
After cleaning each section, immediately use a dry microfiber cloth to remove any remaining moisture. This step prevents water spots and helps distribute the cleaning solution evenly. Quick and thorough drying is crucial for maintaining leather’s structural integrity. Your cleaning cloth should glide smoothly across the surface, picking up residual cleaner and leaving behind a clean, slightly lustrous finish.
Complete the cleaning process by performing a final visual and tactile inspection. The leather should appear clean, with a consistent color and smooth texture. Any remaining dirt or uneven areas might require a gentle second pass with your cleaning cloth. Remember, patience and a delicate touch are your best tools when cleaning leather at home.
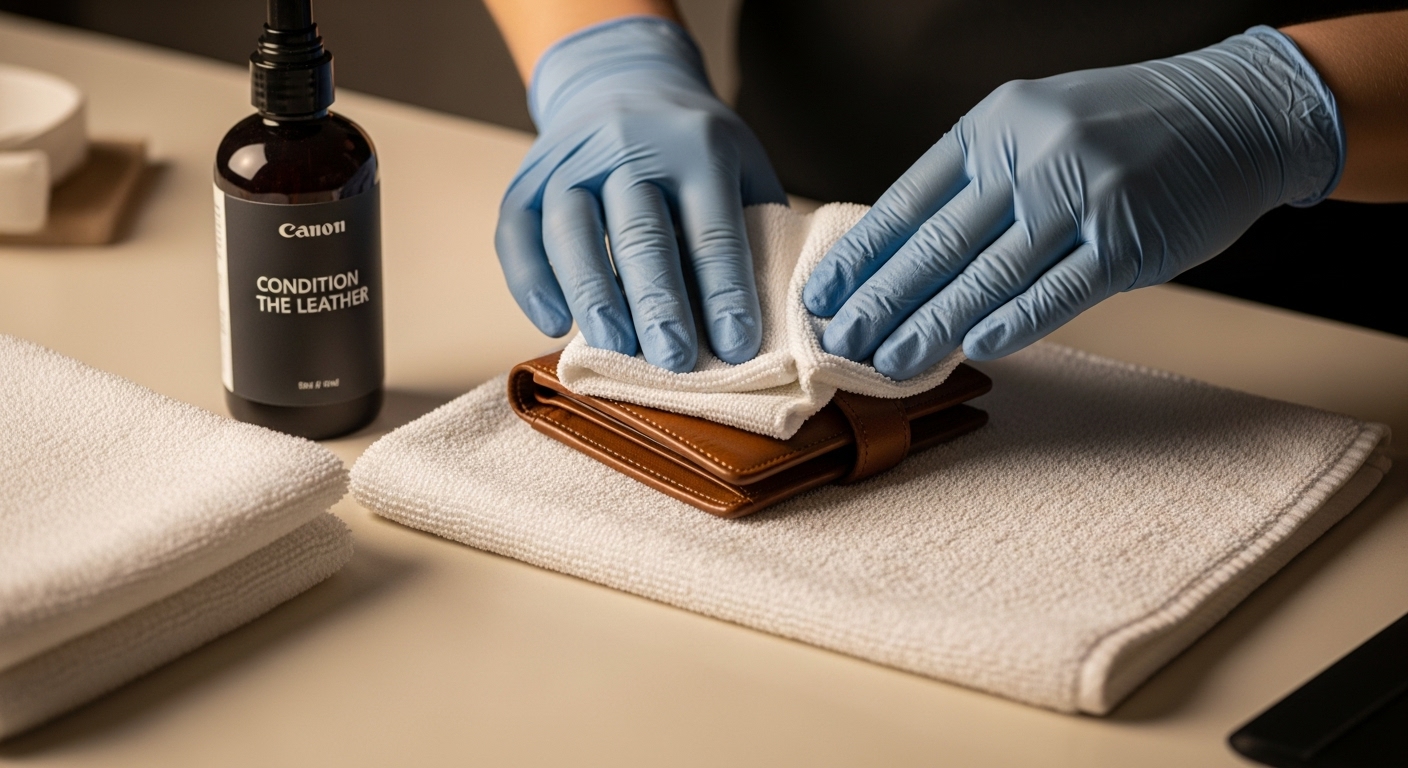
Step 5: Condition the Leather After Cleaning
Conditioning is the final protective measure that transforms a clean leather item into a resilient, long-lasting piece. This crucial step replenishes natural oils removed during cleaning, preventing the leather from becoming brittle, dry, and prone to cracking. Think of conditioning as giving your leather a nourishing drink that restores its flexibility and protective qualities.
Select a high-quality leather conditioner specifically formulated for your leather type. Learn more about applying leather conditioner techniques to ensure optimal results. Begin by testing the conditioner on a small, inconspicuous area to confirm it does not alter the leather’s color or texture. Use a clean, soft microfiber cloth to apply the conditioner, working in thin, even layers that allow the leather to absorb the product naturally.
Apply the conditioner using gentle, circular motions, similar to how you cleaned the leather. Important: Less is more when conditioning. Start with a minimal amount and gradually build up if needed. Focus on working the conditioner into the leather thoroughly but avoid oversaturating the surface. Pay special attention to areas that experience more friction or exposure, such as handles, edges, and frequently flexed sections.
Watch for these key indicators of proper conditioning:
- Even, subtle sheen across the leather surface
- Restored suppleness and flexibility
- No sticky or greasy residue
- Consistent color without dark patches
- Smooth texture without visible product buildup
After application, allow the conditioner to absorb completely. This process typically takes 15 to 30 minutes, during which the leather will slowly integrate the conditioning agents. Use a clean, dry microfiber cloth to gently buff the surface, removing any excess product and creating a soft, natural finish. The leather should feel soft and smooth, with a subtle, understated luster that indicates proper nourishment.
Remember that different leather types require varying conditioning frequencies. Frequently used leather items might need conditioning every six months, while less-worn pieces could go longer between treatments. Observe your leather’s response and adjust your maintenance routine accordingly, always prioritizing gentle, thoughtful care.
Step 6: Inspect and Maintain for Longevity
Maintaining leather is an ongoing process that extends far beyond initial cleaning and conditioning. Consistent care transforms a good leather item into a generational treasure, preserving its beauty, functionality, and structural integrity through proactive maintenance. Think of this step as creating a long-term relationship with your leather piece, where regular attention prevents potential damage and maintains its premium quality.
Schedule routine inspections at least twice a year, preferably in seasonal transitions when environmental changes can impact leather’s condition. Use natural light to carefully examine the entire surface, looking for subtle signs of wear, potential stress points, and emerging issues. Microscopic cracks, slight discoloration, or minor surface changes are early warning signals that require immediate, gentle intervention. Run your fingers softly across the leather, feeling for texture variations that might indicate developing problems.
Storage plays a critical role in leather maintenance. Keep leather items in cool, dry environments away from direct sunlight and heat sources. Use breathable fabric covers that protect against dust while allowing air circulation. Avoid plastic covers that trap moisture and potentially create mildew. Learn more about proper leather maintenance techniques to ensure your items remain in pristine condition.
Pay special attention to these potential problem areas:
- Seams and stitching
- Frequently flexed regions
- Areas exposed to direct skin contact
- Edges and corners
- Handles and high-friction surfaces
Develop a seasonal maintenance ritual that includes gentle cleaning, light conditioning, and careful inspection. During winter, leather might require extra conditioning to combat dry indoor heating. Summer’s humidity can introduce different challenges, potentially causing subtle color changes or surface alterations. Adapt your care routine to these environmental shifts, always using soft, clean microfiber cloths and professional-grade leather care products.
Remember that prevention is always more effective than repair. Small, consistent maintenance efforts can dramatically extend your leather item’s lifespan, transforming a simple piece into a cherished possession that tells a story through its graceful aging process. Treat your leather with respect, and it will reward you with years of reliable service and timeless aesthetic appeal.
Below is a checklist table summarizing the main inspection points and maintenance actions to help keep your leather items in top condition between and after cleanings.
| Maintenance Task | What to Check or Do | Frequency | Notes |
|---|---|---|---|
| Surface inspection | Look for cracks, discoloration, wear | Twice yearly | Use natural light for subtle changes |
| Storage assessment | Ensure cool, dry, and shaded area | Ongoing | Avoid plastic covers and sunlight |
| Edge and seam review | Examine seams, edges, and handles | Twice yearly | Focus on high-friction areas |
| Conditioning | Apply quality leather conditioner | Every 6 months (as needed) | Adjust based on item usage |
| Light cleaning | Remove dust with soft cloth | Monthly or as needed | Use gentle motions only |
| Seasonal adjustments | Adapt care routine for humidity or dry air | Spring and Fall | Add conditioning in winter |
Protect Your Leather, Elevate Your Style
Struggling to keep your favorite leather looking fresh after cleaning at home? You are not alone. Many face the challenge of maintaining that original, flawless look while using the right supplies and techniques. As highlighted in our guide, every type of leather demands special care and correct conditioning for long-lasting beauty. But if constant upkeep makes you second guess investing in leather wear, there is a better way to combine confidence with style.
Discover our Maker of Jacket’s collection where every piece is crafted for easy maintenance and exceptional durability. No more worry about complicated cleaning routines or losing that premium finish. Our range brings together authenticity, customization, and leather quality you can trust.

Why wait to own leather you can love and care for effortlessly? Shop the latest styles or request your own custom jacket designed for your lifestyle at Maker of Jacket. Experience the simple joy of looking sharp, knowing your investment is protected from day one. Get started now and see just how easy premium leather care can be with the right apparel.
Frequently Asked Questions
How can I identify the type of leather I have?
To identify your leather type, observe its texture and look for natural grain patterns, markings, and imperfections. Genuine leather has unique variations, while synthetic alternatives are more uniform. You can also consult professional guides or product documentation.
What supplies do I need to clean leather at home?
You will need soft, lint-free microfiber cloths, a leather-specific cleaner, a leather conditioner, and optionally, a soft bristle brush. It’s also helpful to have distilled water and clean dry towels for buffing.
Why is it important to test cleaning products on a small area first?
Testing cleaning products on a small, inconspicuous area helps prevent widespread damage to your leather item. It allows you to observe how the leather reacts to the cleaner without affecting its primary aesthetic.
How often should I condition my leather after cleaning?
The conditioning frequency depends on usage; generally, leather items used frequently should be conditioned every six months, while those less often should be evaluated for conditioning needs based on their appearance and feel.
