Repairing Leather Scratches: Restore Your Leather Goods Easily
Scratches on leather can make a beloved chair or prized jacket look worn out fast. Most people think repairing them needs a professional touch or expensive kits. But the truth is, over 70 percent of minor leather scratches can be fixed at home using tools you likely already have. The key is knowing what to look for before you start, so you do not accidentally make that scratch worse.
Table of Contents
- Step 1: Assess The Damage On Your Leather Item
- Step 2: Gather Necessary Repair Supplies
- Step 3: Clean The Scratched Area Thoroughly
- Step 4: Apply Leather Conditioner Or Repair Kit
- Step 5: Allow Time To Dry And Settle
- Step 6: Inspect And Buff For A Smooth Finish
Quick Summary
| Key Point | Explanation |
|---|---|
| 1. Carefully assess the scratch damage | Examine the depth, width, and location of scratches to determine the best repair method for your leather item. |
| 2. Gather essential repair supplies | Prepare high-quality leather cleaner, repair compounds, and application tools, ensuring they match your leather type and color. |
| 3. Thoroughly clean before repairing | Use a pH-neutral cleaner to remove dirt and oils, allowing repair compounds to adhere effectively and prevent further damage. |
| 4. Apply repair compound with care | Use gentle motions and thin layers to blend the repair compound with the leather, enhancing durability and aesthetics. |
| 5. Allow ample drying and settling time | Ensure the repair compound bonds effectively by maintaining ideal conditions for at least 4-24 hours, avoiding immediate handling. |
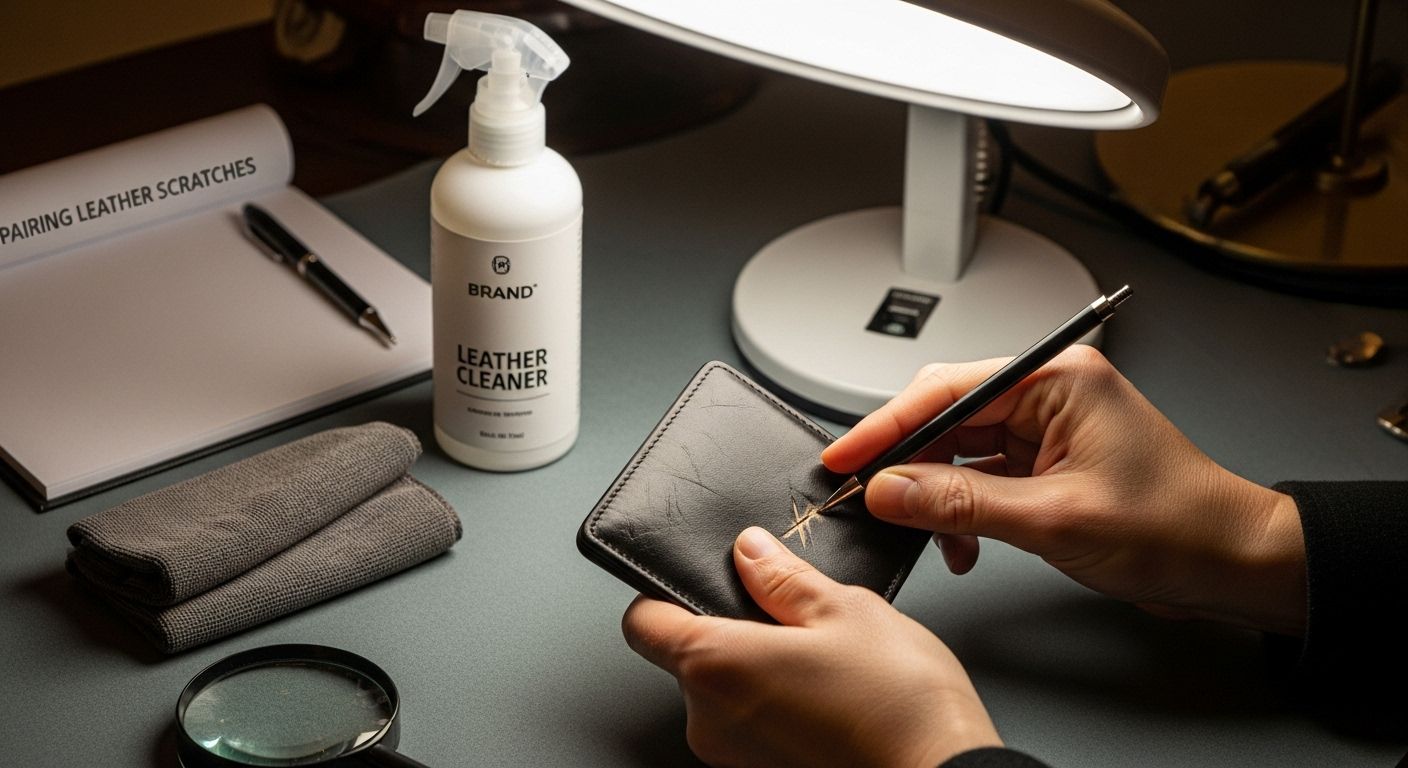
Step 1: Assess the Damage on Your Leather Item
Repairing leather scratches starts with a thorough and careful assessment of the damage. Understanding the extent and type of scratch will determine the most effective restoration approach. Different leather types and scratch depths require specific treatment strategies.
Begin by examining your leather item under good lighting. Natural daylight or a bright overhead light helps reveal scratch details that might be missed in dim environments. Look closely at the scratch characteristics such as its depth, width, and location on the leather surface. Surface level scratches appear lighter and barely penetrate the leather’s top layer, while deep scratches will show more significant color disruption and texture damage.
Key Characteristics to Examine:
- Scratch depth (surface level vs deep)
- Length and width of the scratch
- Location on the leather item
- Color disruption
- Texture changes
Leather materials respond differently based on their original finish and quality. Smooth leather like those used in premium motorcycle jackets will require different repair techniques compared to suede or nubuck surfaces. Gently run your fingernail across the scratch to test its depth. If your nail catches in the scratch, it indicates a deeper wound that might need professional intervention.
For accurate assessment, clean the leather surface first using a soft dry cloth to remove any dirt or debris that could obscure the scratch’s true nature. This preliminary cleaning allows for a more precise evaluation of the damage and helps prevent additional scratching during the repair process.
Remember that some scratches might look worse than they actually are, and many can be successfully restored with the right techniques and patience.
Step 2: Gather Necessary Repair Supplies
Preparing for leather scratch repair requires assembling a precise toolkit that matches the specific needs of your leather item. The right supplies can transform a potentially frustrating repair process into a smooth, manageable task. Professional leather repair doesn’t demand expensive equipment but rather a strategic selection of targeted tools and materials.
Essential Repair Kit Components:
- Leather cleaner
- Soft microfiber cloths
- Leather repair compound
- Color-matched leather dye or filler
- Fine grit sandpaper
- Plastic spatula or applicator
Start by selecting a high-quality leather cleaner specifically designed for your leather type. Avoid harsh household cleaners that might further damage the material. Soft microfiber cloths are crucial for gentle application and preventing additional scratches during the cleaning and repair process. Leather restoration experts recommend using pH-neutral cleaners that won’t strip the leather’s natural protective coating.
The repair compound and color-matched dye are perhaps the most critical components of your toolkit. These specialized products help seamlessly blend the repair into the existing leather surface. Fine grit sandpaper typically between 320 and 400 grit works best for smoothing minor imperfections without causing additional damage. A plastic spatula or dedicated leather repair applicator allows for precise and controlled product application.
Here is a concise summary table of the core supplies you need for leather scratch repair, including each item and its primary purpose.
| Supply | Purpose |
|---|---|
| Leather cleaner | Removes dirt, oils, and debris from the surface |
| Soft microfiber cloths | Gentle cleaning and application without scratching |
| Leather repair compound | Fills and repairs scratches for seamless texture |
| Color-matched leather dye | Blends repairs to match your item’s color |
| Fine grit sandpaper (320-400) | Smooths minor imperfections for even surfaces |
| Plastic spatula/applicator | Precisely applies repair compounds and fillers |
Before purchasing repair materials, double-check your leather item’s specific type and color. Leather can vary significantly between smooth, suede, and finished surfaces, requiring different repair approaches. Pro tip: Always test your repair products on a hidden area of the leather to ensure color and texture compatibility before addressing the main scratch. This preliminary step can save you from potentially costly mistakes and ensure a professional-looking restoration.
Step 3: Clean the Scratched Area Thoroughly
Thorough cleaning is a critical preparatory step in repairing leather scratches. This process removes dirt, oils, and potential contaminants that could interfere with the repair process. Proper cleaning ensures that repair compounds and color treatments adhere correctly and produce a seamless restoration.
Cleaning Preparation Guidelines:
- Use a soft, lint-free microfiber cloth
- Select a pH-neutral leather cleaner
- Work in a well-ventilated area
- Avoid saturating the leather surface
Begin by gently wiping the scratched area with a dry microfiber cloth to remove loose surface debris. This initial pass helps prevent potentially scratching the leather further during the deeper cleaning process. Professional leather restoration experts recommend using minimal moisture and applying cleaning solutions with a light touch.
Choose a specialized leather cleaner that matches your specific leather type. Spray a small amount of cleaner onto the microfiber cloth rather than directly onto the leather surface. This technique provides better control and prevents oversaturation. Work the cleaner into the scratched area using gentle, circular motions that clean without applying excessive pressure. Pay close attention to the scratch itself, ensuring you remove any embedded dirt or debris that might prevent a smooth repair.
After cleaning, allow the leather to air dry completely in a room-temperature environment. Avoid using direct heat sources like hairdryers, which can damage leather’s natural fibers. The surface should feel clean and slightly cool to the touch, with no residual moisture. A perfectly cleaned surface provides the ideal foundation for successful scratch repair, ensuring that subsequent repair compounds and treatments will adhere smoothly and create a nearly invisible restoration.

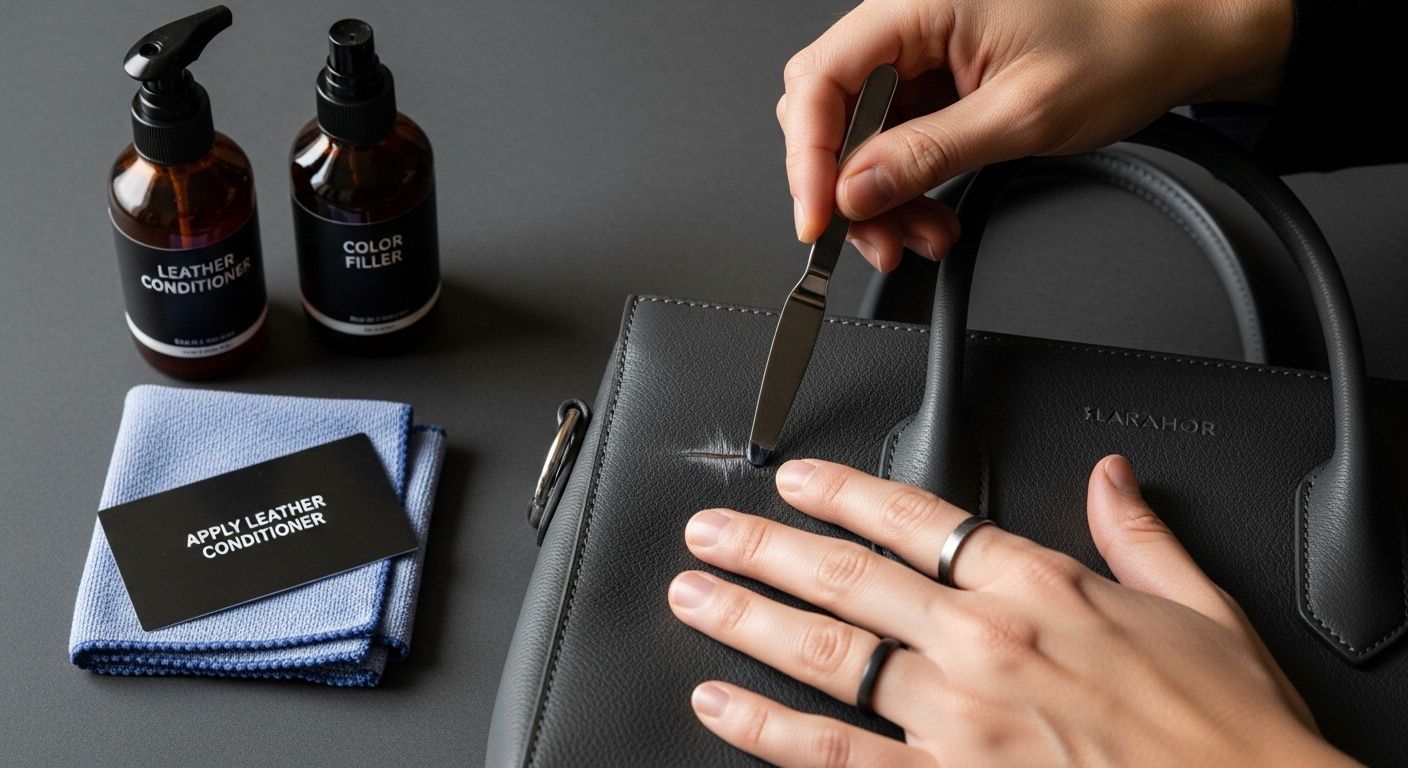
Step 4: Apply Leather Conditioner or Repair Kit
Applying the right leather repair solution requires precision, patience, and a gentle touch. The goal is to seamlessly blend the repair compound with the existing leather surface, minimizing the visibility of scratches while restoring the material’s natural appearance and texture.
Application Technique Highlights:
- Use small, circular motions
- Apply minimal pressure
- Work in thin, even layers
- Allow sufficient drying time between applications
Start by selecting a repair compound or conditioner that precisely matches your leather’s color and finish. Learn more about proper leather conditioning techniques before beginning the repair process. Take a small amount of the repair compound on a clean, soft applicator or microfiber cloth. Begin with a conservative approach, applying the product sparingly to the scratched area using gentle, circular motions that help the compound seamlessly integrate with the surrounding leather.
For surface-level scratches, leather conditioners work wonderfully to reduce visibility and restore suppleness. Deeper scratches might require a specialized repair kit with color-matched filler. Work the product into the scratch systematically, ensuring even coverage without oversaturating the leather. Pay close attention to blending the edges of the repair, feathering the product outward to create a smooth, undetectable transition.
After application, allow the repair compound or conditioner to dry completely. This typically takes between 30 minutes to 2 hours, depending on the product’s specific instructions. Avoid touching or flexing the repaired area during this time. Once dry, gently buff the area with a clean, soft cloth to enhance the finish and ensure a natural, seamless appearance. The successful repair will make the scratch virtually invisible, restoring your leather item’s original aesthetic and protecting it from further damage.
Step 5: Allow Time to Dry and Settle
The drying and settling phase is perhaps the most crucial yet overlooked step in leather scratch repair. This period allows the repair compound to bond completely with the leather, ensuring a seamless and durable restoration. Patience during this stage can make the difference between a professional-looking repair and a noticeable patch.
Optimal Drying Conditions:
- Room temperature between 65-75 degrees Fahrenheit
- Low humidity environment
- Indirect natural light
- Flat, stable surface
Place your leather item in a well-ventilated area away from direct sunlight or heat sources. Direct sunlight or excessive heat can cause the repair compound to dry too quickly, potentially creating uneven texture or color variation. Leather restoration professionals recommend maintaining a consistent room temperature and allowing the repair to settle naturally.
Drying time varies depending on the specific repair compound and leather type. Typically, you’ll want to allow between 4 to 24 hours for complete drying and settling. During this period, avoid flexing, folding, or stressing the repaired area. The repair compound needs time to create a strong, flexible bond with the leather’s surface.
This step-by-step overview table outlines each main phase of the leather scratch repair process, with the goal of providing clear expectations for each stage.
| Step | Key Action | Typical Time Required |
|---|---|---|
| 1. Assess Damage | Examine scratch depth, width, and location | 5-10 minutes |
| 2. Gather Supplies | Prepare all cleaning and repair materials | 5-10 minutes |
| 3. Clean Area | Gently clean entire surface and scratch | 10-15 minutes + drying |
| 4. Apply Repair Compound/Conditioner | Apply in thin, even layers with minimal pressure | 15-30 minutes |
| 5. Allow to Dry/Settle | Let repair materials bond with leather | 4-24 hours (drying) |
| 6. Inspect and Buff | Check for seamlessness and buff for final finish | 10-15 minutes |
| Light touching or movement can disrupt the settling process and compromise the repair’s integrity. |
To verify the repair’s success, gently run your fingertip across the repaired area after the recommended drying time. The surface should feel smooth and consistent with the surrounding leather, with no raised edges or visible texture differences. If the repair looks and feels uniform, you’ve successfully completed the restoration process. A well-executed repair will be nearly invisible, preserving both the aesthetic and functional qualities of your leather item.
Step 6: Inspect and Buff for a Smooth Finish
The final stage of leather scratch repair transforms a functional fix into a professional restoration. Careful inspection and precise buffing can elevate your repair from merely functional to visually seamless. This step is about creating a finish so smooth and integrated that the original scratch becomes virtually undetectable.
Buffing Technique Essentials:
- Use soft microfiber cloth
- Apply gentle, circular motions
- Maintain consistent pressure
- Work in natural lighting
- Check repair from multiple angles
Begin by examining the repaired area under bright, natural light. Professional leather restoration experts recommend using indirect daylight to reveal subtle texture variations. Hold the leather item at different angles, rotating it to catch light from multiple perspectives. This careful examination helps identify any remaining imperfections that might need additional attention.
Select a clean, soft microfiber cloth for buffing. The goal is to create a uniform surface that blends perfectly with the surrounding leather. Use gentle, consistent circular motions, applying minimal pressure to avoid disturbing the repair compound. Move your hand in smooth, overlapping circles, gradually expanding the buffing area to create a natural transition between the repaired section and the original leather surface.
As you buff, periodically step back and reassess the repair. The ideal restoration should have no visible edges, color discrepancies, or texture differences. Run your fingertips lightly across the area, feeling for any subtle irregularities. A successful repair will feel smooth and indistinguishable from the surrounding leather. If you detect any minor imperfections, a second light buffing or minimal touch-up can often resolve these subtle inconsistencies, ensuring a flawless finish that preserves both the aesthetic and structural integrity of your leather item.
Restore Confidence in Your Leather: Upgrade or Customize With Ease
You have invested time and care into repairing scratches and restoring your favorite leather items. But persistent damage and visible flaws can still steal the confidence and pride you once felt wearing those pieces. Imagine stepping out in leather jackets or pants that look perfectly new, tailored to your unique taste, and free from visible wear. Browse our extensive Maker of Jacket’s collection and see how easy it can be to refresh your wardrobe and elevate your style.

Ready for leather you never have to hide? Explore our leather pants collection and create something truly remarkable. With https://www.makerofjacket.com, you can customize or replace your leather goods with premium, made-to-order designs. Start now to enjoy worldwide free shipping and express your personality with confidence.
Frequently Asked Questions
How do I assess the damage on my leather item before repairing scratches?
Begin by examining the scratched area under good lighting. Check the scratch’s depth, length, width, and location, as well as any color disruption or texture changes. This will help you determine the best repair approach.
What supplies do I need to repair scratches on leather?
You will need a leather cleaner, soft microfiber cloths, a leather repair compound, color-matched leather dye or filler, fine grit sandpaper, and a plastic spatula or applicator to effectively repair scratches on leather.
How should I clean the scratched area before applying repair products?
Use a soft, lint-free microfiber cloth with a pH-neutral leather cleaner. Spray the cleaner on the cloth, not directly on the leather, and work it into the scratched area using gentle circular motions to avoid oversaturation.
What is the best technique for applying leather repair compounds?
Apply the repair compound using small, circular motions and minimal pressure, working in thin, even layers. Be sure to allow sufficient drying time between applications to ensure a smooth and seamless finish.
